Turn your mainstream photos into retro coolness. This Photoshop tutorial will show you how to apply a retro/lomo photo effect using professional non-destructive editing techniques. You’ll need Photoshop CS3 or newer to follow this tutorial.
Preview of Final Results
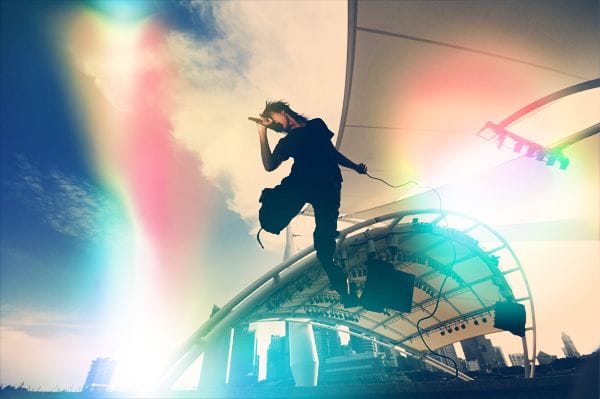
Download the PSD
Hipster Effect.zip | 29.41 MB
Download from FileSonic Download from Website
Video Tutorial
Written tutorial continues below
Hipster Photo Effect Photoshop Tutorial
Step 1
Open a photo into Photoshop. This effect works best for sunny outdoor photos.
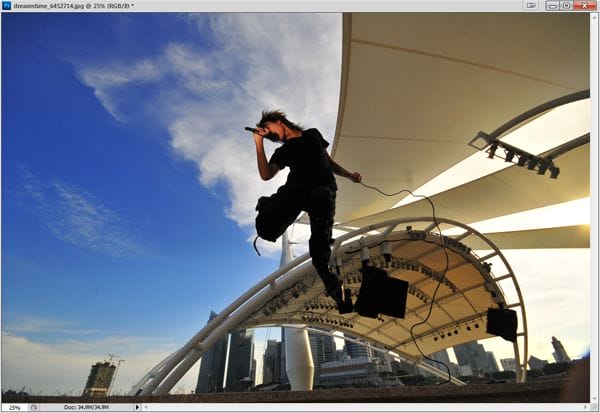
Step 2
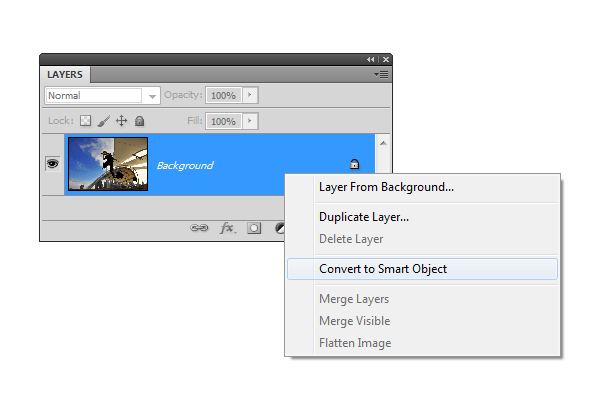
First, we’ll create a bloom effect to make it appear more sunny. Before we apply any filters, convert the layer to a Smart Object. Right click on the Background layer then choose Convert to Smart Object. Now that your layer is a Smart Object, you can apply Smart Filters which are basically non-destructive (settings changeable at any time without any loss in quality) version of filters.
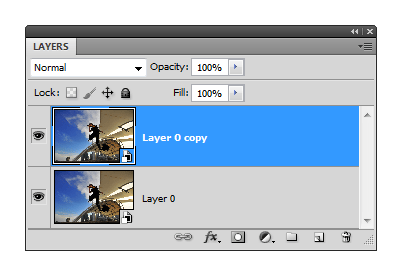
Duplicate the layer (Ctrl/Cmd+J or Layer > Duplicate Layer). Select the top layer; this is the layer we will be applying the bloom effect to.
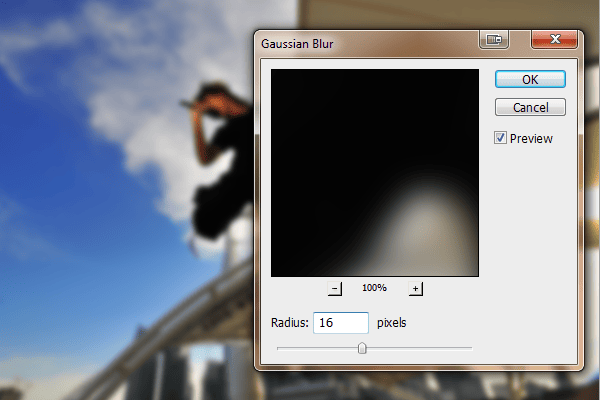
Go to Filter > Blur > Gaussian Blur then apply a Gaussian Blur with a setting that blurs the image like shown below. You should still be able to make out the shape of the objects. Click OK.
Double-click on the ![]() button to edit the filters blending options. Change the mode setting to Screen.
button to edit the filters blending options. Change the mode setting to Screen.
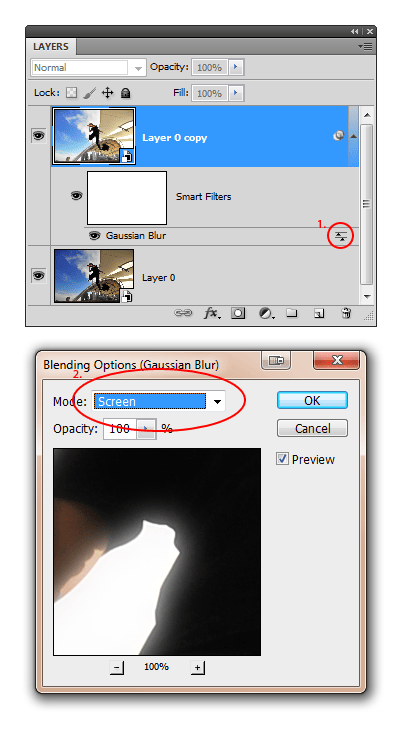
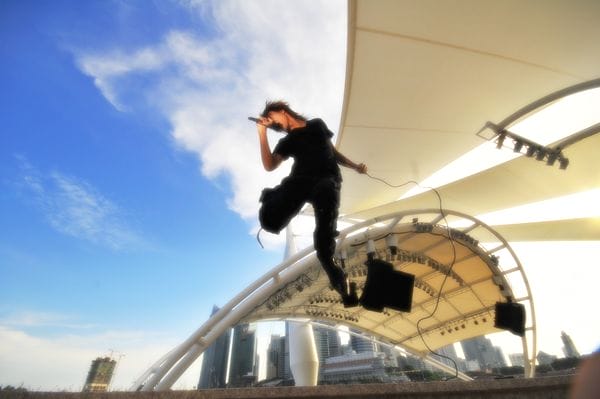
You just created the bloom effect! Unfortunately, it looks a little fake and there are glowing edges around the black areas. Some people like it like this and some don’t. In the next step, we’ll show you how to make this bloom effect more realistic. You can skip it if you like the dramatic bloom effect.
Step 3
In this step, we’ll show you how to make the bloom effect more realistic. This step is optional and you may skip to step 4 if you want to keep the bloom effect strong. To make the bloom effect more realistic, we’re going to modify the blending options for the layer to tell Photoshop to keep the bloom effect to the bright areas but hide it in the dark areas.
First, delete the filter mask because we won’t be using it. This is just to keep our layers clean. Right click on the filter mask then choose Delete Filter Mask.
7 responses to “How to Make Your Photos Look Hipster with Photoshop”
-
Simply sunning. Well written, well explained, and your Lomo Lightning file is perfect. Thank you so much.
-
this is a great tutorial! very descriptive and easy. love it!
-
nice,,,,,,,,,,but
if-u-give-in-pdf-file-then-it-will-help-us-moreeeeeeeeeeee -
Doesn’t look hipster to me. Sorry.
Hipster photo treatment is making a photo look like it was captured by analog film camera. To do so it is better to use film presets for lightroom -
Hi,
I have a problem when i place my light.
The thing is, i want to mold it to something, i don’t want that square when i place and select screen mode.M.
-
your page has been my fovorite. thank you for the step by step easy instructions!!!
-
very nice thanks :)


Leave a Reply