Learn how to give a squirrel a helmet and grenade launcher in Photoshop. This tutorial will also introduce you to the puppet warp tool in Photoshop CS5.
Preview of Final Results
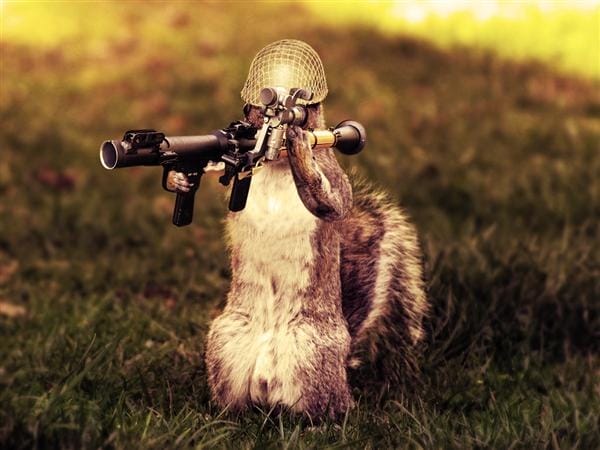
![Photo-manipulation Squirrel Photo-manipulation Squirrel](https://cdn.photoshoptutorials.ws/images/stories/225fdd367ae4_15E/PhotomanipulationSquirrel.jpg?strip=all&lossy=1&webp=82&avif=82&w=1920&ssl=1)
Army Squirrel Photo Manipulation Photoshop Tutorial
Resources
- Curious Squirrel – Dracoart-Stock
- M1 Army Helmet – Jan3090
- RPG-7V2 Grenade Launcher – Garr1971
Step 1
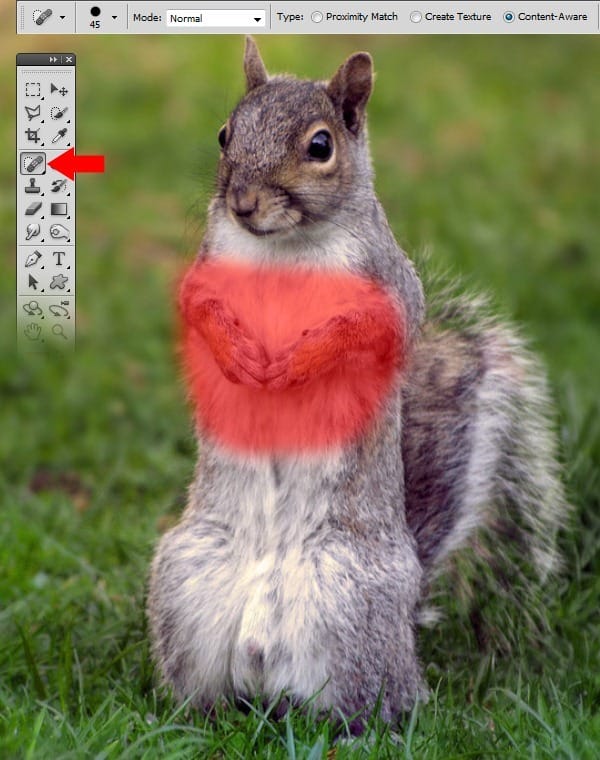
Open the squirrel photo and select the Spot Healing Brush Tool (J). Use the brush tool on the parts of the picture shown below. The brush size should be 45px.
![1 1](https://cdn.photoshoptutorials.ws/images/stories/225fdd367ae4_15E/1.jpg?strip=all&lossy=1&webp=82&avif=82&w=1920&ssl=1)
Step 2
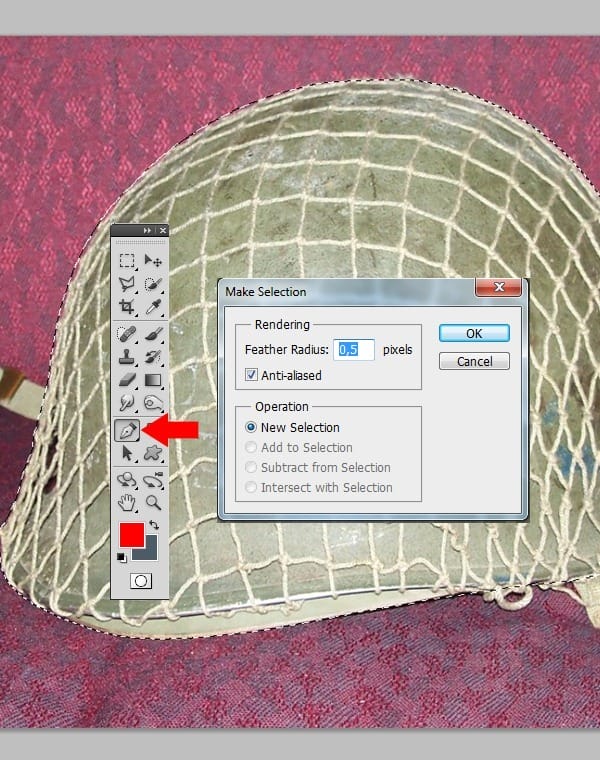
Open the helmet photo and select the helmet with he Pen Tool (P). Set Feather Radius to 0,5.
![2 2](https://cdn.photoshoptutorials.ws/images/stories/225fdd367ae4_15E/2.jpg?strip=all&lossy=1&webp=82&avif=82&w=1920&ssl=1)
Step 3
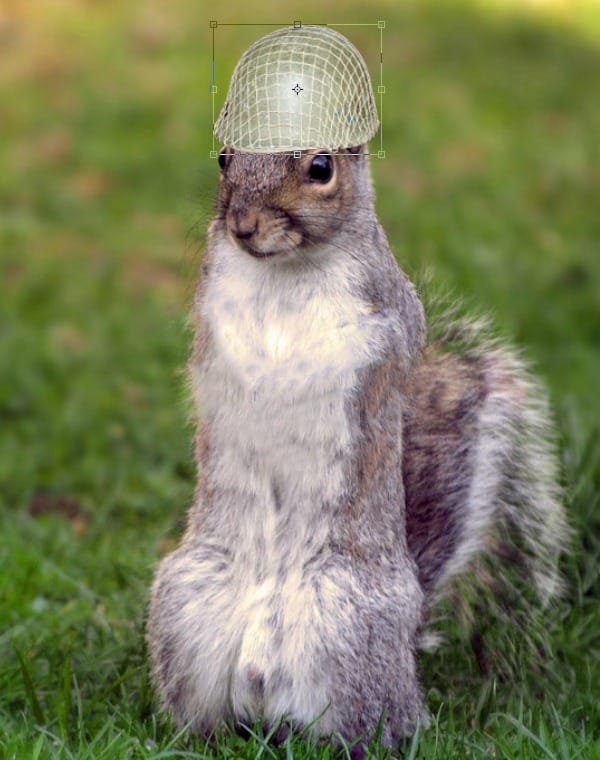
Paste the helmet in the picture with the squirrel and transform the helmet as shown below.
![3 3](https://cdn.photoshoptutorials.ws/images/stories/225fdd367ae4_15E/3.jpg?strip=all&lossy=1&webp=82&avif=82&w=1920&ssl=1)
Step 4
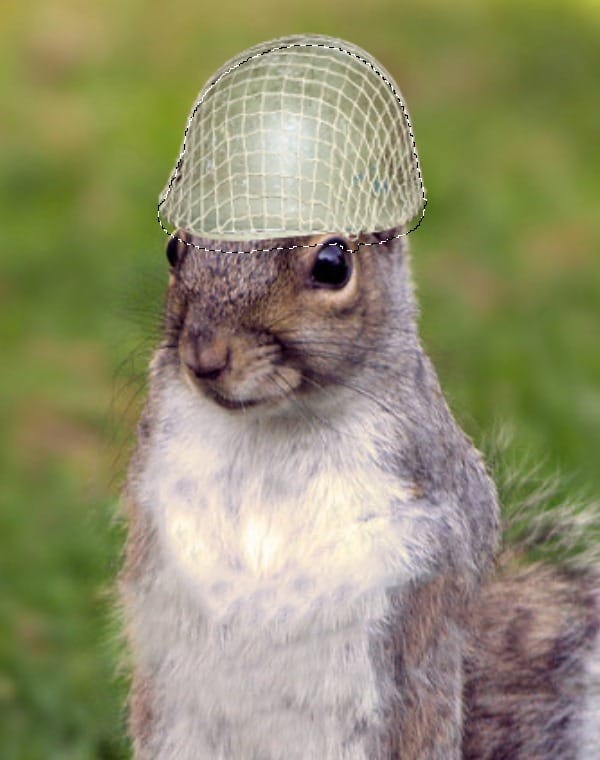
Create a new layer under the helmet layer. Select the helmet and drag it as shown below
![4 4](https://cdn.photoshoptutorials.ws/images/stories/225fdd367ae4_15E/4.jpg?strip=all&lossy=1&webp=82&avif=82&w=1920&ssl=1)
Step 5
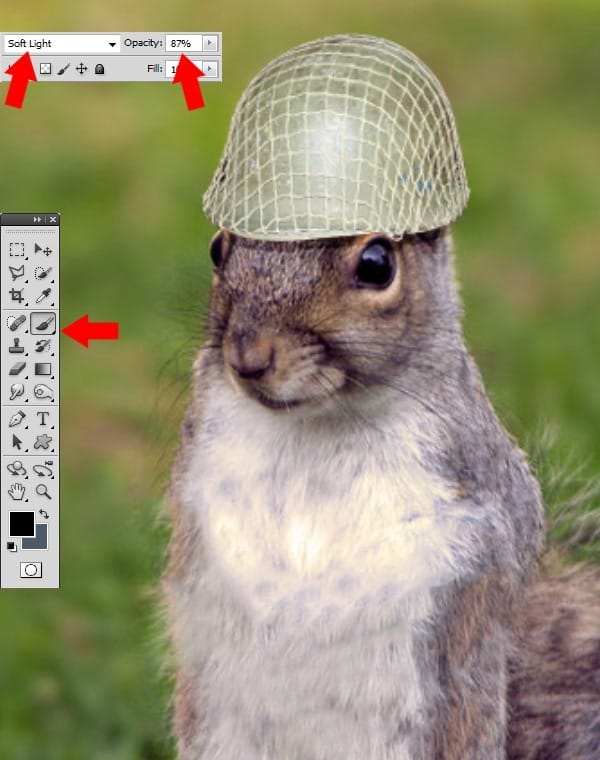
Fill the selection with black. Set the layer as Soft Light and change the opacity to 87%.
![5 5](https://cdn.photoshoptutorials.ws/images/stories/225fdd367ae4_15E/5.jpg?strip=all&lossy=1&webp=82&avif=82&w=1920&ssl=1)
Step 6
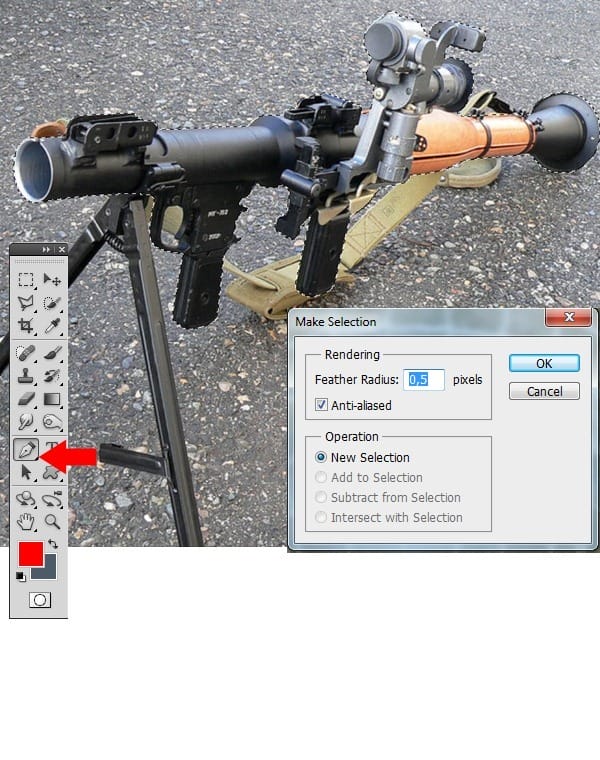
Open the photo of the grenade launcher. Select this with the Pen Tool and set Feather Radius to 0,5.
![6 6](https://cdn.photoshoptutorials.ws/images/stories/225fdd367ae4_15E/6.jpg?strip=all&lossy=1&webp=82&avif=82&w=1920&ssl=1)
Step 7
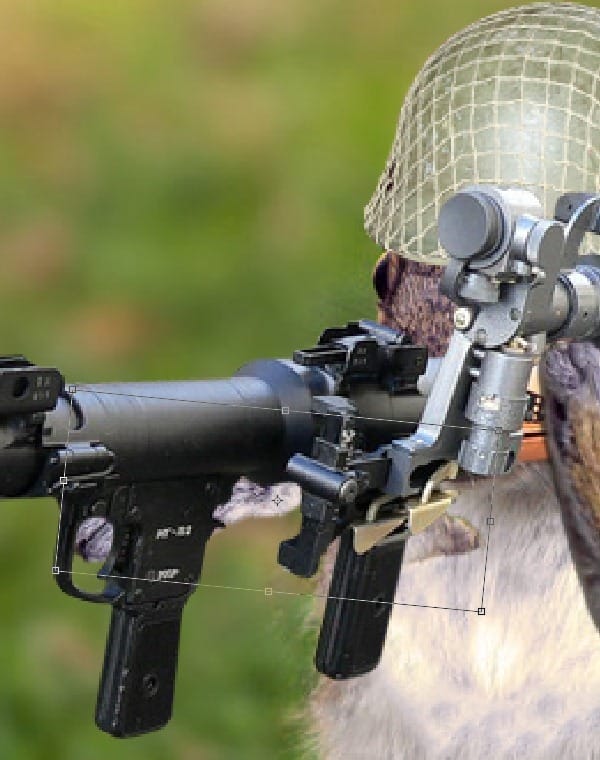
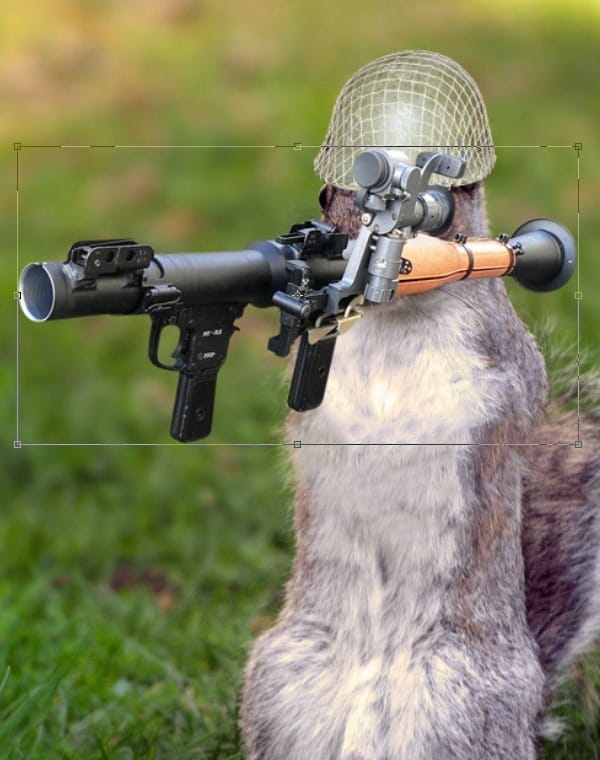
Paste the grenade launcher in the picture with the squirrel. Transform the grenade launcher as shown below.
![7 7](https://cdn.photoshoptutorials.ws/images/stories/225fdd367ae4_15E/7.jpg?strip=all&lossy=1&webp=82&avif=82&w=1920&ssl=1)
Step 8
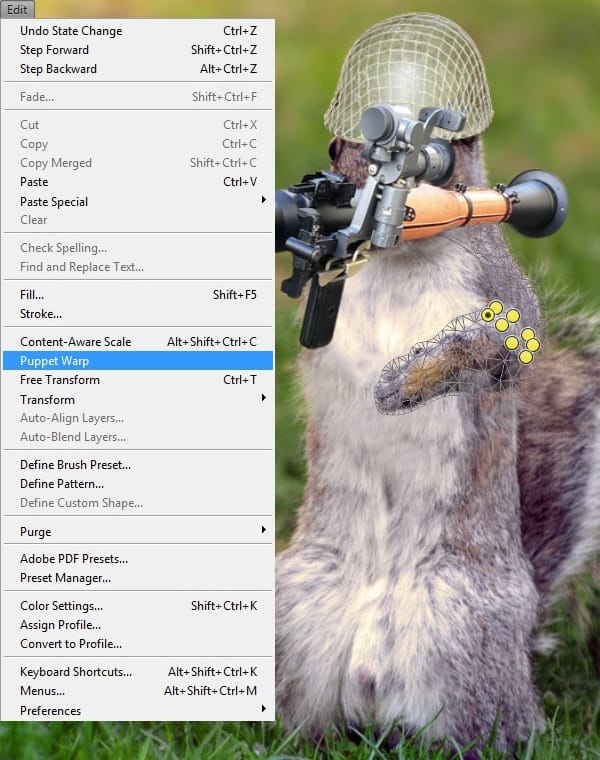
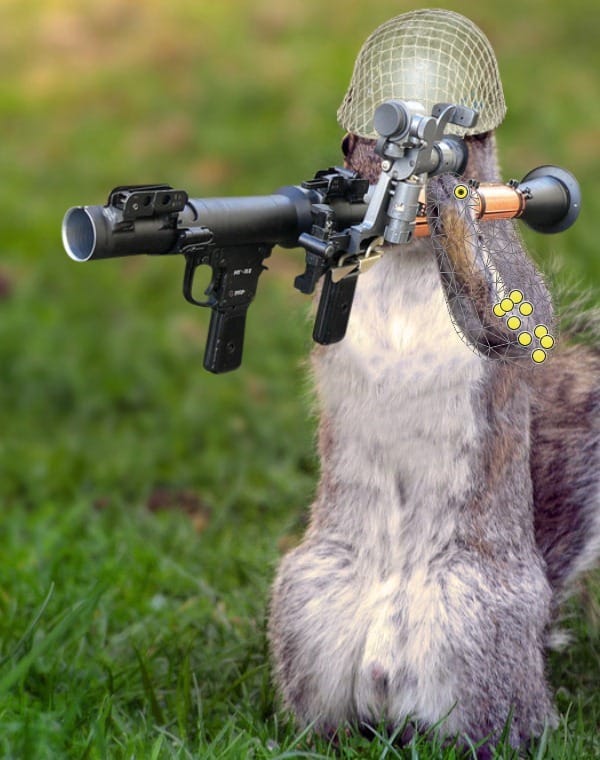
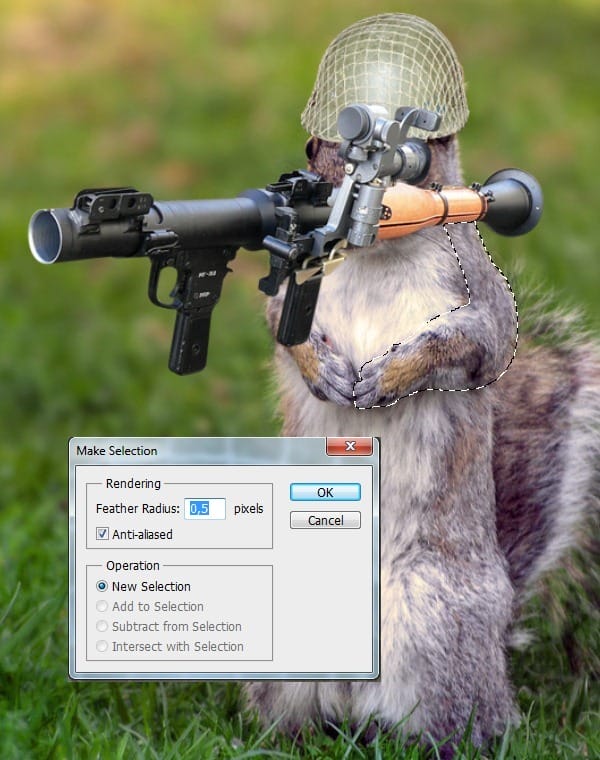
Select the left arm with the Pen Tool and set Feather Radius to 0,5. Select the layer via Copy. Select Edit, then select Puppet Warp and place the points as shown below. Hold Shift and transform the arm as shown below.
![8 8](https://cdn.photoshoptutorials.ws/images/stories/225fdd367ae4_15E/8.jpg?strip=all&lossy=1&webp=82&avif=82&w=1920&ssl=1)
![9 9](https://cdn.photoshoptutorials.ws/images/stories/225fdd367ae4_15E/9.jpg?strip=all&lossy=1&webp=82&avif=82&w=1920&ssl=1)
![10 10](https://cdn.photoshoptutorials.ws/images/stories/225fdd367ae4_15E/10.jpg?strip=all&lossy=1&webp=82&avif=82&w=1920&ssl=1)
Step 9
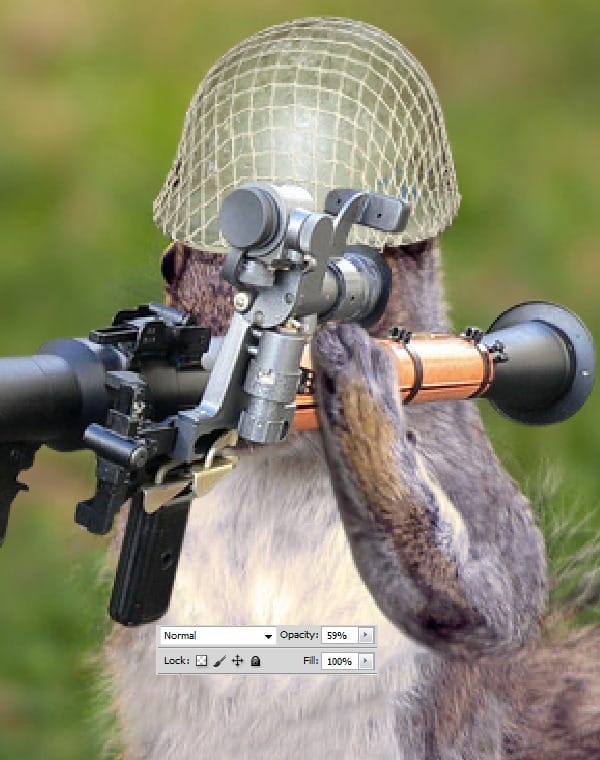
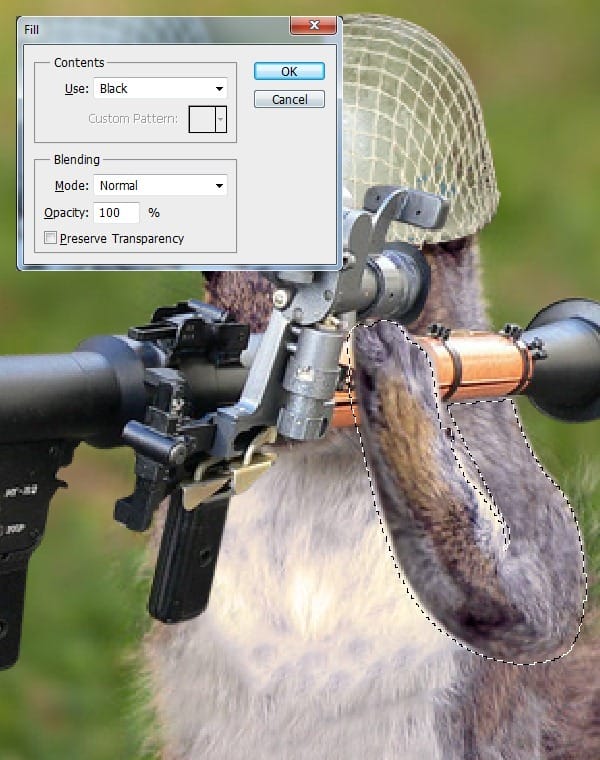
Select the arm and move the selection 2-3 px to the left. Fill the selection with black and set the opacity to 59%.
![11 11](https://cdn.photoshoptutorials.ws/images/stories/225fdd367ae4_15E/11.jpg?strip=all&lossy=1&webp=82&avif=82&w=1920&ssl=1)
![12 12](https://cdn.photoshoptutorials.ws/images/stories/225fdd367ae4_15E/12.jpg?strip=all&lossy=1&webp=82&avif=82&w=1920&ssl=1)
Step 10
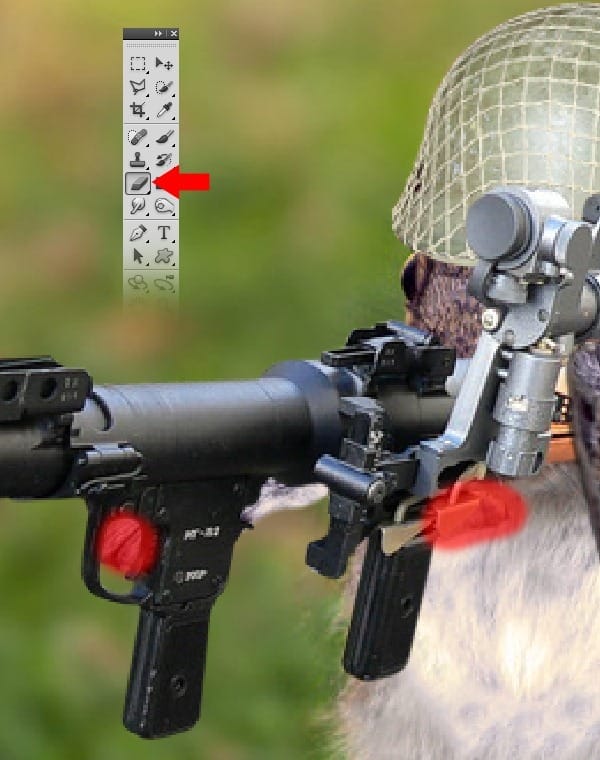
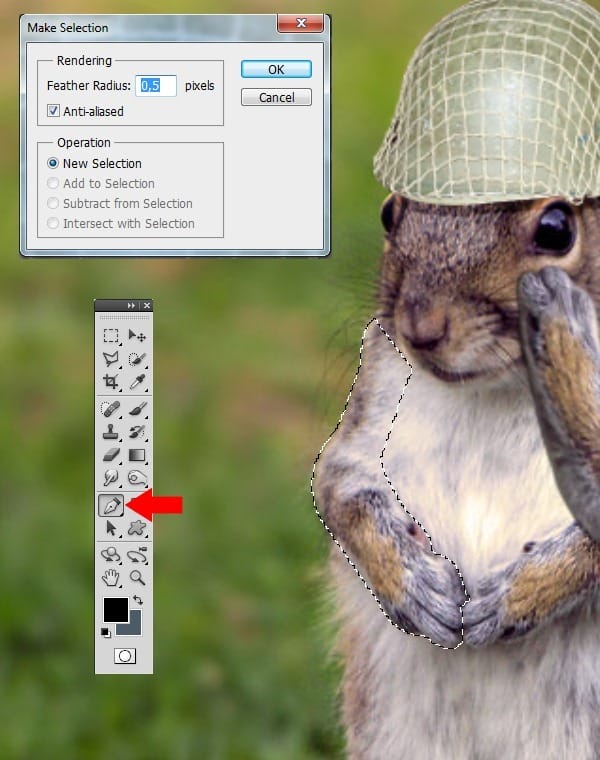
Select the right arm with the Pen Tool and set Feather Radius to 0,5. Transform the arm as shown below. Erase the extra parts as shown below.
![13 13](https://cdn.photoshoptutorials.ws/images/stories/225fdd367ae4_15E/13.jpg?strip=all&lossy=1&webp=82&avif=82&w=1920&ssl=1)
![14 14](https://cdn.photoshoptutorials.ws/images/stories/225fdd367ae4_15E/14.jpg?strip=all&lossy=1&webp=82&avif=82&w=1920&ssl=1)
![15 15](https://cdn.photoshoptutorials.ws/images/stories/225fdd367ae4_15E/15.jpg?strip=all&lossy=1&webp=82&avif=82&w=1920&ssl=1)
Step 11
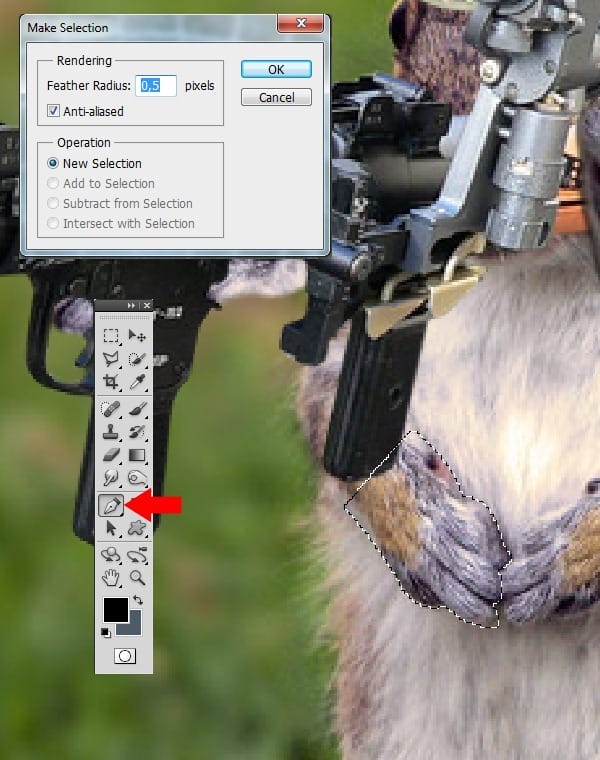
Select the hand with the Pen Tool and set Feather Radius to 0,5. Select the layer via Copy.
![16 16](https://cdn.photoshoptutorials.ws/images/stories/225fdd367ae4_15E/16.jpg?strip=all&lossy=1&webp=82&avif=82&w=1920&ssl=1)
Step 12
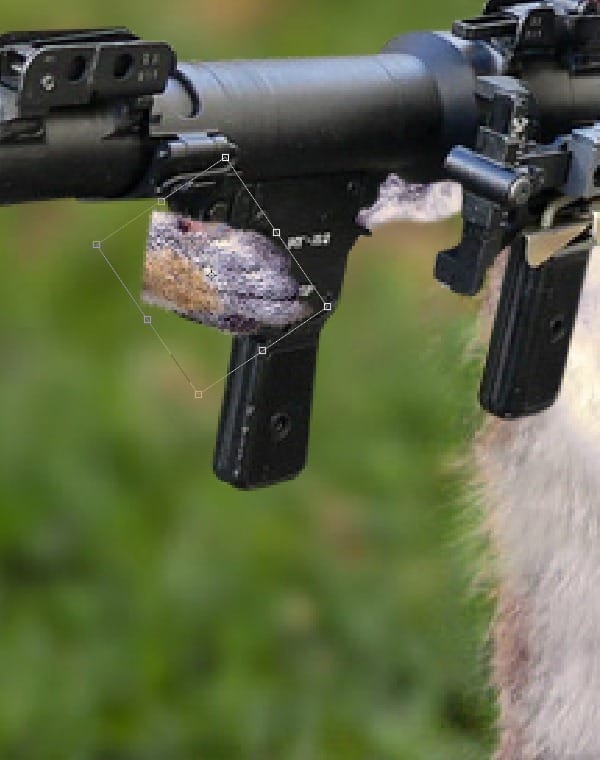
Transform the hand as shown below. Select Warp Transform and place the points like how they are in the example.
![17 17](https://cdn.photoshoptutorials.ws/images/stories/225fdd367ae4_15E/17.jpg?strip=all&lossy=1&webp=82&avif=82&w=1920&ssl=1)
![18 18](https://cdn.photoshoptutorials.ws/images/stories/225fdd367ae4_15E/18.jpg?strip=all&lossy=1&webp=82&avif=82&w=1920&ssl=1)
Step 13
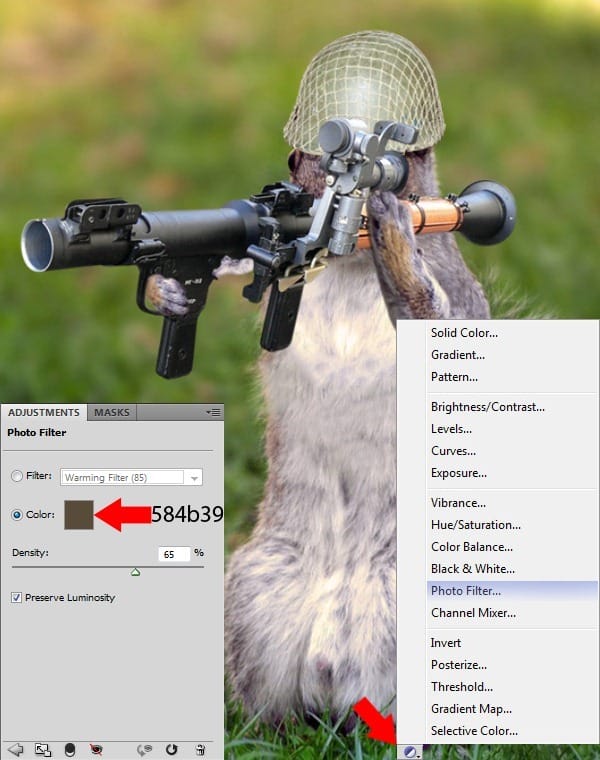
Go to Photo Filter and set the color to #584b39. Set the Density to 65%.
![19 19](https://cdn.photoshoptutorials.ws/images/stories/225fdd367ae4_15E/19.jpg?strip=all&lossy=1&webp=82&avif=82&w=1920&ssl=1)
Step 14
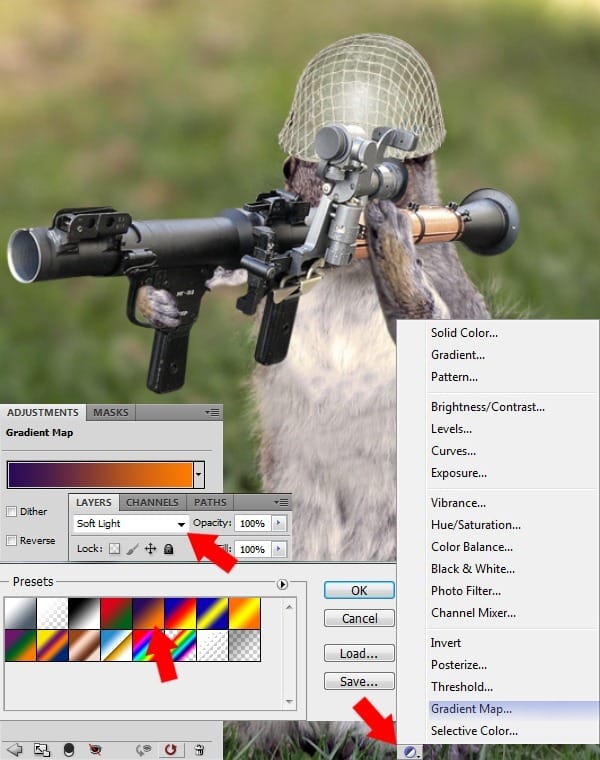
Go to Gradient Map and select the Preset option shown below. Set the layer to Soft Light.
![20 20](https://cdn.photoshoptutorials.ws/images/stories/225fdd367ae4_15E/20.jpg?strip=all&lossy=1&webp=82&avif=82&w=1920&ssl=1)
Step 15
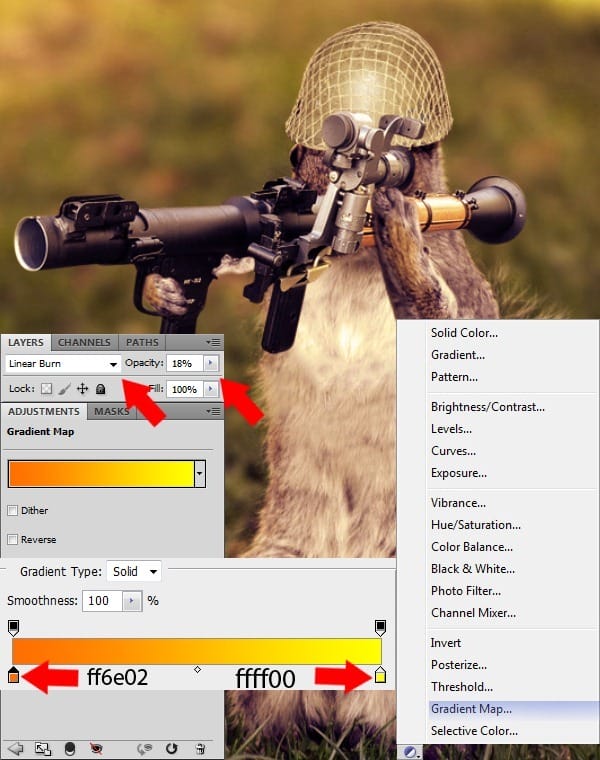
Go to Gradient Map and create a new gradient with the following color settings: Left Color #ff6e02, Right Color # ffff00. Set the Layer mode as Linear Burn and Opacity to 18%.
![21 21](https://cdn.photoshoptutorials.ws/images/stories/225fdd367ae4_15E/21.jpg?strip=all&lossy=1&webp=82&avif=82&w=1920&ssl=1)
Step 16
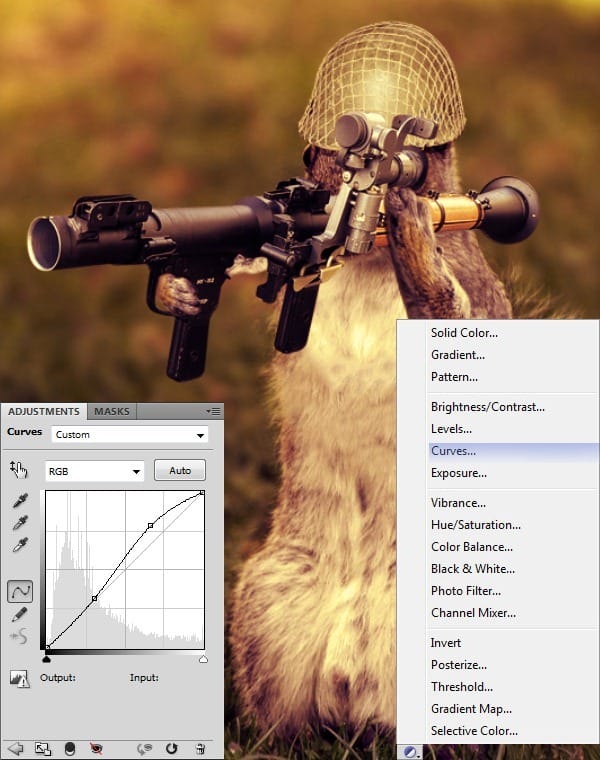
Go to Curves and place the points as shown below.
![22 22](https://cdn.photoshoptutorials.ws/images/stories/225fdd367ae4_15E/22.jpg?strip=all&lossy=1&webp=82&avif=82&w=1920&ssl=1)
Step 17
Select the Photo Filter. Choose #8f7959 as the color and set the density to 80%.
3 responses to “Army Squirrel Photo Manipulation”
-
A quite good work.
-
bruh, i love it. putting this into my portfolio. this fire
-
Great job man!!! I’m putting this gem into my portfolio!!!!!!!
XOXO
Leave a Reply