Make your artwork look like they're from an alternate universe. These Cyberpunk presets work with Photoshop (via the Camera Raw filter) and Lightroom. Download all 788 presets for 90% off.
Learn how to create this mysterious image of a newly explored space cave. This tutorial will show you how to seamlessly combine photos together, create rock carvings, smoke, and more.
Preview of Final Results
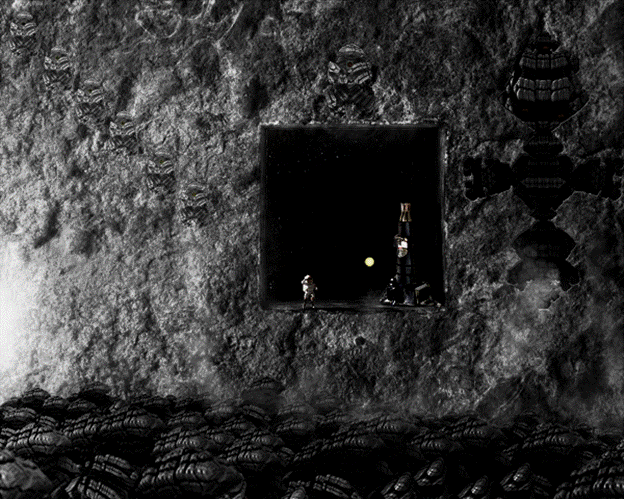
Sci-Fi Space Cave Scene Photoshop Tutorial
Tutorial Resources
Step 1
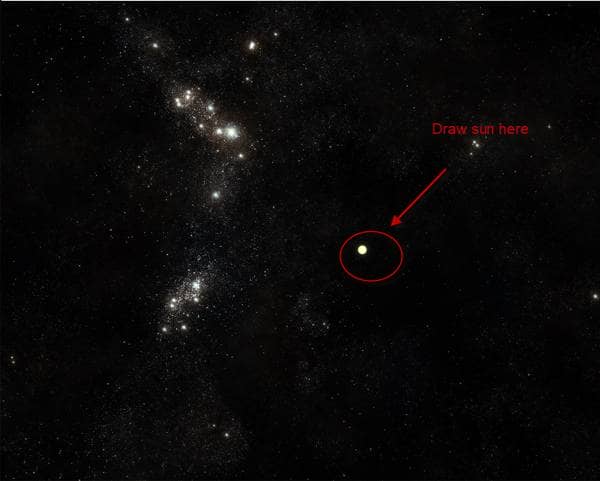
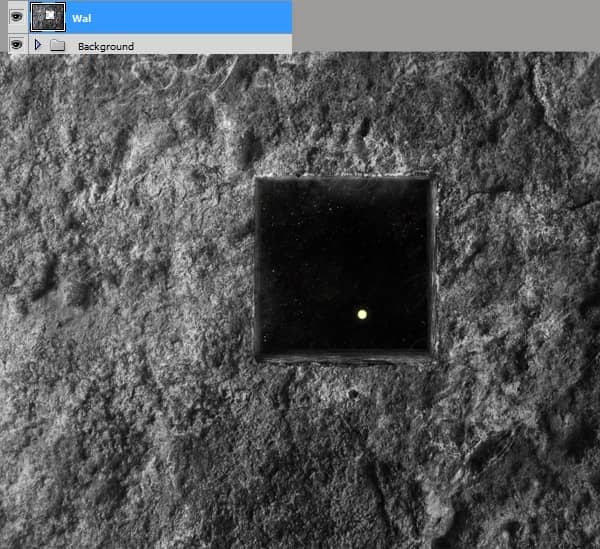
Open the file "Stars field". This will be our background. Let's add a Sun to it. First, create a new layer and name it “Sun”. You can put these two layers into a group named “Background” to keep your layers organized.
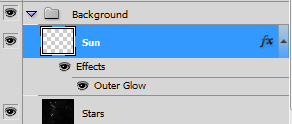
With the “Sun” layer selected, select the Elliptical Marquee tool and draw a small circle. Fill this circle with a light yellow color.
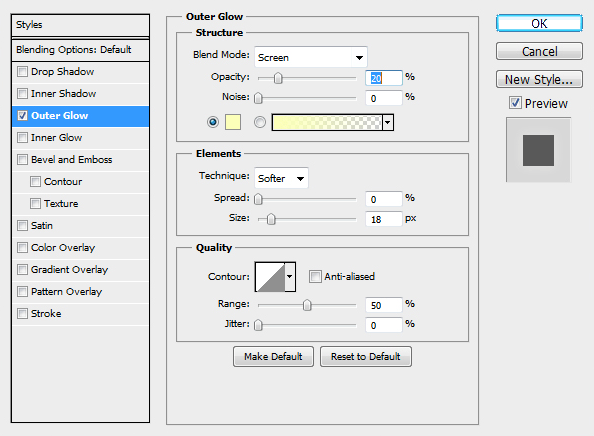
Add an outer glow effect using the same light yellow color. To add the Outer Glow layer style, go to Layer > Layer Style > Outer Glow.
Step 2
Open the file “Hole through the wall”. Go to Select > All then copy the image to your clipboard (Ctrl/Cmd+C or Edit > Copy). Close this file and go back to the original document. Go to Edit > Paste and Photoshop will paste the image as a new layer in your document.
Step 3
Open the file “Alien man 1” and create a selection of the stone figure using any of the selection tools. Copy and paste it into your document. You’ll get a new layer with the stone. Name this layer “Upper Effigy”.
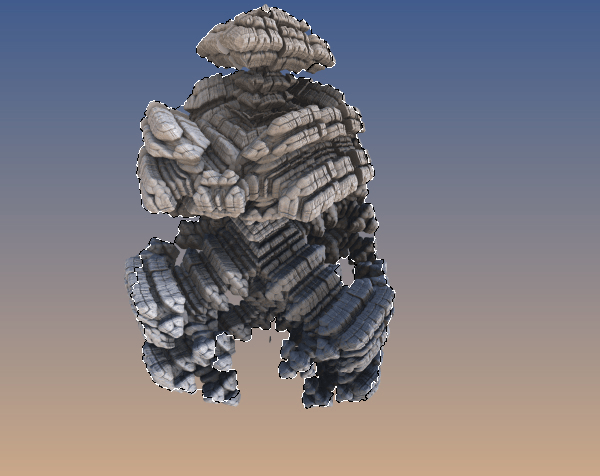
Desaturate this layer (Ctrl/Cmd+Shift+U or Image > Adjustments > Desaturate). Resize and position it above the wall entrance using the Free Transform tool (Ctrl/Cmd+T or Edit > Free Transform).

Step 4
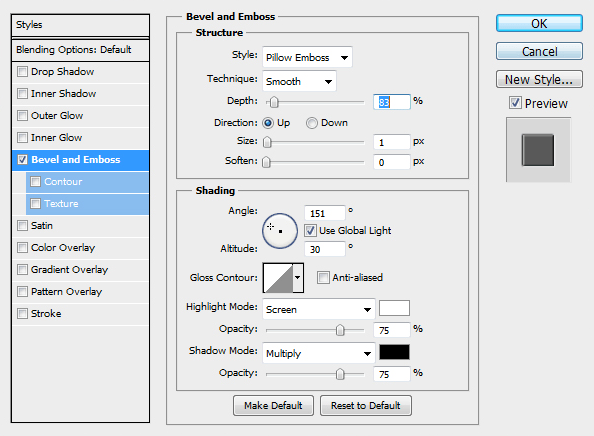
Add a Bevel and Emboss layer style (Layer > New Layer Style > Bevel and Emboss) with the settings shown in the image below.
Step 5
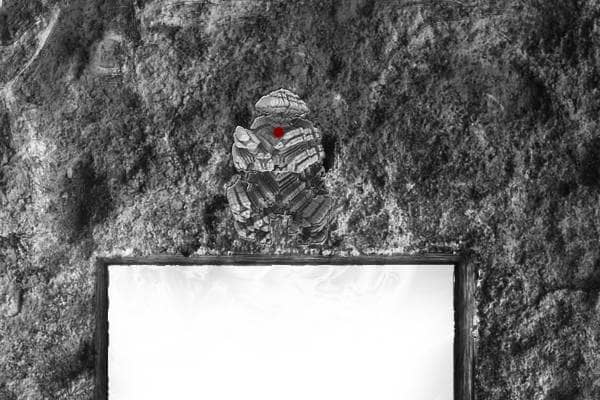
Create a new layer and position it as the top layer. Use the Brush tool to paint a red dot in the upper middle of the stone.
Step 6
Apply the layer styles shown in the images below to the current layer. You can access the Layer Styles window by going to Layer > Layer Style > Blending Options.
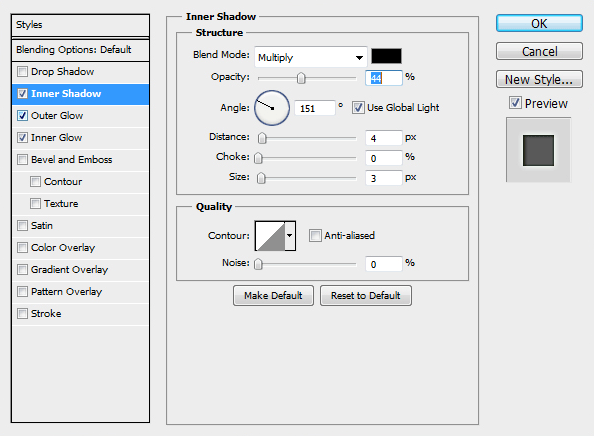
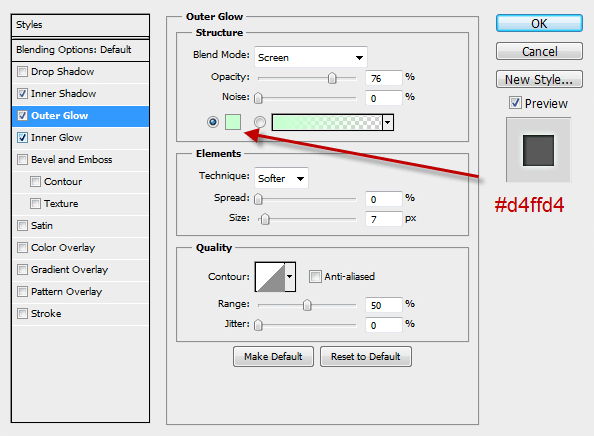
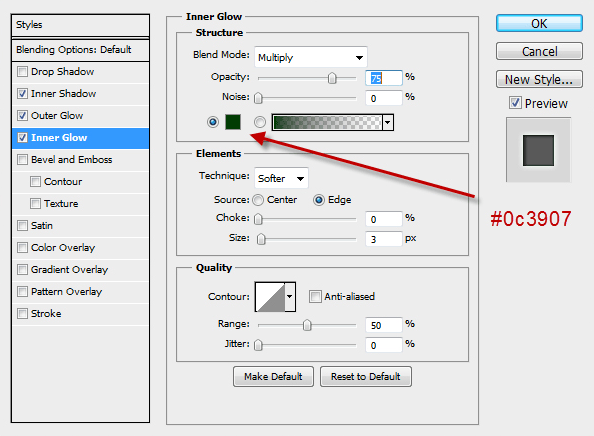
Rename this layer to “Button” and place the top two layers into a group called “Effigy1”.
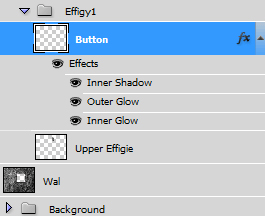
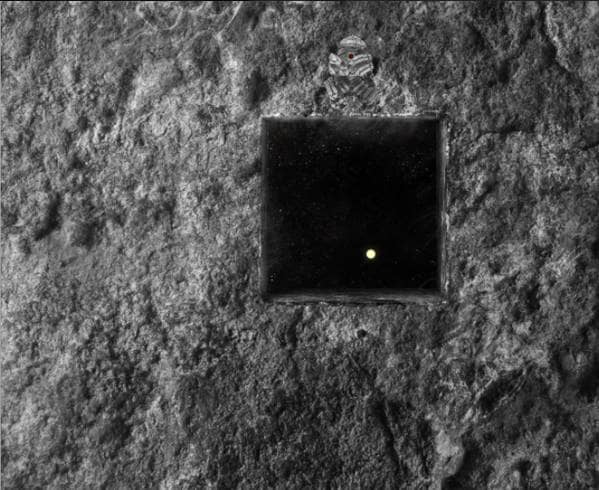
Here’s what our image currently looks like.
Step 7
Duplicate the group “Effigy” 6 times. You can duplicate a group by dragging the group into the new layer button in the Layers palette.

3 comments on “Create a Sci-Fi Space Cave Scene in Photoshop”
None of these image links actually work now, unfortunately
Impressive Work...Love it.thanks for sharing!
Actually it is best tutorial.It is very helpful and important.Well explained, great article and really all is awesome !!