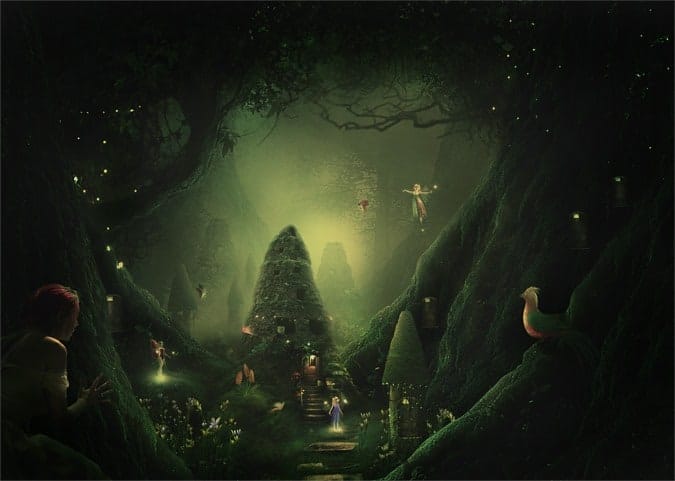
Learn how to create a mossy jungle scene with fairies flying around. This tutorial will show you how to creatively create your own jungle background, manipulate a stone building into a tower, and add doors to create a miniature village for fairies.
Preview of Final Results

Tutorial Resources
- Girl – DeviantART
- Tree – DeviantART
- Fairy house – DeviantART
- Fairy 1 – DeviantART
- Ariata – DeviantART (Alternative)
- Flowers – DeviantART
- Background – DeviantART
- Tree 2 – DeviantART
- Door – sxc.hu
- Twig – DeviantART
- Vines – DeviantART
- Path – DeviantART
- Witch house – DeviantART
- Birs, butterfly – Dek Wid
Step 1 (Creating the background’s base)
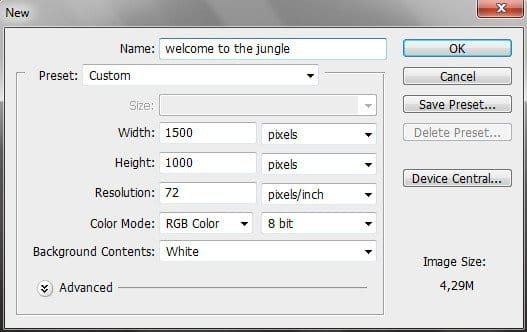
Start by creating a new document (Ctrl+N) of 1500 pixels wide and 1000 pixels high:
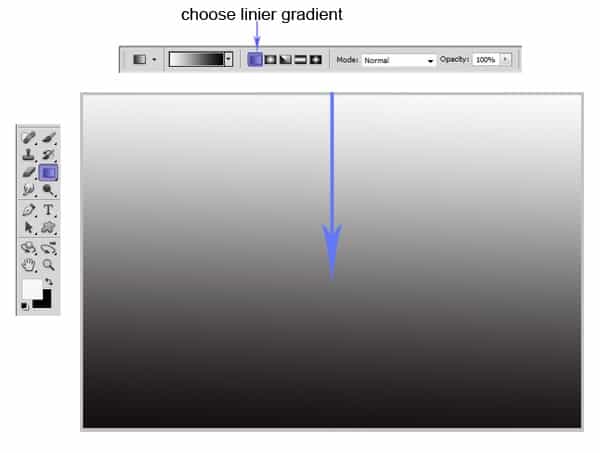
Hit G on the keyboard to activate Gradient Tool. Set the foreground color to white and background to black. Choose Linier Gradient. Fill the white document with gradient by clicking on the top and dragging to the bottom of it.
Step 2 (Creating foreground)
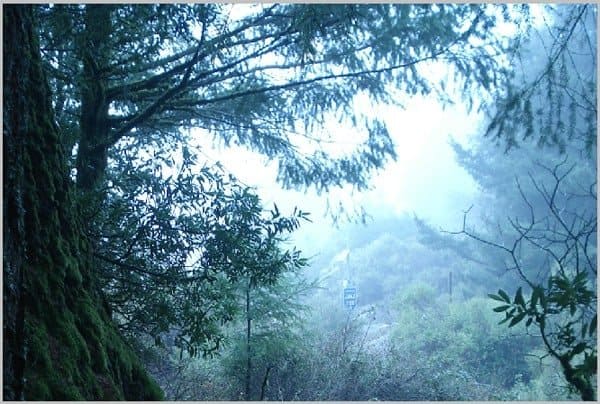
Open the tree stock image in the document. Hit Ctrl+G to place the image in a group. Name this group foreground 1. Then, with the tree layer selected, go to Layer > Smart Objects > Convert To Smart Object. This will change the layer into a smart object layer.
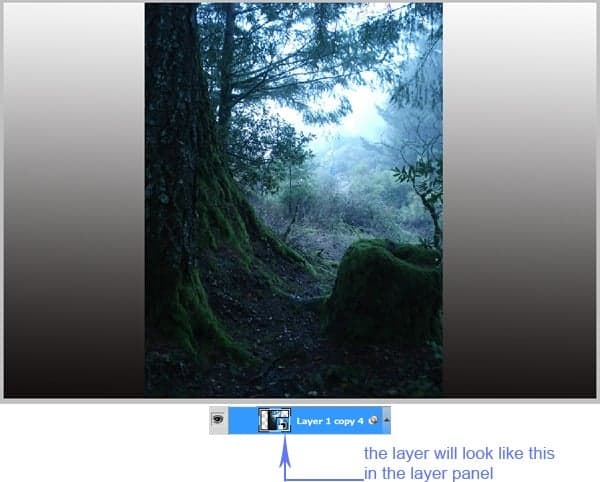
Now scale up the image to cover the document. Use Free Transform Tool to do this. Hit Shift on the keyboard along with clicking and dragging one of the dragging point marked in blue in the screenshot. Place and arrange its position in a such way that the stem of the tree fill the left foreground.
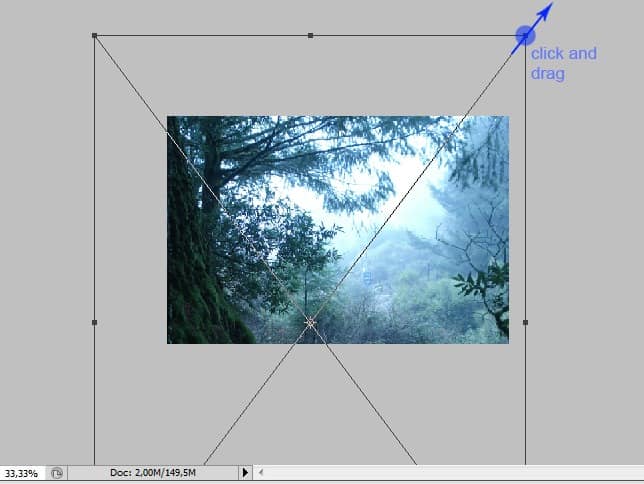
This is the result should look like:
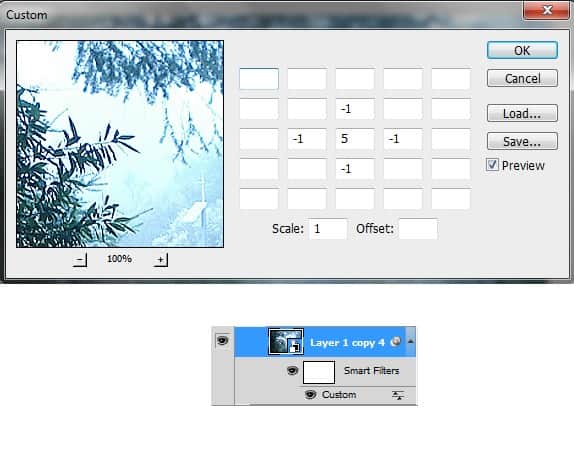
Now give this layer filter: Custom. To achieve this, go to Filter > Others > Custom. Take a look at the screenshot below to figure out the setting of the custom filter:
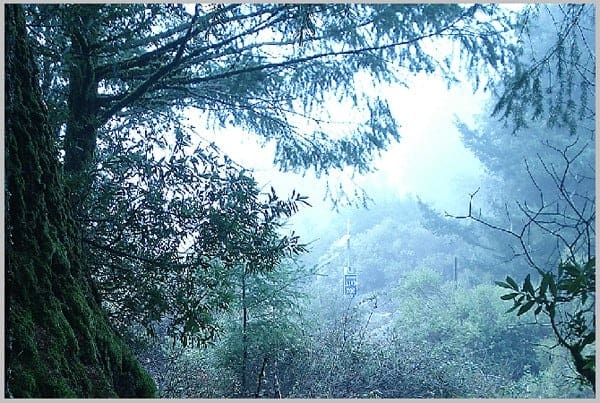
Here is the result should be:
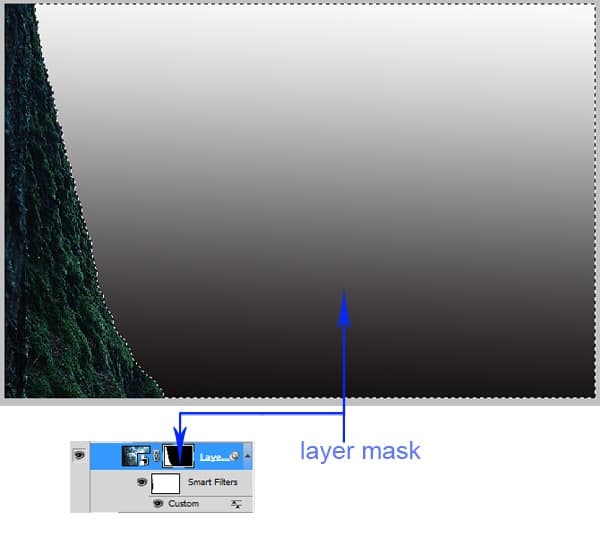
We just need the stem of the tree as the foreground of the scene. We will hide the rest of image so that only the stem is visible. To achieve this, we will mask the background of the image. Go to Layer > Layer Mask. There will be a white layer mask thumbnail next to the layer. Now make selection around the background. Use Lasso Tool to achieve this. With the layer mask thumbnail is activated, hit Shift+F5 to fill it. Fill the mask with black. This will mask hide the background.
Step 3 (The other foregrounds)
Duplicate (Ctrl+J) the tree image layer used as the previous foreground. Group this layer and name the group foreground 2. With this duplication layer, we will add another foreground on the other side. Do almost the same steps as the ones taken in creating the previous foreground. One thing to remember is try to alter the shape, position and size of the the second foreground so it does not look uniform:
24 responses to “How to Create a Night Jungle Scenery in Photoshop”
-
Thanks for this tutorial! I finished it and my image looks just like yours! It was a lot of fun! Thank you!
-
This is one awesome collection. One of my favorites I have seen in a long time. Thanks for sharing.
-
this is really nice but its too difficult for me !
-
Your not a master assassin
-
-
hey Arsi .
nice tut , but some resources you used are not available anymore .
can you reupload them again ? thanx -
Thank you for this tutoriel but certain material(equipment) not more available sound
Ariata – DeviantART
Flowers -
amazing photo! but when I opened the tree picture in the beginning in PS it was shorter than the background. Not that perfect as your screenshot. should I change the picture size or do you have any tip?
-
Thanks so much for this wonderful tutorial n__n
-
You must be a Master Assassin to complete this
-
-
wo men ji you qun qian lai bai fang
-
Its looking super but to learn this is not an essay
-
“Links don’t work” “writing on background”, just use another picture. There’s billions out there.
-
the background has a writing on it! how do you get it off?
-
use clone stamp
-
-
I mean what a detailed and an amazing tutorial. Just loved it. It was awesome.
-
damn haha, took forever!! Amazing tutorial, I wouldn’t normally do something like this, but I need to step out of my comfort zone and learn something I may never use.
Thanks.
Amazing feeling to finish something like this lol
-
Good one
-
her
-
Nice tutorial.
-
Awesome tuts
-
Links #5, #6 (Ariata – DeviantART, Flowers – DeviantART) as well as the last one do not work :(
-
This is too hard for me to make, I just wanna say that it looks amazing!
-
hey how are you . my name is Arsi actually nothing is Hard you do try .. is simple and easy possible . don’t say hard and go back .. do try and come to front side . Thanks
-
-
What is the custom filter for?

Leave a Reply