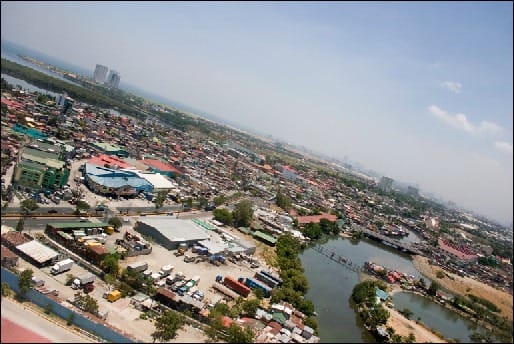
In this photo-manipulation tutorial we will learn how to create an image parody of Google Maps© which features an aerial view of a city with tacks placed on various areas of the map. We will learn how to blend images seamlessly by adjusting their colors, their blending modes, and their opacity levels. We would learn how to create a reflection on a metal surface through the use of the Clone Stamp tool and a lot more like softening the images contrast but still leaving the edges sharp.
Preview of Final Results

Google Maps Parody Photoshop Tutorial
Tutorial Details
- Program: Adobe Photoshop CS2
- Version: 9
- Difficulty: Easy
- Estimated Completion Time: 1 hour
Resources:
- Earth pin 025 by Michael Vincent Manalo (Creative Commons License)
- Aerial view of Paranaque PHILS by Michael Vincent Manalo (Creative Commons License)
- Sunny Field by frozenstocks (Creative Commons License)
Step 1 – Create a new image
To start, let’s create an image document with the following settings:
- Width: 3072 pixels
- Height: 2048 pixels
- Resolution: 300 dpi
- Color Mode: RGB Color; 8bit
- Background Contents: Transparent

Step 2 – Create the background
In this step, we would be creating our background, that is, the ground and the sky. So, to begin, let’s open Aerial View of Paranaque PHILS. Once it has been opened, left-click on the image and activate the Move tool (V) then drag it to our newly created canvas. You’d notice that this stock image’s dimensions and that of the canvas are similar, so there is no need to do any resizing.

After moving the stock image, double click on the words “layer 1” to rename this layer to “ground”. Renaming layers is a good thing since it lessens the confusion in the work process.
Now that that’s done, let’s give the “ground” layer a little retouch to make it blend in with the rest of the images that we would be adding. While the “ground” layer is selected, let’s create a Brightness/Contrast adjustment layer. To do that, click on the Create New Fill Layer/Adjustment Layer button on the bottom part of the Layer Window and then click on Brightness/Contrast from the contextual menu.

Use the settings below when the Brightness/Contrast box opens:
- Brightness: 0
- Contrast: -5
Then after that, let’s give “ground” a Color Balance adjustment, repeat the steps above and then click on Color Balance when the contextual menu opens. When the box appears, input the settings shown below respectively:
- Color Levels: 22, 0, -19
- Tone Balance: Midtones
- Preserve Luminosity: Checked
We’ve finished creating the ground, now let’s create the sky. Open Sunny Field and then activate the Marquee tool (M). We are going to use the Marquee tool (M) to drag a selection area around the stock image’s sky. When you’re done, click on the selected area and activate the Move tool (V) then drag that area to our canvas. Rename this layer to “sky”.
One response to “Google Map Parody Photo Manipulation”
-
invalid link for the photo resources


Leave a Reply