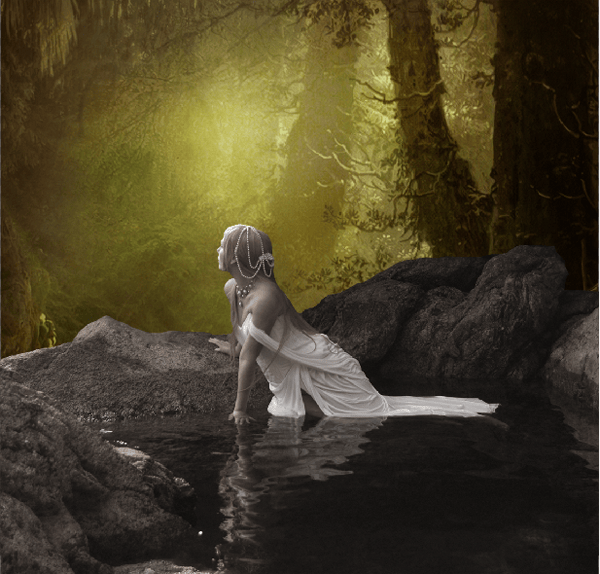
Learn how to create this photo manipulation using a combo of different stock photos and artworks. You’ll learn how to create a soft photo effect, add moss to rocks, and enhance a pool of water with some water lilies.
Preview of Final Results
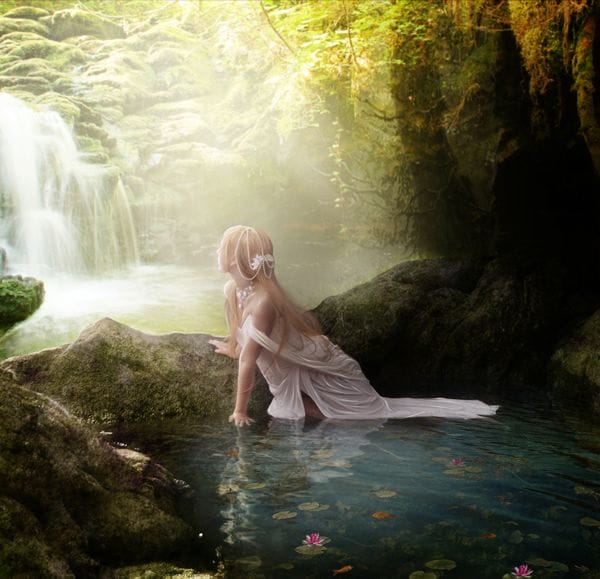
Outdoor Fantasy Manipulation Photoshop Tutorial
Resources
- Model – jaymasee
- Waterfall – elenadudina
- Trees – deviantart.com
- Moss – shardinite
- Pond – sxc.hu
- Fishes – tracie76stock
- Flower – elvensheepstock
Step 1 – Choosing the stocks
Choose the stocks you are going to use.

Step 2 – Cut outing the model
Cut out the model with the tool you prefer, you can use Polygonal Lasso Tool, Magnetic Lasso Tool, Quick Mask, Quick Selection Tool, Eraser, etc. In this case I used Polygonal Lasso Tool.
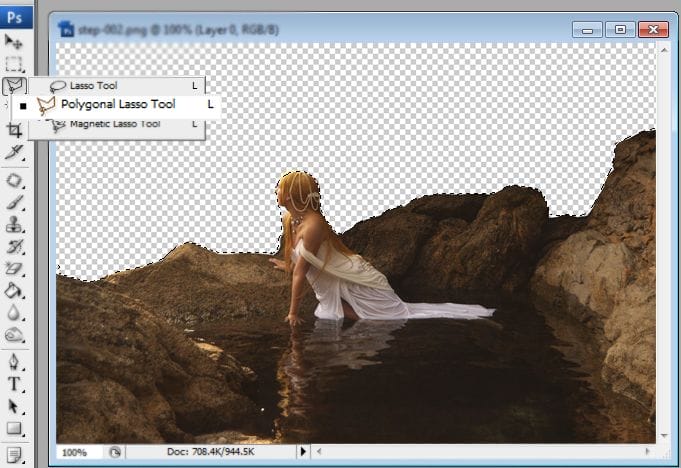

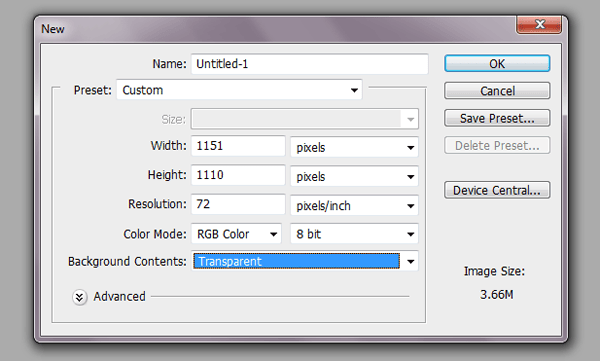
Step 3 – Creating the image to put a new Background
Put the model in a new file with the following size:

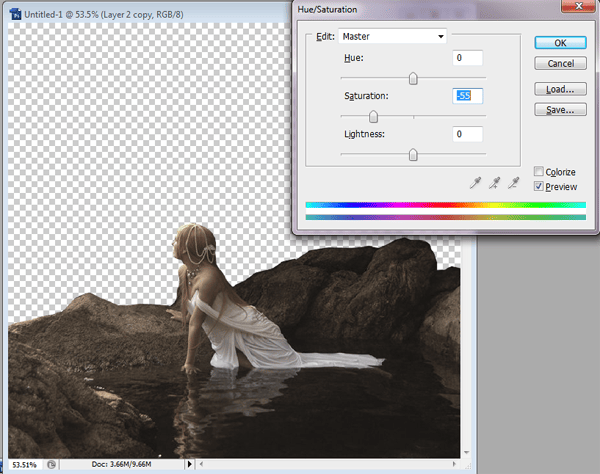
Step 4 – Removing the saturation
Duplicate the model’s layer pressing ctrl + j. and to change the saturation press ctrl + U and desaturate the layer -55.
Step 5 – Working with the scenery
Then find a background. I like to mix different images to create a background, in this case the picture I used as a “base” was this one.
Step 6 – The power of the Gradient Tool
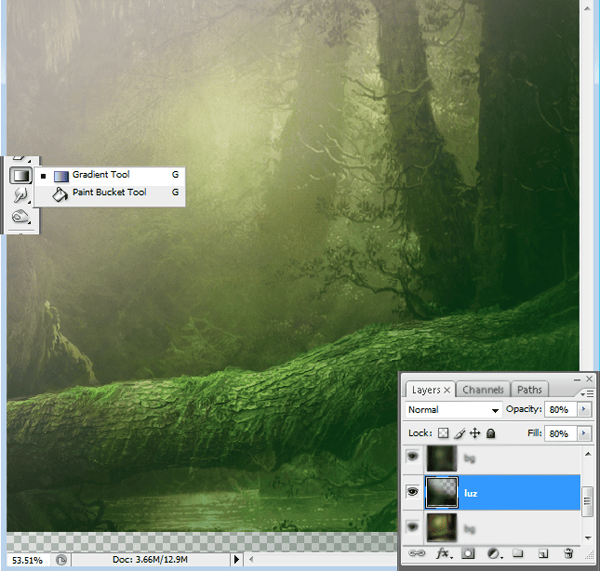
Add a new layer and make a gradient in that layer with green and white. And the choose opacity as 80% also fill 80%.
Step 7 – A touch of Gaussian Blur
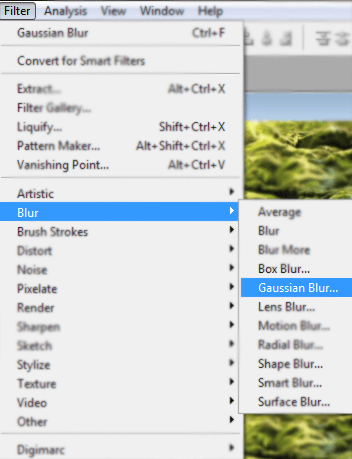
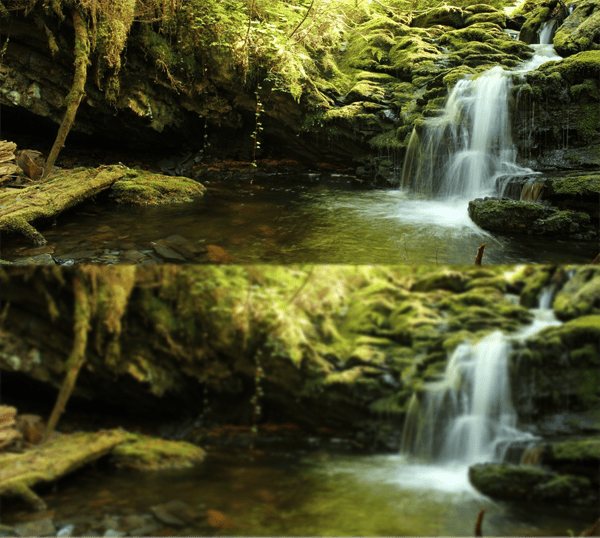
Add another layer with a waterfall and trees in screen mode and add Gaussian blur to get this result. In this image I used more Gaussian so you can see the difference, but you can use less.
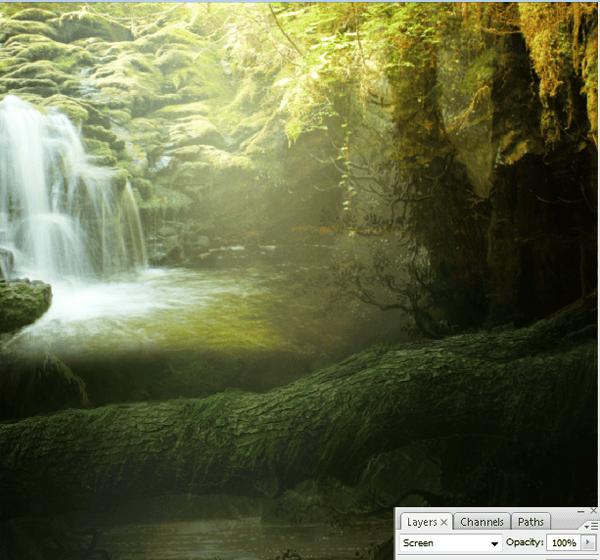
Step 8 – Adjusting of lighting
Add a new green layer and put it in screen mode with 50% of opacity to make the background brighter.
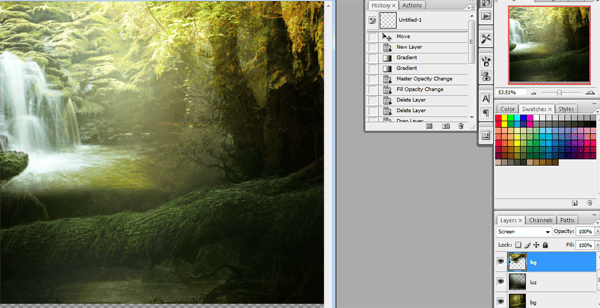
Step 9 – The textures
Now I’m going to show you how to add some moss to the stones using a texture in soft light with 80% of opacity.

Step 10 – The model skin is important!
Work with the model’s skin. To start with that you should make a selection with lasso tool in the model’s original layer. Doesn’t have to be perfect, but you got to select every piece of skin. Cause then you can erase the parts you need.

Step 11 – More of skin, I said it was important
Duplicate the selection twice pressing ctrl + j to create two new layers, and in the second layer you made use “screen mode” with 50% of opacity to make the skin look brighter.

Step 12 – Add some hair
to make the hair I used brushes, until I get the result I want, also you can used the pen tool to create hair.

Step 13 – The Pond
To make the pond we used a soft light layer like this:

Step 14 – Foggy is awesome!
Then we add a foggy layer to create more light using the layer in soft light.
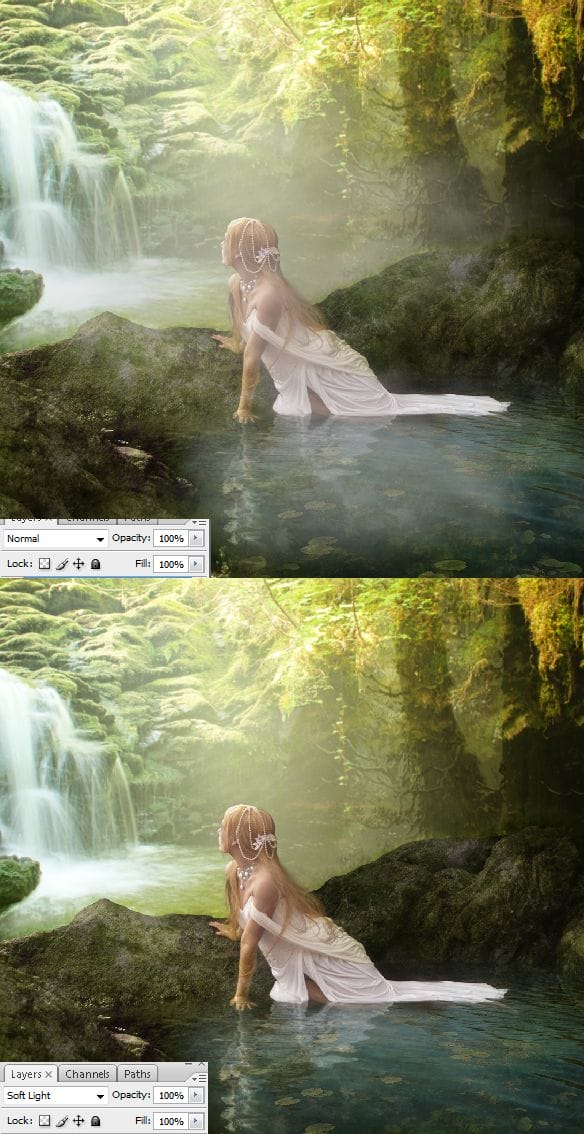
Step 15 – A little of life would be great.
Also you can add some fishes or plants in 80% of opacity, or even less if they are more away you can used less opacity to make then look blend into the pond.
7 responses to “How to Create an Outdoor Fantasy Manipulation in Photoshop”
-
e lindo
-
These look fantastic! Thanks for bringing them together – what a great collection
-
You are amazing artist and I really appreciate your time to share your wonderful skills and knowledge…. Bless !!!
-
what kind of brush you used for the model’s hair?? Thank you.
-
That’s the thing about free stock images. 1/2 end up becoming dead links.
-
The link that goes to the “tree’s” stock takes you to the main profile page of elenaDudina’s deviantart account and I can’t find the specific file you used in this tutorial. Could you possibly have a look and provide an up to date link. I’d really like to try this tutorial but I can’t until I have all the stock or find an appropriate alternative :3
-
Found here: http://elenadudina.deviantart.com/art/Background-9-141845107
-


Leave a Reply