

Step 8
Create a Hue/Saturation Adjustment Layer and change the Hue to +33. Clip this layer to the grass layer (Alt-click between the two layers in the layer palette). By doing this we will restrict the Hue/Saturation adjustment layer effect to the grass layer only.
Step 9
Create a new layer (Ctrl + Shift + Alt +N) and use the standard chalk brush to paint an ellipse as shown below (use any color you like). This will be the base of our hole in the ground.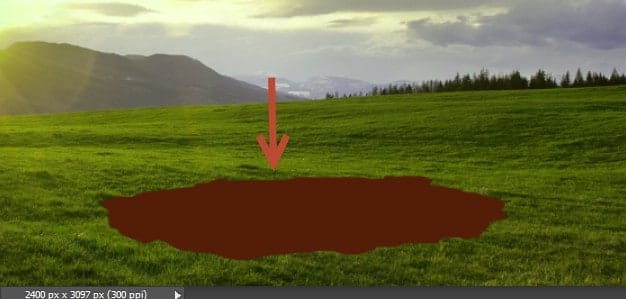
Step 10
Double click the layer you painted in the step above and add an inner shadow and a color overlay effect.
Step 11
Create a new layer and choose the standard round soft brush. With the brush tool (B) paint some black shadows as shown below (set the brush to 30% Opacity).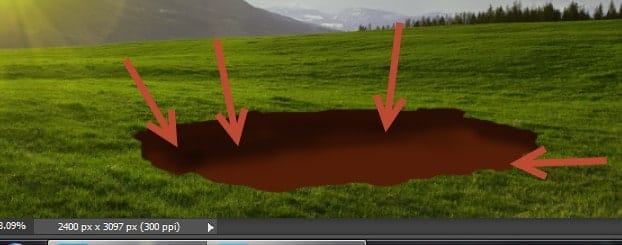
Step 12
Create a new layer and select the standard chalk brush. Increase the opacity to 80% and paint a thin line where the wall of the hole should meet the ground.
Step 13
Create another new layer and with the same chalk brush paint a thin white line on the upper margins of the hole (the specular highlights).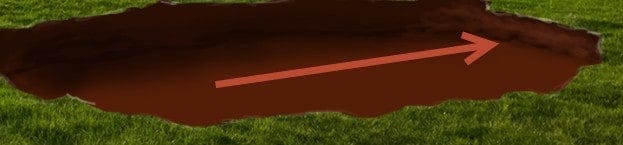
Step 14
Lower the opacity of the chalk brush to 40% and paint with white in the area indicated below to give our hole a basic shading.Step 15
Open the “Dirt” texture, select all and copy/paste in our scene (and don’t forget to convert it to a smart object). Use the Free Transform Tool (T) to place the dirt as shown below.
Step 16
Add a layer mask to the texture layer (Layer > Layer Mask > Hide All) and use a white chalk brush to paint over the whole in the layer mask to reveal the texture .
Step 17
Change the blending mode of the dirt texture to Multiply to add some texture and realism to our hole in the ground.
Step 18
Open the file “Island”, select all and copy/paste in our scene. Add a layer mask to the island and paint with black in the layer mask to hide the lower part as shown below. Use the Free Transform Tool to make the island seem like it’s coming from the hole.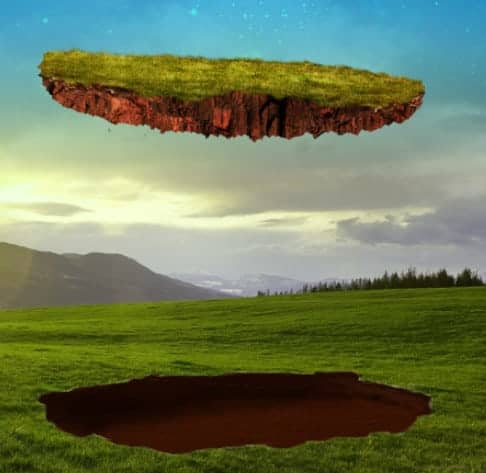
Step 19
Create a new layer and clip it to the island layer. Change the blending mode to Luminosity and paint with a black brush at 40% opacity over the area shown below.17 responses to “How to Create This Eerie Floating Island Photo Manipulation in Photoshop”
-

Wonderful tutorial, thank you so much for sharing it
-
Its a very useful tutorial for all. Thank you
-
bro, this looks like ass!
-
The concept is nice, but the shadows are totally wrong. The illuminated side of the tree is on the opposite side of the light source, i.e. the sun, which is located on the left side. The shadows are placed as if the light is coming from the back, instead of the left side. Look at the tree, meerkat and baby shadow. The farmer’s shadow is correct and all the elements shadows should follow the same direction. Also, they should have placed some roots in the bottom of the tree to give the artwork more realism and the hole in the ground should have grass in its edge.
-
It would look more realistic if it was used a grass brush around the edge of the hole and the island. The edge is too sharp.
-
The hole in the ground and the island could look more realistic if it was used a grass brush around the edge to make not to look so sharp.
-
That is Great, Thank you very much. But please I will like to download it if is possible.
-
good
-
kk
-
This is a very good tutorial. I worked with it to make a birthday card for my mother in law – she will get a helper in her garden from us. But I am a little sad because the page with the download zip can not be find. But thank you for sharing this tutorial anyway
-
Sorry about that – link has been fixed.
-
-
:-*
-
Great tutorial, Johan.
-
Larry, this is a great page to pick up some PS pointers!
-
Thanks for thinking of me, your a swell guy… many thanks!!!
-
-
hi thank u ,i like to know all about it please send to me ,how i can learn it ?nice to me
-
عمل جميل
Leave a Reply