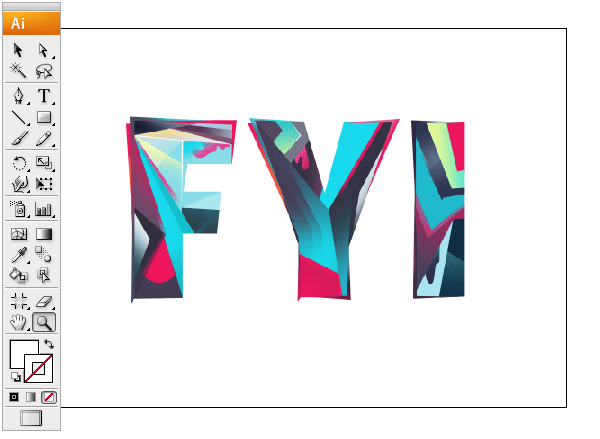
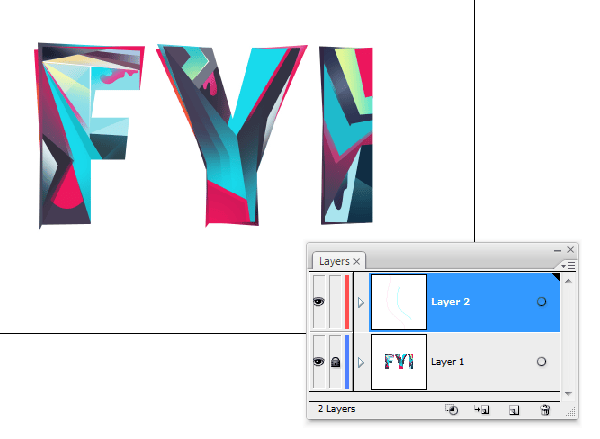
Now create the blends. Use Pen Tool to draw the lines. Pick different colors for each of the lines that will give a nice transformation between the two colors. Select the lines and hit Ctrl+Alt+B to create blend. To edit the blend settings, double click on the blend tool. Pick any color that looks good.

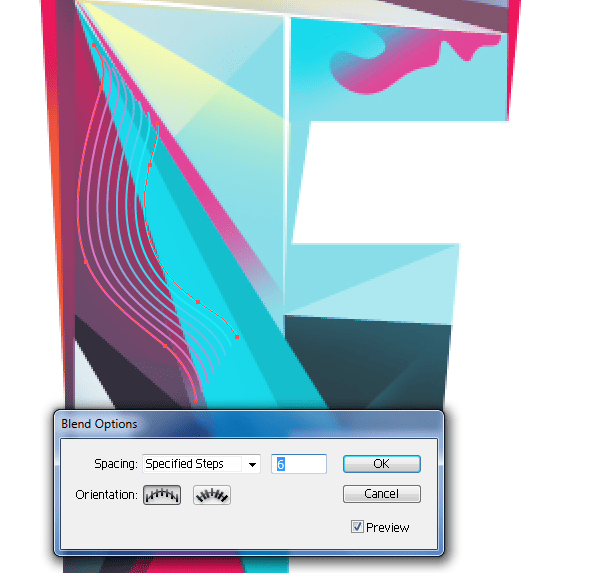
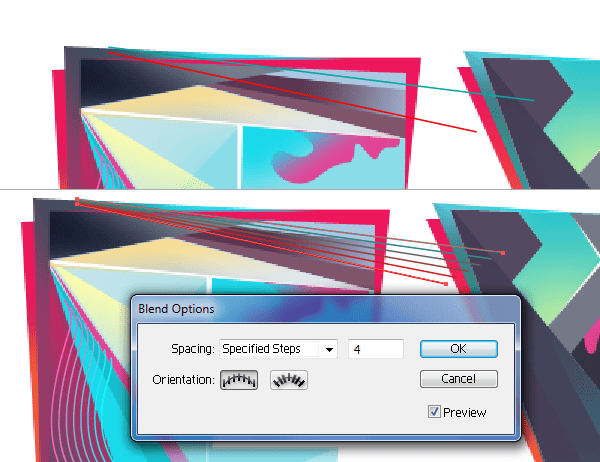
Create blends for the remaining letters.
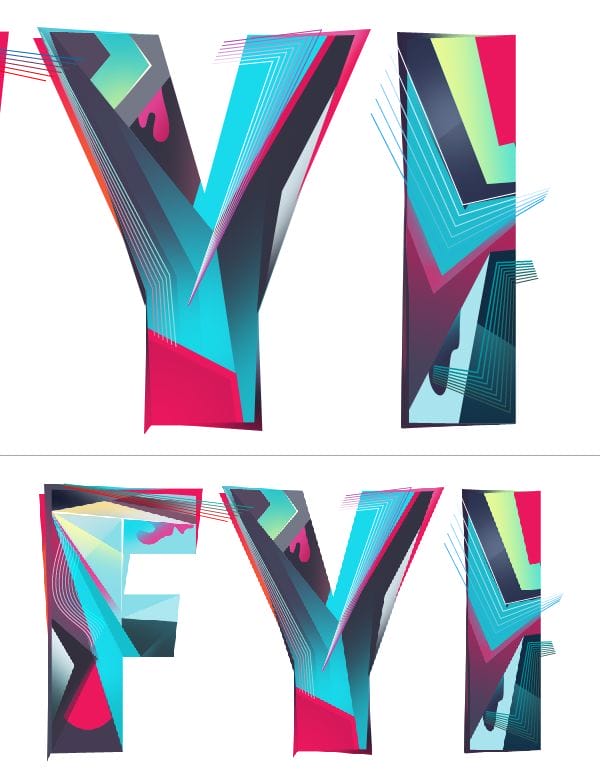
We now need to take the blends into Photoshop. Copy and paste each piece separately as Smart Objects.
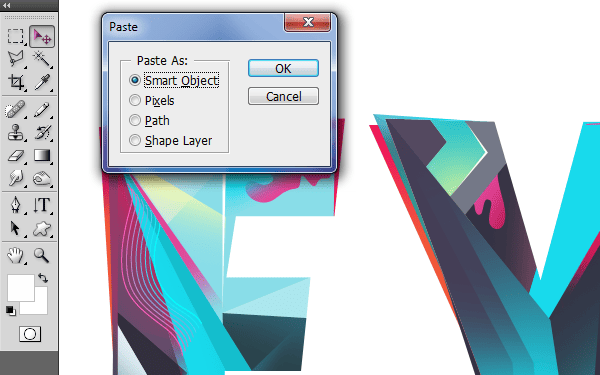
To hide any part add layer mask select the area and fill the selection with black.
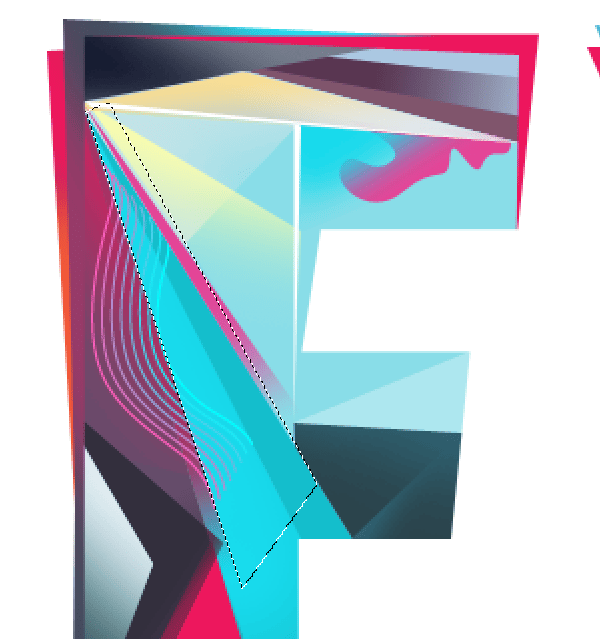
Or place it in the clipping stack below the layer that is supposed to be on top.
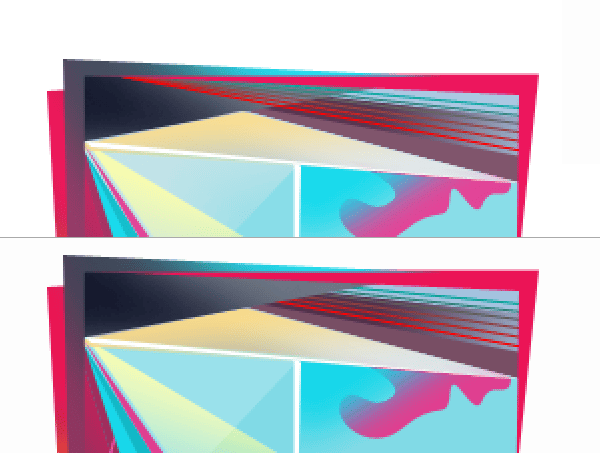
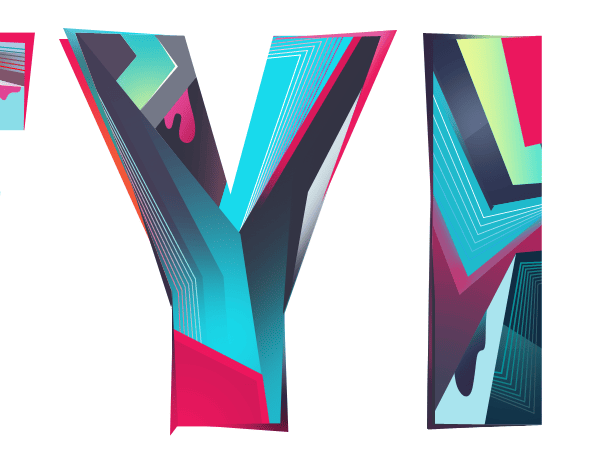
Bring in rest of the blend objects. that finishes the text part.
Step 6 : Bakcground
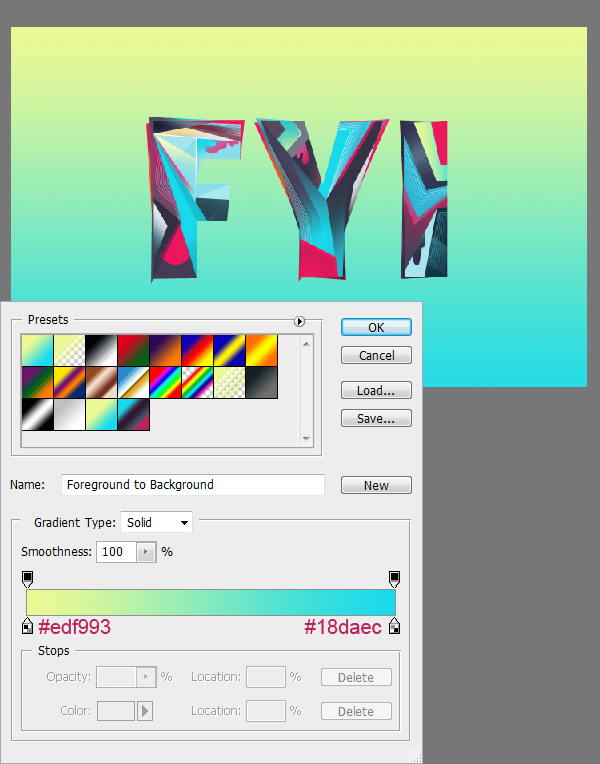
Create a new layer below the text and fill the gradient using Gradient Tool.
Create a new layer above the background and choose Filter > Render > Clouds. Press ‘D’ key before applying the filter to reset the colors to default. Change the blend mode to “Soft light”.
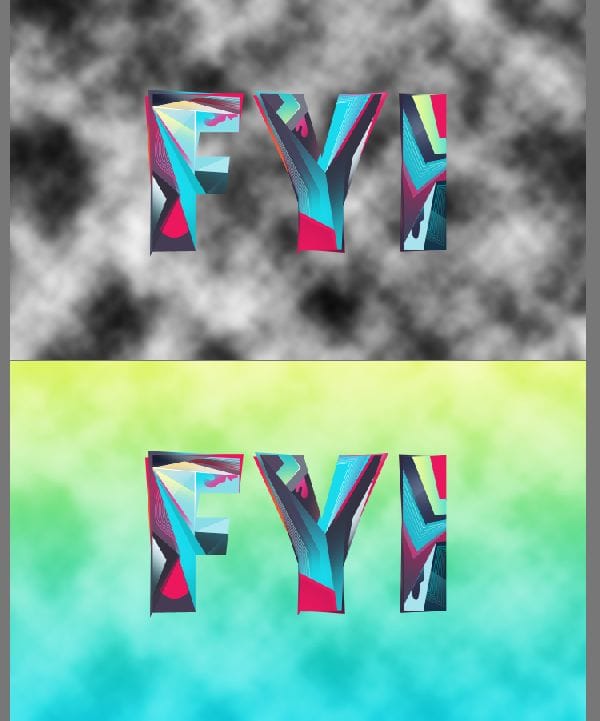
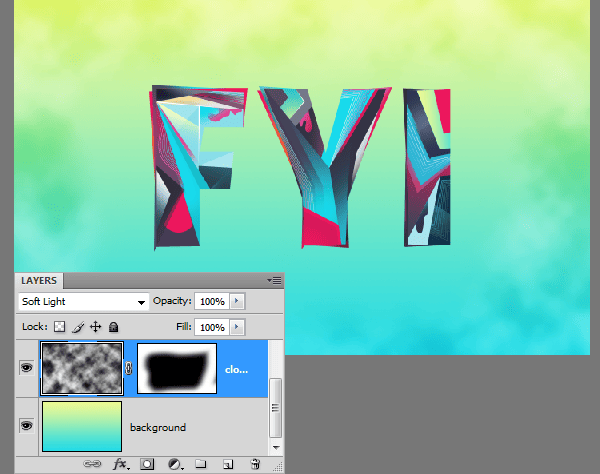
I don’t like the clouds to appear all over. Hide the clouds at the center using Layer Mask.
Drop in the coffee stain image (1.JPEG in the pack). Place it below the Text.
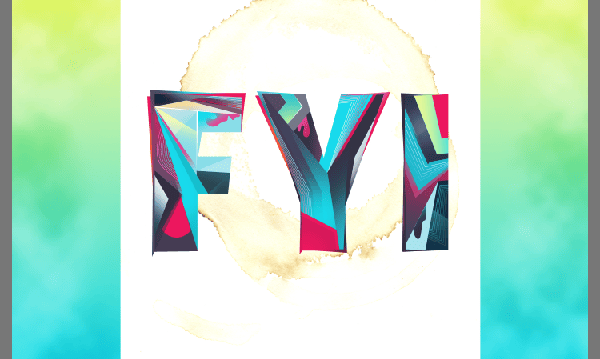
Now double click on the layer thumbnail. This will present you the Layer Style box. First change the blend mode to “Screen” On the same box you will find “Blend If” section. This is where all is going to happen. We have two Blend sliders there we can adjust. We need to adjust the “This Layer” slider. Hold the “Alt” key, click on the white color handle and drag it away from the edge. This will blend the texture into the background nicely.
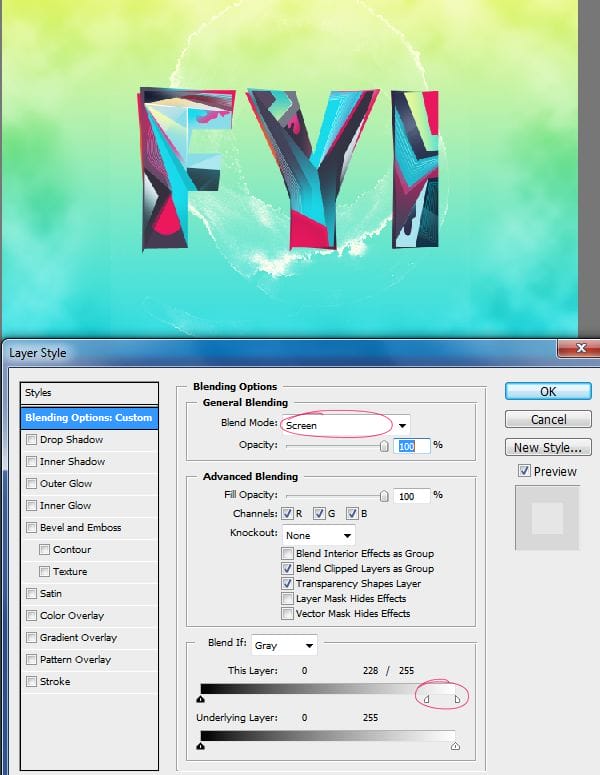
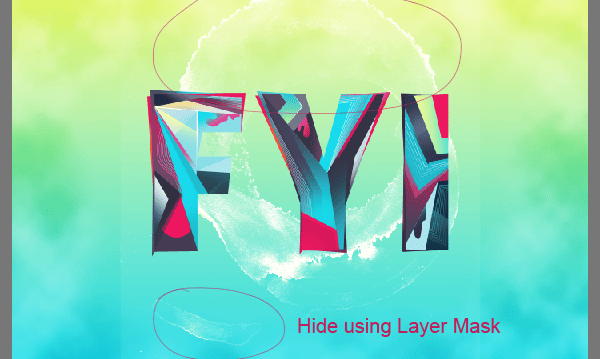
Duplicate the layer if the result is not strong enough. Mask out unwanted any areas.
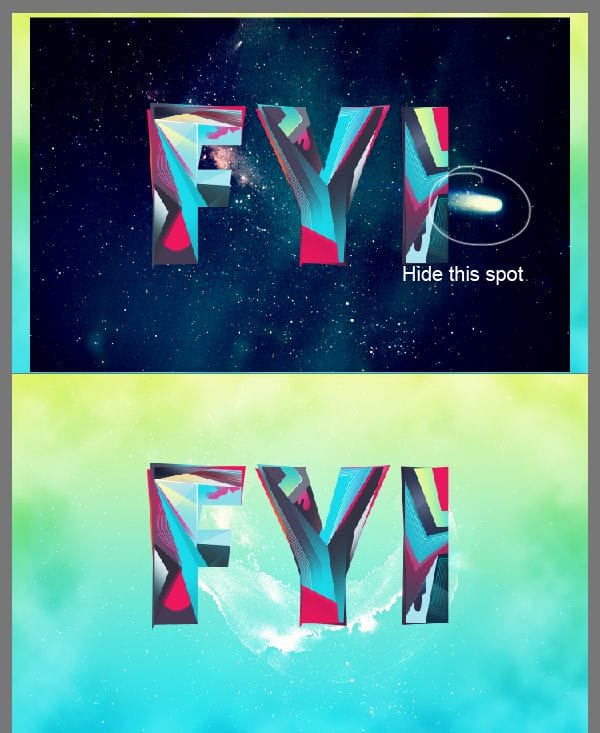
Drop in the nebula stock image. Place it above the coffee stain texture. There is a big white spot in the image. Hide it using Layer Mask. Then change the blend mode to “Screen”.
Step 7 : Adding More Elements
Add some glowing highlights to the text using the Brush Tool. Create a new layer above the text and use brush tool to add the highlights. Modify the brush width and angle in the Brushes palette.
21 responses to “How to Create a Colorful Text Design in Photoshop”
-
Really nice work and thanks for the PSD file.
-
Only few artists share their tricks of the trade. You’re one passionate artist that believes in “share your blessing” motto. :-)
-
It’s truly a great and helpful piece of information. I am happy that you shared this helpful information with us. Please stay us informed like this. Thank you for sharing.
-
Its not my first time to pay a visit this website, i am visiting this site dailly and get good data from here every day.
-
It’s truly a great and helpful piece of info. I’m happy that you just shared this helpful information with us. Please keep us informed like this. Thank you for sharing.
-
AMAZING!!
-
Download link not working… 404 Error .
-
Fixed thanks!
-
-
… Honestly This should be named “how to collect textures to create a design” because nothing named design over here
-
oh my god what the patient artist
thank you for your article!
its very help full
i learned some more tips and tricks from it
:D -
I really appreciate your struggle in this tutorial…!! lovely text effect.. so shared it..
-
It’s amazing!
-
Hi,
how can i apply line tool on the duplicate layer??
should I rasterize vector mask..because i cant simply draw the lines and they goes to new layers when i draw them.. -
This is wow.
Thank you so much -
Hey, I’m starting learning Photoshop lately :)
but I’m stuck at step one hhhh
I don’t know what is ” illustrator ” , but when I try to write the letters in Photoshop then try to create outlines it doesn’t work :(
so, can anyone help me please :) ??
Thanks in advanced.-
only illustrator can do ths work…
-
It’s a whole other program. sorry dude.
-
-
This is wow.
Thank you so much for creating vivid tutorials for free. :) -
very bad
-
thank you so much! This was exactly what I was looking for.
-
page of the wings is not


Leave a Reply