
Use Photoshop to create a realistic metal texture. The texture can also be used for 3D modeling.
Step 1
Create a new Photoshop document (File> New or Ctrl+N). For this tutorial, we’ve created a 800×600 pixels document.

Step 2
Set the background color to 50% grey. You can edit the background color by clicking on the background color in the toolbox.

Step 3
Now we’ll add some noise to the image. To do this, use the Add Noise tool (Filter> Noise> Add Noise). Select Uniform and checkmark Monochromatic. The Amount you specify will determine how visible the metal grain will be.

Step 4
Use the Motion Blur tool (Filter> Blur> Motion Blur) to blur the grain.

Step 5
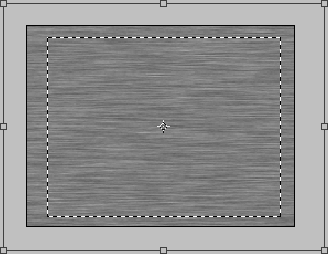
Now we need to enlarge the layer to hide the edge effect caused by the Motion Blur filter. To do this, use the Rectangular Marquee tool (M) to create a selection of most of the brushed metal area.

Step 6
Use the Transform tool (Edit> Transform> Scale or Ctrl+T) to scale the selection to the document’s size.
Step 7
The metal texture is complete, but it doesn’t look realistic because of a lack of lighting. If you are using this tutorial to create a texture for a 3D modeling software, you can now import this texture to your software and let your 3D modeling software handle the lighting effects. If you want to add lighting with Photoshop, continue to the next step.
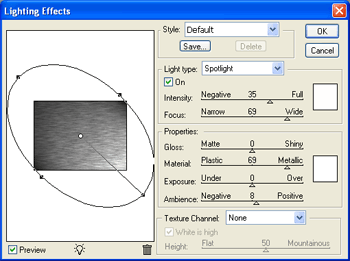
Step 8
To add a lighting effect to this texture, simply use the Lighting Effects filter (Filter> Render> Lighting Effects).
Final Results

9 responses to “Metal Texture”
-

thanks i love you
-
Thanks! Ist very simple and spectacular. I will use it in my job, in visualization.
-
That very helpful
-
very nice
thanx -
thanx it was very helpful.
-
sweet, but could you show more that would be used for different types of objects, like vehicles, swords and others.
-
Thank you very much!
-
Very nice and creative tutorial.Thanks a lot…….
-
Magnificent. Thank you!
Leave a Reply