
Insignias and retro logos are popular and many of them have some sort of text along a curved path. Most people use the Text Warp tool but it ends up deforming the text. In this tutorial, you’ll learn why they look deformed and how you can properly create text along a curve without deforming the letters.
Why Curved Text Looks Deformed
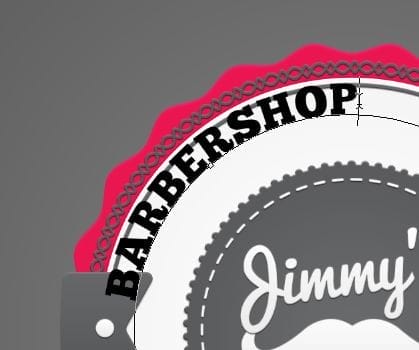
Have a look at the two badges below – the one on the left was curved with the Warp Text tool while the other was created on a curved path. At first glance, they both look the same but look closely at the text and you can see that the left-image text is deformed (letters upper-half are enlarged).

Here’s another example with just plain text to better show how the text gets deformed.

Don’t use the Warp Text tool
First of all, never create curved text with the Warp Text tool. This tool can be found in the options bar when you have your Text tool selected and it can be quick and easy, but the results are amateur. The Warp Text tool should only be used for warping the shape of your text such as making it bulge, pinched, etc.


How to Create Text on a Curved Path
The proper way is to create a vector path then add your text to the path. We’ll show you how.
Step 1
First, select the Ellipse tool from your toolbar. You can pick any shape you like or use the Pen tool (P) to draw your own path that your text will follow. For our image, the Ellipse tool is the most suitable choice.


Step 2
In the options bar located below your Photoshop menu, click on the dropdown menu and select Path.

Draw a path on your document. You can hold the Shift key while dragging to get a perfect circle (or square/polygon if you are using another shape tool).

To reposition the path, switch to the Path Selection tool and drag the path.


Step 3
Next, switch to the Text tool (T) then click anywhere on the path. When you hover over the path, your cursor should change to a text cursor with a curved line across it.

Type in your text. If you want your text centered, remember to set it in the options bar.

Step 4
We have our text, but it’s not quite aligned. First, to position the text in the center, you can adjust the start and stop points. On the path, you’ll find two points. Switch to the Path Selection Tool then drag the point to reposition your text. Your cursor should change to a text cursor with two arrows. As you’re dragging, you can hold the Shift key if you want to position the points perfectly in the center.
87 responses to “Quick Tip: The Correct Way to Create Curved Text”
-

Thanks so much
-
Thank you!
-
Hi! Can this be done in PSE 2022?
-
Thanks
-
only the first two letters of my text appear. then nothing. What’s the problem?
-
THANK YOU I have been telling my designer that the curved text he made look weird but he insisted it was fine until I showed him this.
-
Thanks, so far so good but how do I get a short text to span the lower edge of a circle? Upper arc dies the job but lower arc distorts.
-
Can a multiline text be placed on a path in Photoshop?
-
Using an ellipse, when I type my text in Step 3, it inserts the entire Loren Ipsom text instead of just my desire one word text. How can I fix that? Thank you.
-
First time I did it I didn’t pay attention to step 3 and it did not work. Went back and reread the instructions. Works perfectly.
Thank you
-
this doesnt work on photoshop 2019
-
It should work the same in Photoshop CC 2019.
Can you elaborate on what’s not working?
-
-
to hard lol tra lal
-
in your sample, how did you get east riverside to not be upside down. when I try to follow the path the top part is good, bottom part is upside down.
-
You need to flip it.
With the Path Selection tool selected, simply drag the point towards the center of the shape to inverse the text.
-
-
Hey
-
Good article, but I think it is a judgment call on whether to use Path method vs Warp method. I find that warp does a better job of keeping the letter spacing looking nice and stylized. The Path tool’s text controls are a nightmare when trying to get spacing correct, and it can tend to tilt the letters in odd ways.
-
Fumbling my way around PS and clear, concise tuts like this one are a godsend.
-
I concur!
-
-
Thanks very much for this knowledge
-
Sadly, this doesn’t seem to work for Photoshop 5.5. Any ideas on how to do this, for Photoshop 5.5.
-
NICE!
-
Thank you, I learnt Curve tool from this article, It really helped me for a logo. Thanks alot.
-
I just discovered the warp text tool. Glad I ran across your post.
The Photoshop warp tool has ‘flag’ and ‘wave’. How can either be done with out the warp tool? Creating an ‘S’ curve? -
This was incredibly helpful, thank you!
-
Drag the little square/point towards the center and the text should flip over to the other side of the path.
-
how do i get the text towards the inside of the circle
-
it is not working for second line
-
EXACTLY THE PROBLEM I’M HAVING
-
-
Great tutorial! I’m trying to apply a drop shadow to the curved text, but it doesn’t seem to affect its appearance. Any idea why? Photoshop CS6.
-
Great tutorial. Easy to follow and straight to the point. Found it to be extremely helpful.
Thanks so much! -
Finally found a proper tutorial on this
-
helpful tutorial. thanks for sharing
-
awesome tutorial
-
How do you do the bottom curve?
-
Well, I can honestly say that I have been doing this incorrectly all of these years :)
-
One of my pet peeves is a nice-looking graphic that is marred by bad text. One of the chief culprits is curved text because people fall into the trap of using “warp text.” I’ve run into this problem and sadly, stopped using it. Now I have an option to create some outstanding visuals for my text without things looking like amateur hour.
-
What tutorial? Nothing to click on and no tutorial loading. Just a picture of curved text…?
-
thank you!
-
I don’t see a video or instructions… I usually see a little tool in CS6 for curves, arcs, etc and now it isn’t there. But this is not a video as near as I can tell. How do I see the instructions? Thanks.
-
Didn’t work, the Type Tool cursor never showed the icon in Photoshop CC that showed in your tutorial
-
Any tutorials on how to make that pastry shop disc… I’d like to make something simlilar.
-
Could you please explain how you got the Riverside part at the bottom? I created a new layer for that piece, but I still can’t figure out how to do this.
-
So sorry to be writing so much. I figured it out, but now my “Riverside” bottom text is on the inside of the circle, rather than on the outside of it. Is there a way to “fix” this?
-
Try this: Select the Path Selection tool. There’s a tiny <> diamond shape on the path. Click and drag that up/down to move your text.
-
Thank you very much. I will try this today. I just wish you had a printable version of this, as the text on the web page stacks on itself when I try to print.
I can’t get the text to flip. You say to use the Point Selection tool, nowhere in my photoshop does anything say Point Selection tool and you don’t show what it looks like. Where is the dang thing located??? I’m trying to make a logo for someone and I need it yesterday.
-
Sorry about that. It is actually the Path Selection tool (A) which is under the Text tool. Post has been updated – thanks for the tip!
Stupid question. I managed the top text just fine, but I can’t get the lower text to not show upside down! ?
can this be done in adobe after effects as well?? so it can be animated
-
Yes you can do this in After Effects as well. Draw a path and you should be able to add text along the path.
Clear and to-the-point tutorial. Just what I needed, thanks!
Thank you! Just learning Photoshop for fun and trying to absorb as much as popular! Your tutorials are really awesome and greatly appreciated!
This is really helpful and so easy to understand for anyone.Thanks you!!
I’ve used this technique (learned from this very page!) many times, so I thought it was about time I also said thank you!
Super helpful and straight forward tip. I really dig this.
Thanks so much!
There aren’t two points to adjust the start and stop of the path and when i type my text it goes onto two line when i want it on one?
After selecting the Text tool (step 3) and hovering over the path, my cursor does not change, as described, and thus will not allow me to insert text on the path. I have CS5 12.0.4. Any hints?
This tutorial was extremely helpful. Thank you very much!
Ah brilliant! Thanks! This onw finally had it right after all those text warping tip pages.
Ah brilliant! Thank you! This one finally had it right after all those test warping tips.
beautiful tutorial but my step 4 is aint working. text cursor with two arrows is not appearing
Thank you, you helped a lot!
Thank you so much ..Really Awesome!!
Super helpful. Clear. Easy. Love this, thank you.
awesome
Excelent, saved me time…
Just what I need. Perfect. Thank-you!
Thnxs !! it really helps ^^
vector’s win again !!!!
Loved this tutorial! It was quick and easy!
Excellent and Really Helpful.
Fantastic. But here’s a question I have been searching high and low for, to no avail.
How do you create exactly the same result but instead of text, you have a narrow panoramic skyline image instead? I can’t find the answer to this anywhere and have gotton exhausted for hunting for the answer for 2 days.
Nice technique. Really useful…thanks for the post…
Awesome! Excellent tutorial.
Excelente! Conteúdo de alta qualidade.
I’m having a problem at step 4. After entering my text and clicking the path selection tool, the path vanishes. I am unable to select start or end points. Where am I going wrong?
-
Same here
-
Go to the path tab. If you can’t find the tab or it is not visible, then go to window>paths.
Simply great
Now this was helpful. I knew their was a better way of doing it, just couldn’t figure out how.
Thanks.
cool
Nice and clear tutorial
Realy…Nice Explaining,,,
Nice one!
Excelente trabajos…!!!
Leave a Reply