
“It’s the ship that made the Kessel run in less than twelve parsecs. I’ve outrun Imperial starships. Not the local bulk cruisers, mind you. I’m talking about the big Corellian ships, now. She’s fast enough for you, old man.” — Han Solo
This oft-cited quote is the legendary Han Solo in a nutshell, combining his roguish arrogance with the fact that he can usually back up his confident words with actions.
In this Photoshop tutorial we learn how to create a Star Wars attack scene. First we added a background, then add some adjustment layers. Next added robots and spaceships and blended with some adjustment layers. Finaly add fog and gradient map. For last effect wee added Camera Raw filter.
Preview of Final Image

Tutorial Resources
Step 1
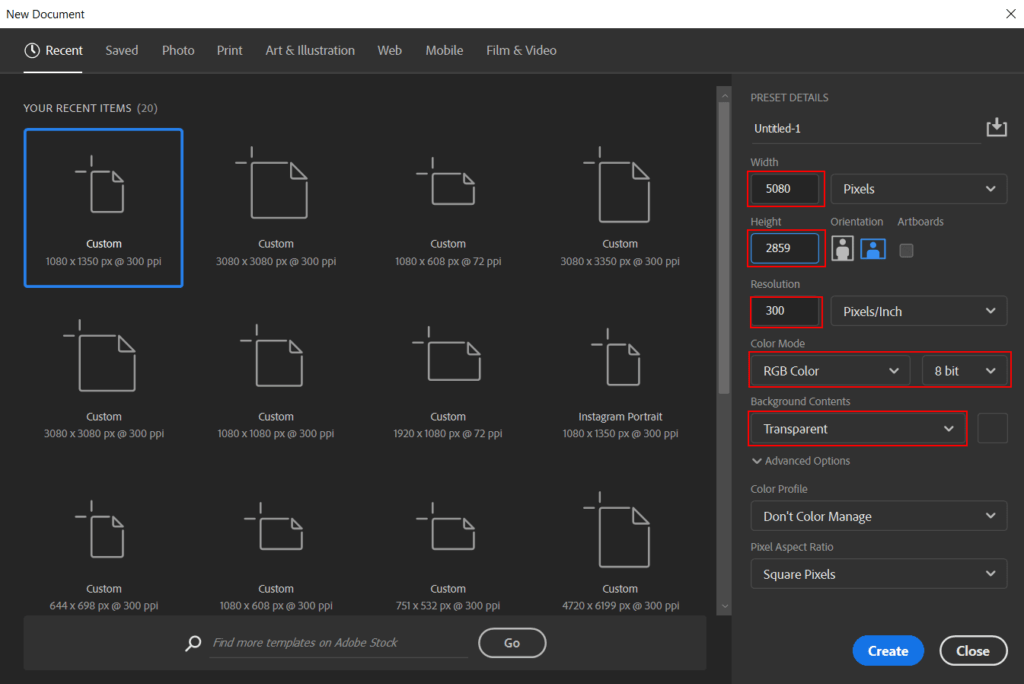
Now, let’s start by creating a new image file, go to the Menu bar and click File > New, and then input the following values on their respective fields
- Preset: Custom
- Width: 5080px
- Height: 2859px
- Resolution: 300px
- Color Mode: RGB Color 8 bit
- Background Contents: Transparent
Step 2
Now, place Background photo Go to File > Place and select Mountains. Then place it to our work canvas. Then position the image with the transform tool (Ctrl / Cmd + T). Hold Alt + Shift and rasterize like the image below. In Photoshop CC only hold Alt to rasterize all sides together.

Next select layer and create layer mask, then use Brush Tool(B) Soft Round with foreground color black and paint on sky and sun to delete it.


Step 3
Add Adjustment Layer “Levels”

Step 4
Add Adjustment Layer “Color Balance” Opacity set to 50%.

Step 5
Add Adjustment Layer “Curves” and press Ctrl/Cmd + I to invert and use Brush Tool(B) Soft Round with foreground color white and paint the highlights parts.


Step 6
Next, select landscape layer and go to File > Open and select planet photo stock. Use Rectangular Marquee Tool(M). With the Rectangular Marquee tool, drag over the area you want to select. Hold down Shift as you drag to constrain the marquee to(release the mouse button before you release Shift to keep the selection shape constrained).

After the selection area has been created, simply copy (Ctrl / Cmd + C) and Paste (Ctrl / Cmd + V) it below the mountains layer. Then position the image with the transform tool (Ctrl / Cmd + T). Hold Alt + Shift and resterize like image below. In Photoshop CC only hold Alt to resterize al sides together.
9 responses to “Create a Star Wars Scene Photoshop Tutorial”
-

HI why are the colors red and the file i downloaded it is blueish? i followed the steps for changing colors with adju layers but wont get it redish. Please explain? i mean if you download een blueish file and yours is read somehow the outcome will be different then yours.. and that is really frustrated when you follow a tut step by step :)
-
Which step are you on?
-
-
Why do i get a different color then your Mountains? I changed the color and added the adjustment layers but didnt changed a thing with the colors how come? I mean i download the file from mountains and that is blueish not red … and even with the changes you made it wont become red… Did i mis something?
-
Does anyone know if this tutorial is good? I’m at step 5 and struggling to understand what it’s asking me to do. If anyone has already beat this challenge please let me know, it would help wonders.
-
Hey Student,
I’m currently up to step 21, and have found the tutorial becomes a lot easier to understand. My design currently looks spectacular, and this ‘challenge’ has almost been conquered. I truly believe if you put your mind to this, then you can do it.
With the kindest regards,
Another Student -
Yeah I agree with everything you just said whole heartedly
-
-
Meh
-
meh
-
-
Looks good thank you
Leave a Reply