In this tutorial, we will learn how to create a breathtaking and fantasy-themed, painting-like photo-manipulation. You will learn how to create this scenery by combining images, using Photoshop brushes, then finishing it with a soft photo effect.
Preview of Final Results
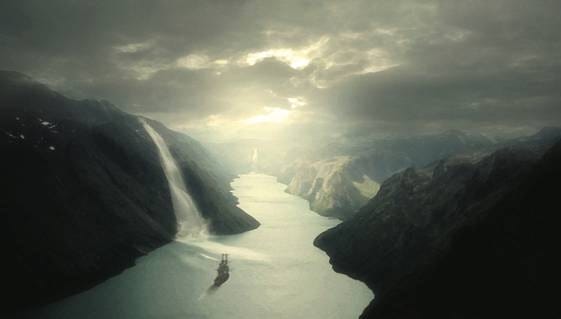
Beautiful River Scenery Photoshop Tutorial
Resources
- Stock: Norwegian Nature 1– RiddleSolved
- Stockimage 10 – CSnyder
- Waterfalls brushes – midnightstouch
- Water Brushes Sampler– FrozenStarRo
- Tall Ship – Alegion Stock
Step 1: Create a New Image File
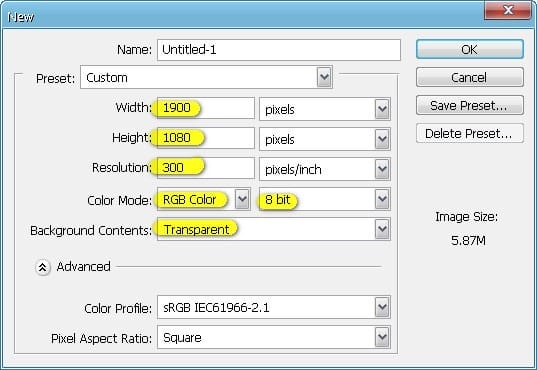
To start, let’s create a new image file, go to the Menu bar and click File > New, and then input the following values on their respective fields:
- Width: 1900 pixels
- Height: 1080 pixels
- Resolution: 300pixels/inch
- Color Mode: RGB Color; 8 bit
- Background Contents: Transparent
Step 2: Create the Lake and the Sky
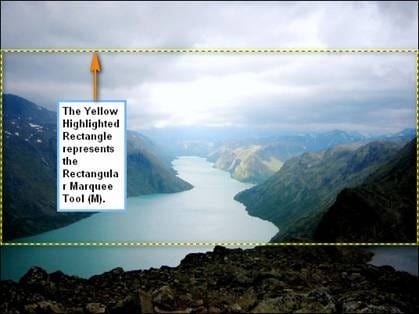
In this step, we will be creating the major element of our picture which is the sea and the sky. To start, let’s open the image “Stock Norwegian Nature 1” by RiddleSolved. Once the image is open, activate the Rectangular Marquee tool by pressing M on your keyboard. See image below:

When it is activated, click on an area on the edge of the image and drag a selection area (Rectangular Marquee) on the area shown below:
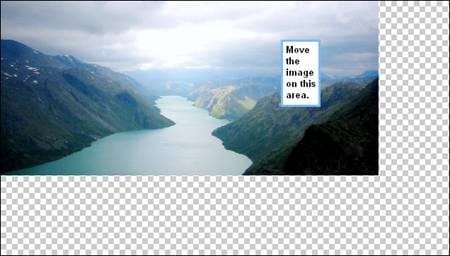
Once you’ve made the selection area, you may now move the image to our canvas. To do that, activate the Move tool by pressing V on your keyboard. Once you’re done, the mouse pointer will change and a small cross will be added to the bottom-right part of the cursor. When you see that change, left-click on the image using the Move tool and then drag the image within the selection area to our canvas.
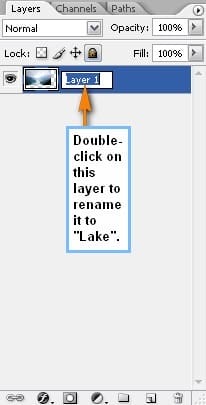
Before we proceed with the next part, we will need to rename this layer to “Lake”. To rename a layer, simply double-click on the words: “layer 2” to prompt a text box to appear. Once that appears, you may now rename the layer.
Now we will have to resize that stock image to fit our canvas. To resize or transform the image, activate the Transform tool by pressing Ctrl/Cmd + T on your keyboard. When the Transform tool is activated, you’ll see a box around the image, with squares around it.
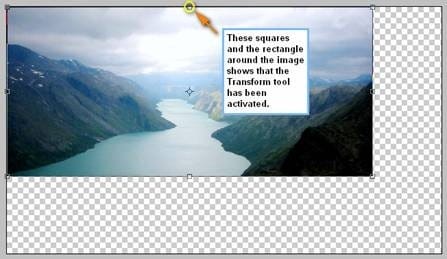
Now to resize, simply move the square shown below to the edge of the canvas to stretch our image.


Now that we’re done with those, it’s time we do a quick fix for this lake. On the Layer Window, click on the Create New Fill/Adjustment layer button. See image below:

After clicking that, a contextual menu would open – click on Gradient Map.


4 responses to “Create a Beautiful River Scenery in Photoshop”
nice :D
lovely~
the river photo on deviant arts, several links are the exact photo here, very popular tutorial, thanks!
stockimage 10 isn’t there anymore
That deviantart account closed. I just used this picture instead http://www.sxc.hu/photo/1405918