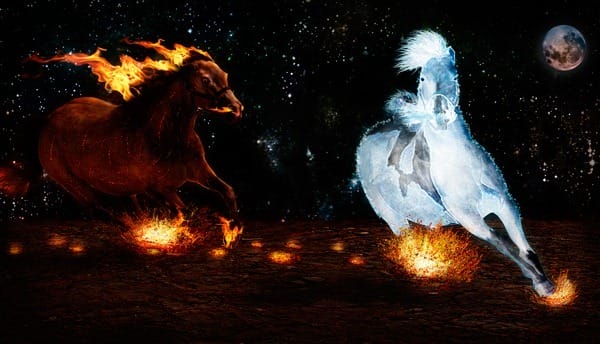
In this Photoshop tutorial we will compose a fantasy scene depicting a fire horse chasing an ice horse on a volcanic field. We will learn to use a small number of elements in various circumstances to achieve different effects.
Preview of Final Results

“A Chase of Fire and Ice” Photoshop Tutorial
Resources
- Horses at play 2
- Fire flames 1
- Cracked earth texture
- Stars Background
- Frost texture brushes
- Smoke Brush
- Full Moon Luc Viatour
Step 1
Open file “Horses at play 2”. Using the pen tool select the 2 horses. Don’t worry too much about the hair as we will resolve this issue later.

Step 2
With the path still active pres ctrl+Enter to transform path into a selection. Press ctrl+J to copy selection into a new layer and turn off the visibility of the Background layer. Name the new layer horses.

Step 3
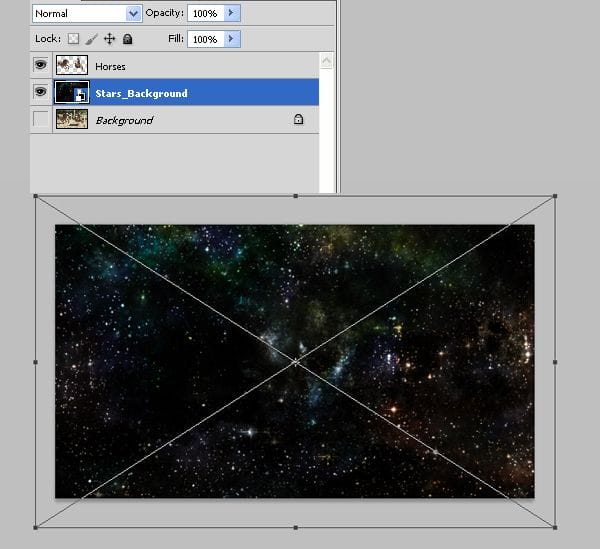
Go to File > Place and select “Stars Background”. Resize it like in the image bellow and press Enter. Move this layer below our horses layer.

Step 4
Now we will refine our horses selection by creating some hair. First press ctrl on the horses layer to select it’s opaque pixels. Press ctrl+alt+R to open refine selection window. Use settings like shown below.

Step 5
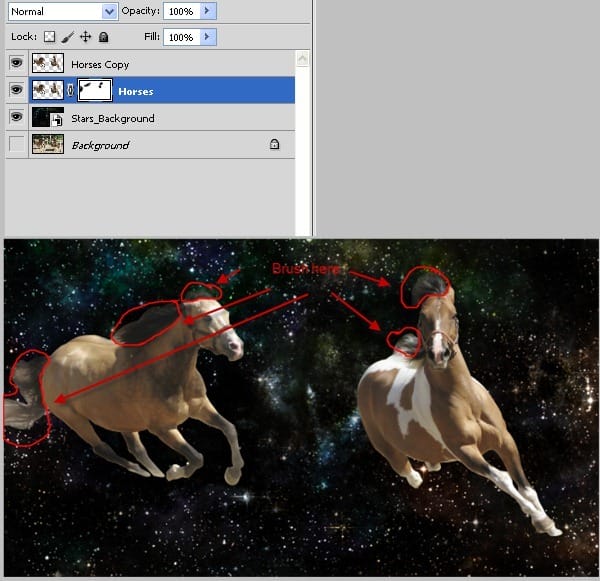
If the horses are still selected press ctrl+D to deselect them. Turn on the visibility of the Horses layer and add a layer mask. Choose a brush with the following settings:
- Size: 100 px
- Hardness: 0%
Select black as foreground color and brush gently in the areas shown below. Make sure you are brushing in the layer mask and not in the layer itself.

Step 6
Select layer Horses and layer Horses copy by holding ctrl and clicking on them. Pres ctrl+E to merge them together. Name the new layer Horses.

Step 7
Now comes the tedious part. We will recreate the horses hair by using the smudge tool. Select the smudge tool and use a fairly small 3 px size to drag hairs following the natural way the hair falls. Use smaller and larger brush sizes, but don’t go beyond 8 px. Try to imagine the way hair is blown by the wind. This task took me about 40 minutes to accomplish so take your time. Now it is also a good time to tone down the highlights from the horses skin and to reduce the harsh transitions between highlights and shadows. For this task I used the Clone Stamp tool set at 10% opacity and sampled from the darker skin.
2 responses to “Create a Spectacular Space Scene in Photoshop”
-
what are the settings for the fire horse color balance?
-
What are the settings used on color balance layer?


Leave a Reply