
It is my nature to be kind, gentle, and loving… But know this: When it comes to matters of protecting my friend, my family, and my heart. Do not trifle with me. For I am also the most powerful and relentless creature you will ever know. In this Photoshop tutorial, we will learn how to create a wolf in flowers. We’ll start first by adding a wolf and enhance it with some adjustment layers. Next, we’ll add contrast to the eyes. Then we’ll enhance it with flowers and fire particles. Finally, we’ll complete it with a Gradient Map adjustment layer and a Camera Raw filter.
Preview of Final Image

Tutorial Resources
Step 1
Now, let’s start by creating a new image file, go to the Menu bar and click File > New, and then input the following values on their respective fields
- Preset: Custom
- Width: 3080px
- Height: 3080px
- Resolution: 300px
- Color Mode: RGB Color 8 bit
- Background Contents: Transparent

Step 2
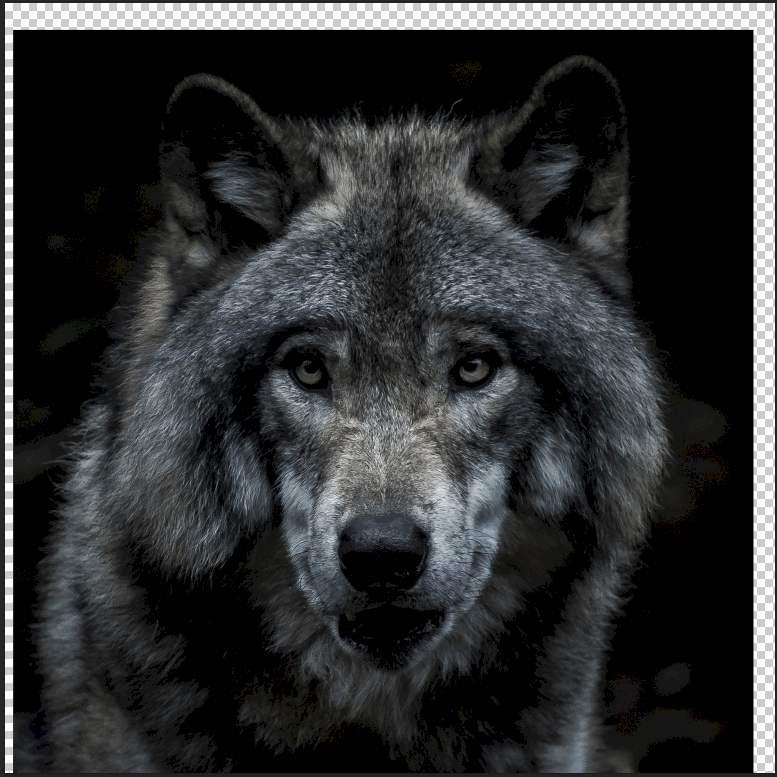
Now, place Wolf photo Go to File > Place and select Wolf. Then place it to our work canvas. Then position the image with the transform tool (Ctrl / Cmd + T). Hold Alt + Shift and rasterize like the image below. In Photoshop CC only hold Alt to rasterize all sides together.

Step 3
Add Adjustment Layer “Color Balance”

Step 4
Add Adjustment Layer “Exposure”

Step 5
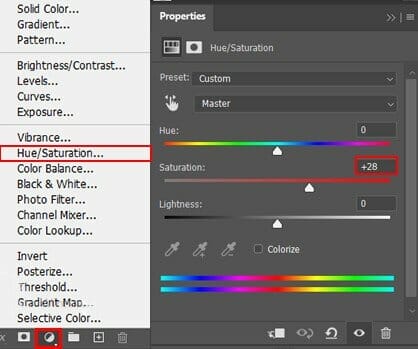
Add Adjustment Layer “Hue/Saturation”
Step 6
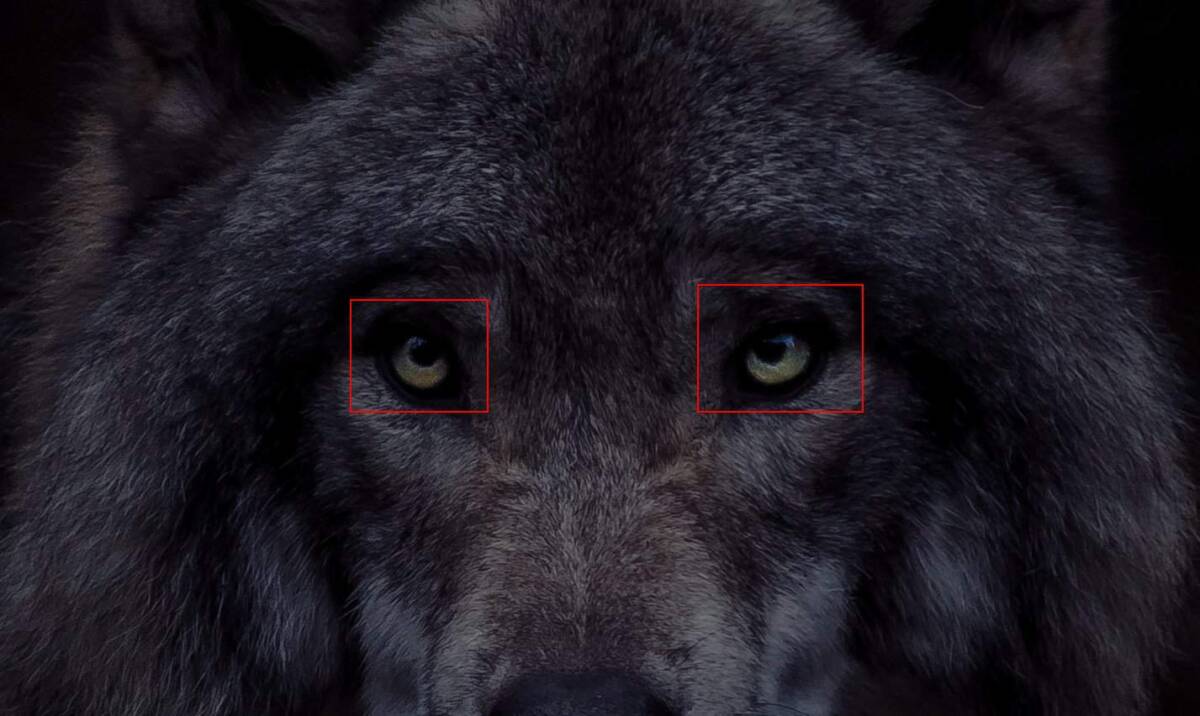
Create a new layer and use Brush Tool(B) Soft Round with foreground color Gray #808080 and start paint the Eyes. Blend mode change to Color Dodge. Next create another layer and set foreground color to Orange #f34704, then use Brush Tool(B) Soft Round and paint the eyes. Blend mode change to ColorDodge with opacity 30%.


Step 7
Next, create a new layer and use Brush Tool(B) Soft Round with foreground color White and paint to left corner like in image below. Blend mode change to Soft Light with Opacity 80%.

Step 8
Next we will openButterfly. After you open the image, use Lasso Tool(L) and start selecting butterfly. After the selection area has been created, simply copy (Ctrl / Cmd + C) and Paste (Ctrl / Cmd + V) it to our work canvas. Then position the image with the transform tool (Ctrl / Cmd + T). Hold Alt + Shift and resterize like image below. In Photoshop CC only hold Alt to resterize al sides together.
Leave a Reply