
Reduce slight freckles naturally without using the Healing Brush. In this Photoshop tutorial, you’ll learn how to subtract freckles using a layer. This process provides the most natural results for light-brown freckles (ephelides) but will not work for dark freckles (lentigines).
Preview of Final Results

Remove Freckles Photoshop Tutorial
Step 1: Open an image into Photoshop
Open the photo with the freckles you would like to remove. To open a file, open the File menu and select Open. Then, browse for the photo and click OK. This tutorial only works for light-brown freckles (ephelides); not dark freckles (lentigines).

Step 2: Convert to CMYK color
To subtract the freckles, we need to find a channel that shows the most freckles. This is usually shown in the Yellow channel but to access that channel, we need to convert the image mode to CMYK. Convert the image to CMYK color by opening the Image> Mode menu and selecting CMYK Color. When you convert to CMYK color, the colors will shift and look different, but we’ll show you a way to get around this issue later.

Step 3: Select the yellow channel
In the Channels pallet, click on the yellow channel to view it. You can see that the yellow channel shows a lot of freckles and this is what we’re looking for.

Step 4: Copy the yellow channel
Now we’re going to create a new layer with the yellow channel in it. Press Ctrl+A or open the Select menu and click All. This will create a selection of the canvas. With the selection created, Press Ctrl+C or open the Edit menu and choose Copy.
Step 5: Convert the image back to RGB color
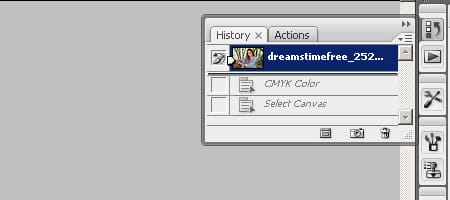
We’re done taking the yellow channel from the CMYK mode and we need to switch back to RGB color. But all this color conversion means that there will be a lot of color shifts. Earlier we told you that we’ll show you how to get around this issue and here it is. Simly go into the History pallet and click on the first step to revert the image to the way it was.
Step 6: Paste the contents as a layer
Press Ctrl+V or open the Edit menu and click Paste. You should now have a new layer with the yellow channel we copied earlier.

Step 7: Invert the layer
To subtract the freckles, we need to invert the layer so that it shows the opposite of the layer below. To invert the layer, press Ctrl+I or open the Image> Adjustments menu and select Invert.
6 responses to “Remove Freckles”
-

It really works but it has limitations
-
It works excellently! Thanks for the technique.
-
Sorry sir, but it doesnt work. pls fix asap
-
This does not work
-
thank you please download me
-
Be a buddy not a bully.
-
Leave a Reply