

Step 25
Now we will make s Sun. We will use for that Adjustment Layer “Gradient”. Style Radial, Angle 90, Scale 15% and check Align with Layer. Blend mode change from Normal to Color Dodge.

Step 26
Add another Gradient and set value Style Radial, Angle 90, Scale 30% and check Align with layer. Blend mode change to Screen with Opacity to 100%.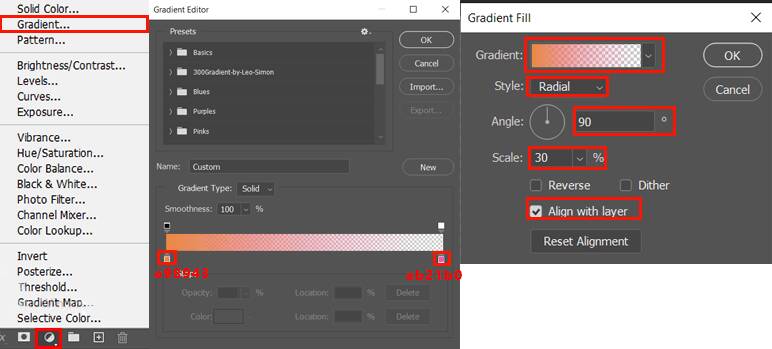


Step 27
Next, we will now do the final color grading. Create a new Adjustment Layer “Gradient Map” and set Color mode to Hue and Opacity to 15%.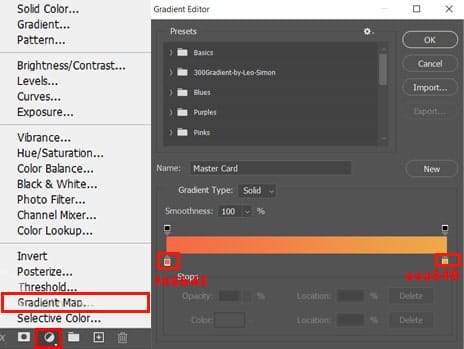
Step 28
Add Adjustment Layer “Gradient Map” Black/White and set Blend mode to SoftLight with Opacity to 8%.
Step 29
Add Adjustment Layer “Selective Color”
Step 30
Add Adjustment Layer “Exposure” and set Opacity to 80%.
Step 31
When we finished all this, now merge all layers to one. Slecet the last layer “Exposure” and hold CTRL/CMD + SHIFT + ALT + E. Now we have a final layer, right click on mouse and select Convert to Smart Object. Then go to Filter > Camera RAW Filter. At its most basic, the Photoshop Camera Raw filter allows you to use the functions of the ACR interface at any time within Photoshop. This allows you to make any adjustments within ACR at any time during your workflow instead of just limiting its usage to theraw processing stage.While it would be possible to import your working file into Lightroom to make the same sets of adjustments, doing this in Photoshop saves you from that cumbersome step. It allows you the use of these tools without any extra effort.
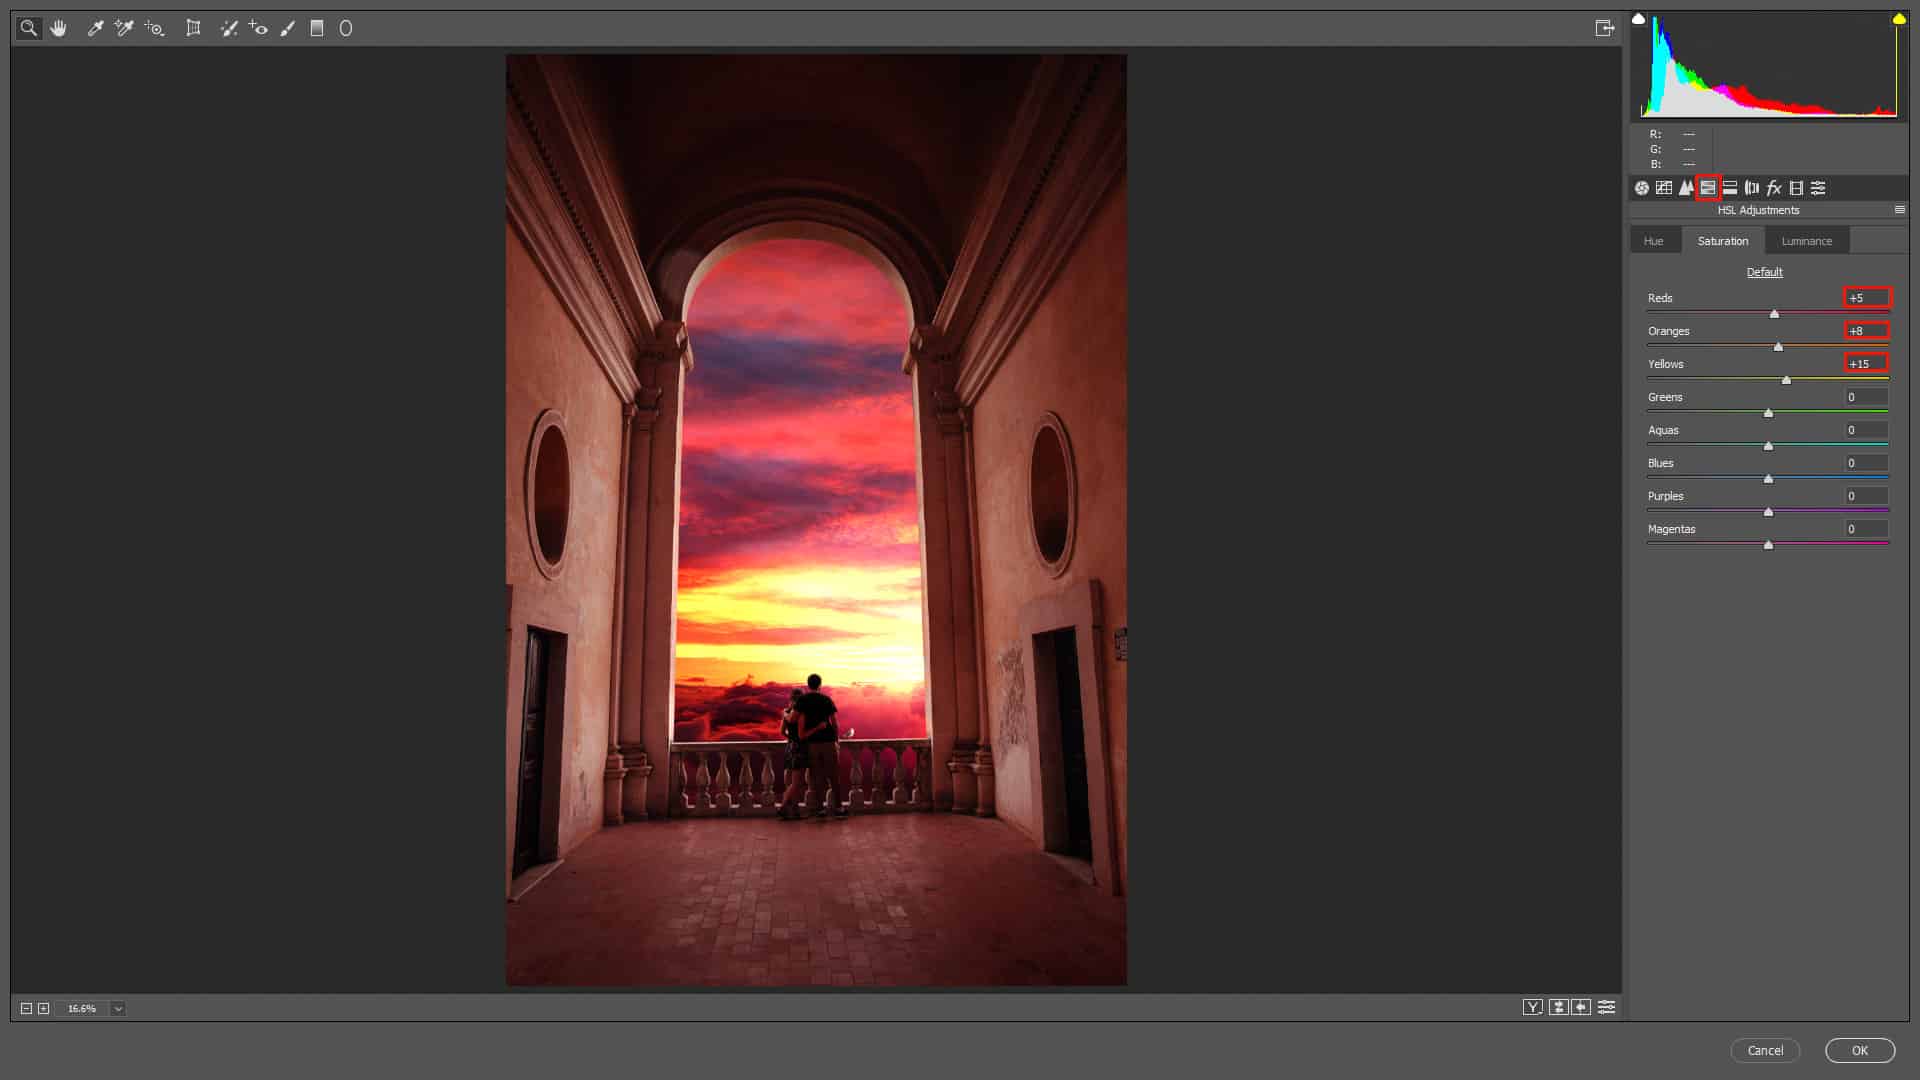
Step 32
Now in Camera Raw Filter, sset the Value:- Basic
- Exposure: -0.05
- Contrast: +3
- Highlights: +21
- Shadow: -3
- Whites: +14
- Blacks: 0
- Texture: +8
- Clarity: +8

- Saturation
- Reds: +5
- Oranges: +8
- Yellows: +15
- Luminance
- Reds: -3
- Oranges: -5
- Yellows: -6
- Purples: -8

- Exposure: -0.15
- Contrast: +3
- Highlights: -10
- Shadows: -5

- Exposure: -0.25
- Highlights: -10
- Shadows: -20
- Blacks: -5

- Exposure: +0.10
- Highlights: +5
- Shadows: -20
- Whites: +10
- Blacks: -5

Step 33
Add Adjustment Layer “Gradient Map” and change Blend mode to Soft Light with Opacity 8%.

Final Results

Download the PSD
View Above the Clouds Tutorial.zip7 responses to “Create an Emotional Sunset Scene Above the Clouds in Photoshop”
-

Nice
-
thank you
-
Nice tut! Thank you!!
I’m getting a 404 page on the download link, tho.Su.
-
Sorry link should be working now.
-
-
link psd is dead?
-
Thanks for letting us know! Link has been fixed
-
always impossible :)
-
Leave a Reply