Note that this layer applied to the whole document!
Step 56
Now we change our background color. It seemed to me that a shortage of work more vivid and mysterious colors, which are in the woods. So, I corrected the background with help of curves. So, add adjustment layer to background layer. Go to Layer > New Adjustment Layer > Curves… or click on icon New Adjustment Layer and in list, select Curves…

Step 57
Now in the window that appears, click the blue channel and the upper point lower so that it almost touched the midline. Then there are bright colors blue gray, we do, because the middle curve is the midtones.

Do not apply this adjustment layer to the background.
Step 58
Select the Brush Tool (B) on the toolbar. Set it to the following settings: Size: 200px. Hardness: 0% Opacity: 70% flow: 100%. Be sure to set the background color (the color that you will work) to black by pressing D on keyboard.

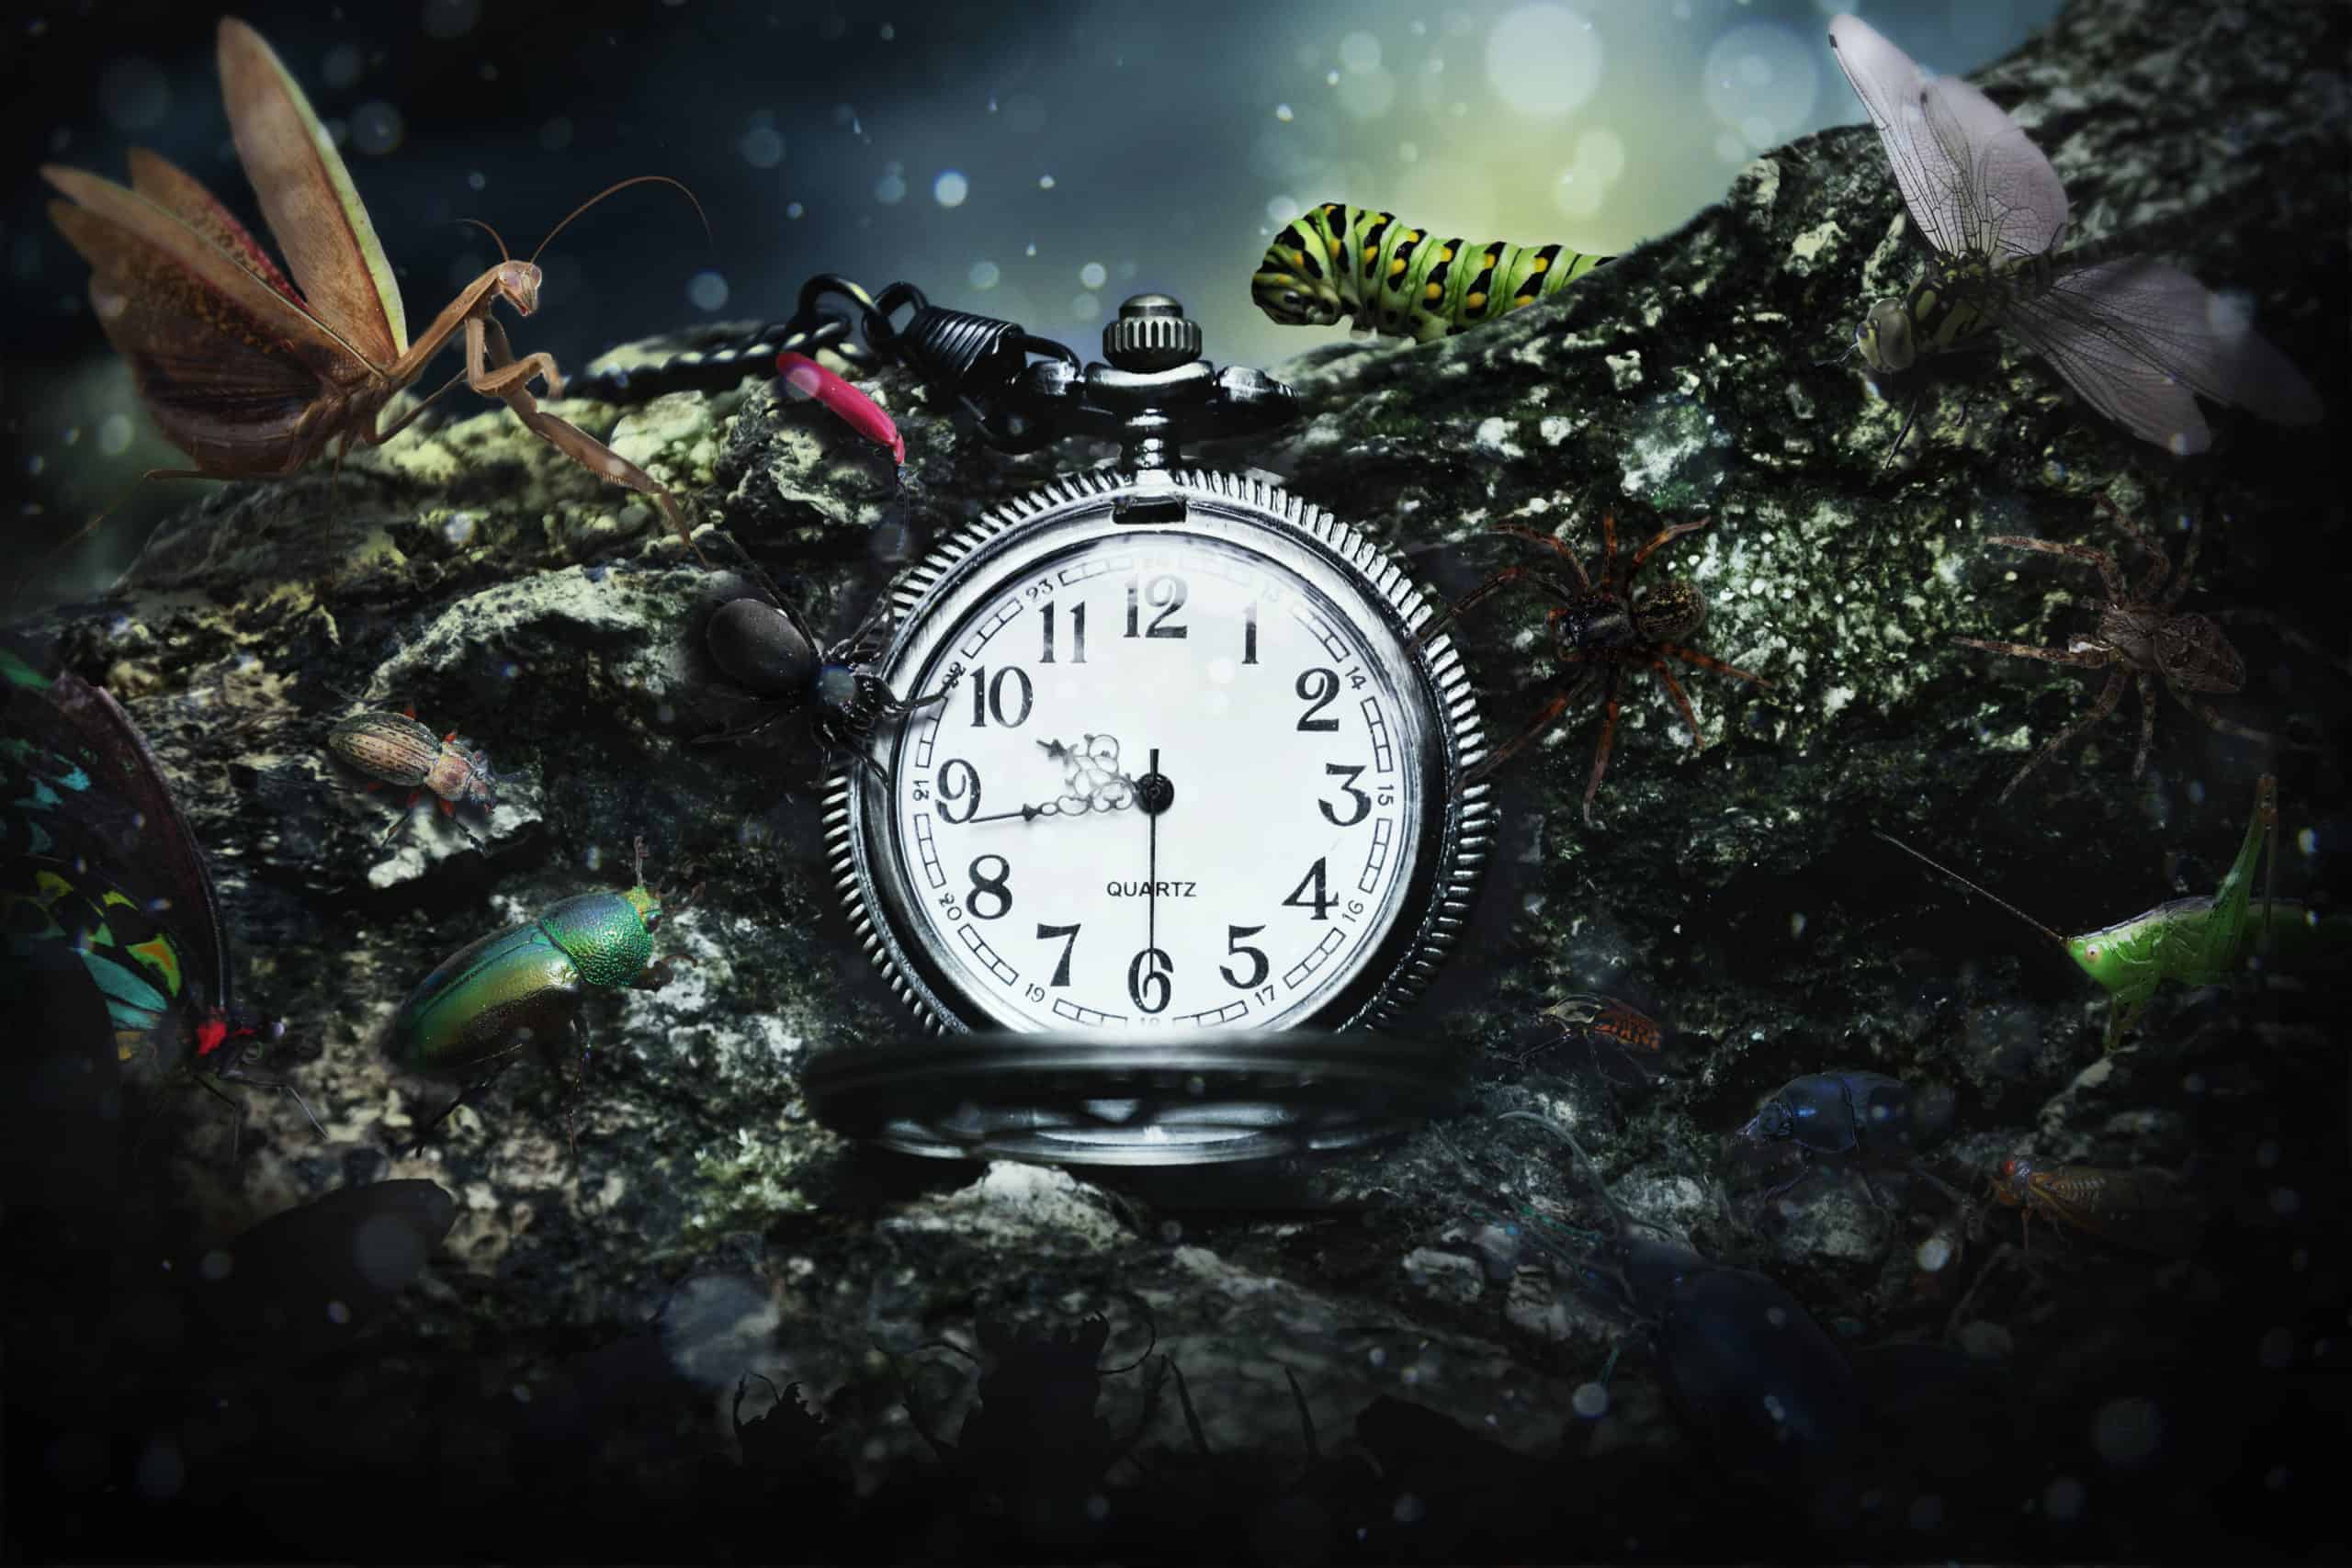
Remove some of the adjustment layer with stones, watches (image center) draws a black mask on the adjustment layer.

Step 59
Next adjustment layer is Hue/Saturation… Go to Layer > New Adjustment Layer > Hue/Saturation… or click on icon New Adjustment Layer and in list, select Hue/Saturation…

Step 60
Need to make the colors more vivid and contrast. Set the following settings: Hue: +20, Saturation: +12, Lightness: +2.

Step 61
Place this layer under the curve. Hold down Alt, click on the background layer to apply an adjustment layer to the background.

Step 62
Select the Brush Tool (B) on the toolbar. Set it to the following settings: Size: 200px. Hardness: 0% Opacity: 70% flow: 100%. Be sure to set the background color (the color that you will work) to black by pressing D on keyboard.

Now remove the effect of the adjustment layer on the layer mask, as shown in the figure.

Step 63
I decided that the blurred edges of the image will not distract the viewer and focus on the main idea. Getting to the final effect! So, first select all the layers except the white background that we created at the beginning (I deleted it) and duplicate them (the short key Cmd /Ctrl+ J)
9 responses to “How to Add Creepy Bugs to Your Photos”
-

Fabulous and clear tutorial . Congratulations Maria !!!
👍👍👍👍👍👍👍👍👍❤😉 -
Hey there, You’ve done an excellent job. I will certainly
digg it and personally suggest to my friends. I am sure they
will be benefited from this site. -
Thank you for the great tutorial! It has been very helpful to see a few techniques in action.
-
One of the best collection , I seen on internet , Thanks for sharing
-
very nice
-
Great tutorial!
-
didnt work.
-
yes it did g , try harder
-
-
nice work
Leave a Reply