
Step 64
Now you want to merge the selected layers into one. Press the short key Cmd /Ctrl+ E or go to the Layers palette. The upper right corner is an icon setting. Click on it and the drop-down list select Merge Layers.

This layer must be above all others.

Step 65
Now blur this layer. Go to Filter> Blur> Gaussian Blur…

Step 66
In the window that appears, set the following settings: Radius: 6.0px.

Step 67
Now add a layer mask to this layer clicking on the layer mask icon in the Layers panel.

Select the Brush Tool (B) on the toolbar. Set it to the following settings: Size: 200px. Hardness: 0% Opacity: 70% flow: 100%. Be sure to set the background color (the color that you will work) to black by pressing D on keyboard.

Step 68
Remove the blurred image of the center, beetles and started the dark shadow. Should left on the edges of the image blurring, mantis and dragonfly wings, in the dark corners in the background.

Step 69
Little supplement the lesson. You can use it if you want. I clock the original image in black and white. It is not immediately noticeable, but still I decided to add this step. Do it if you want. Create a new layer and place it as shown in Figure.

Step 70
Select the Brush Tool (B) on the toolbar. Set it to the following settings: Size: 200px. Hardness: 0% Opacity: 100% flow: 100%. Set the white color # ffffff.

Step 71
Put a white spot on the clock.

Now change the blending mode for this layer to “Color”.

Step 72
That is completely ready to work with all layers. Look at the location of the layers and check if everything is in place. I hope you enjoyed my tutorial and you had a good time! Remember, you – the artist and can make your choice! Go ahead and good luck!

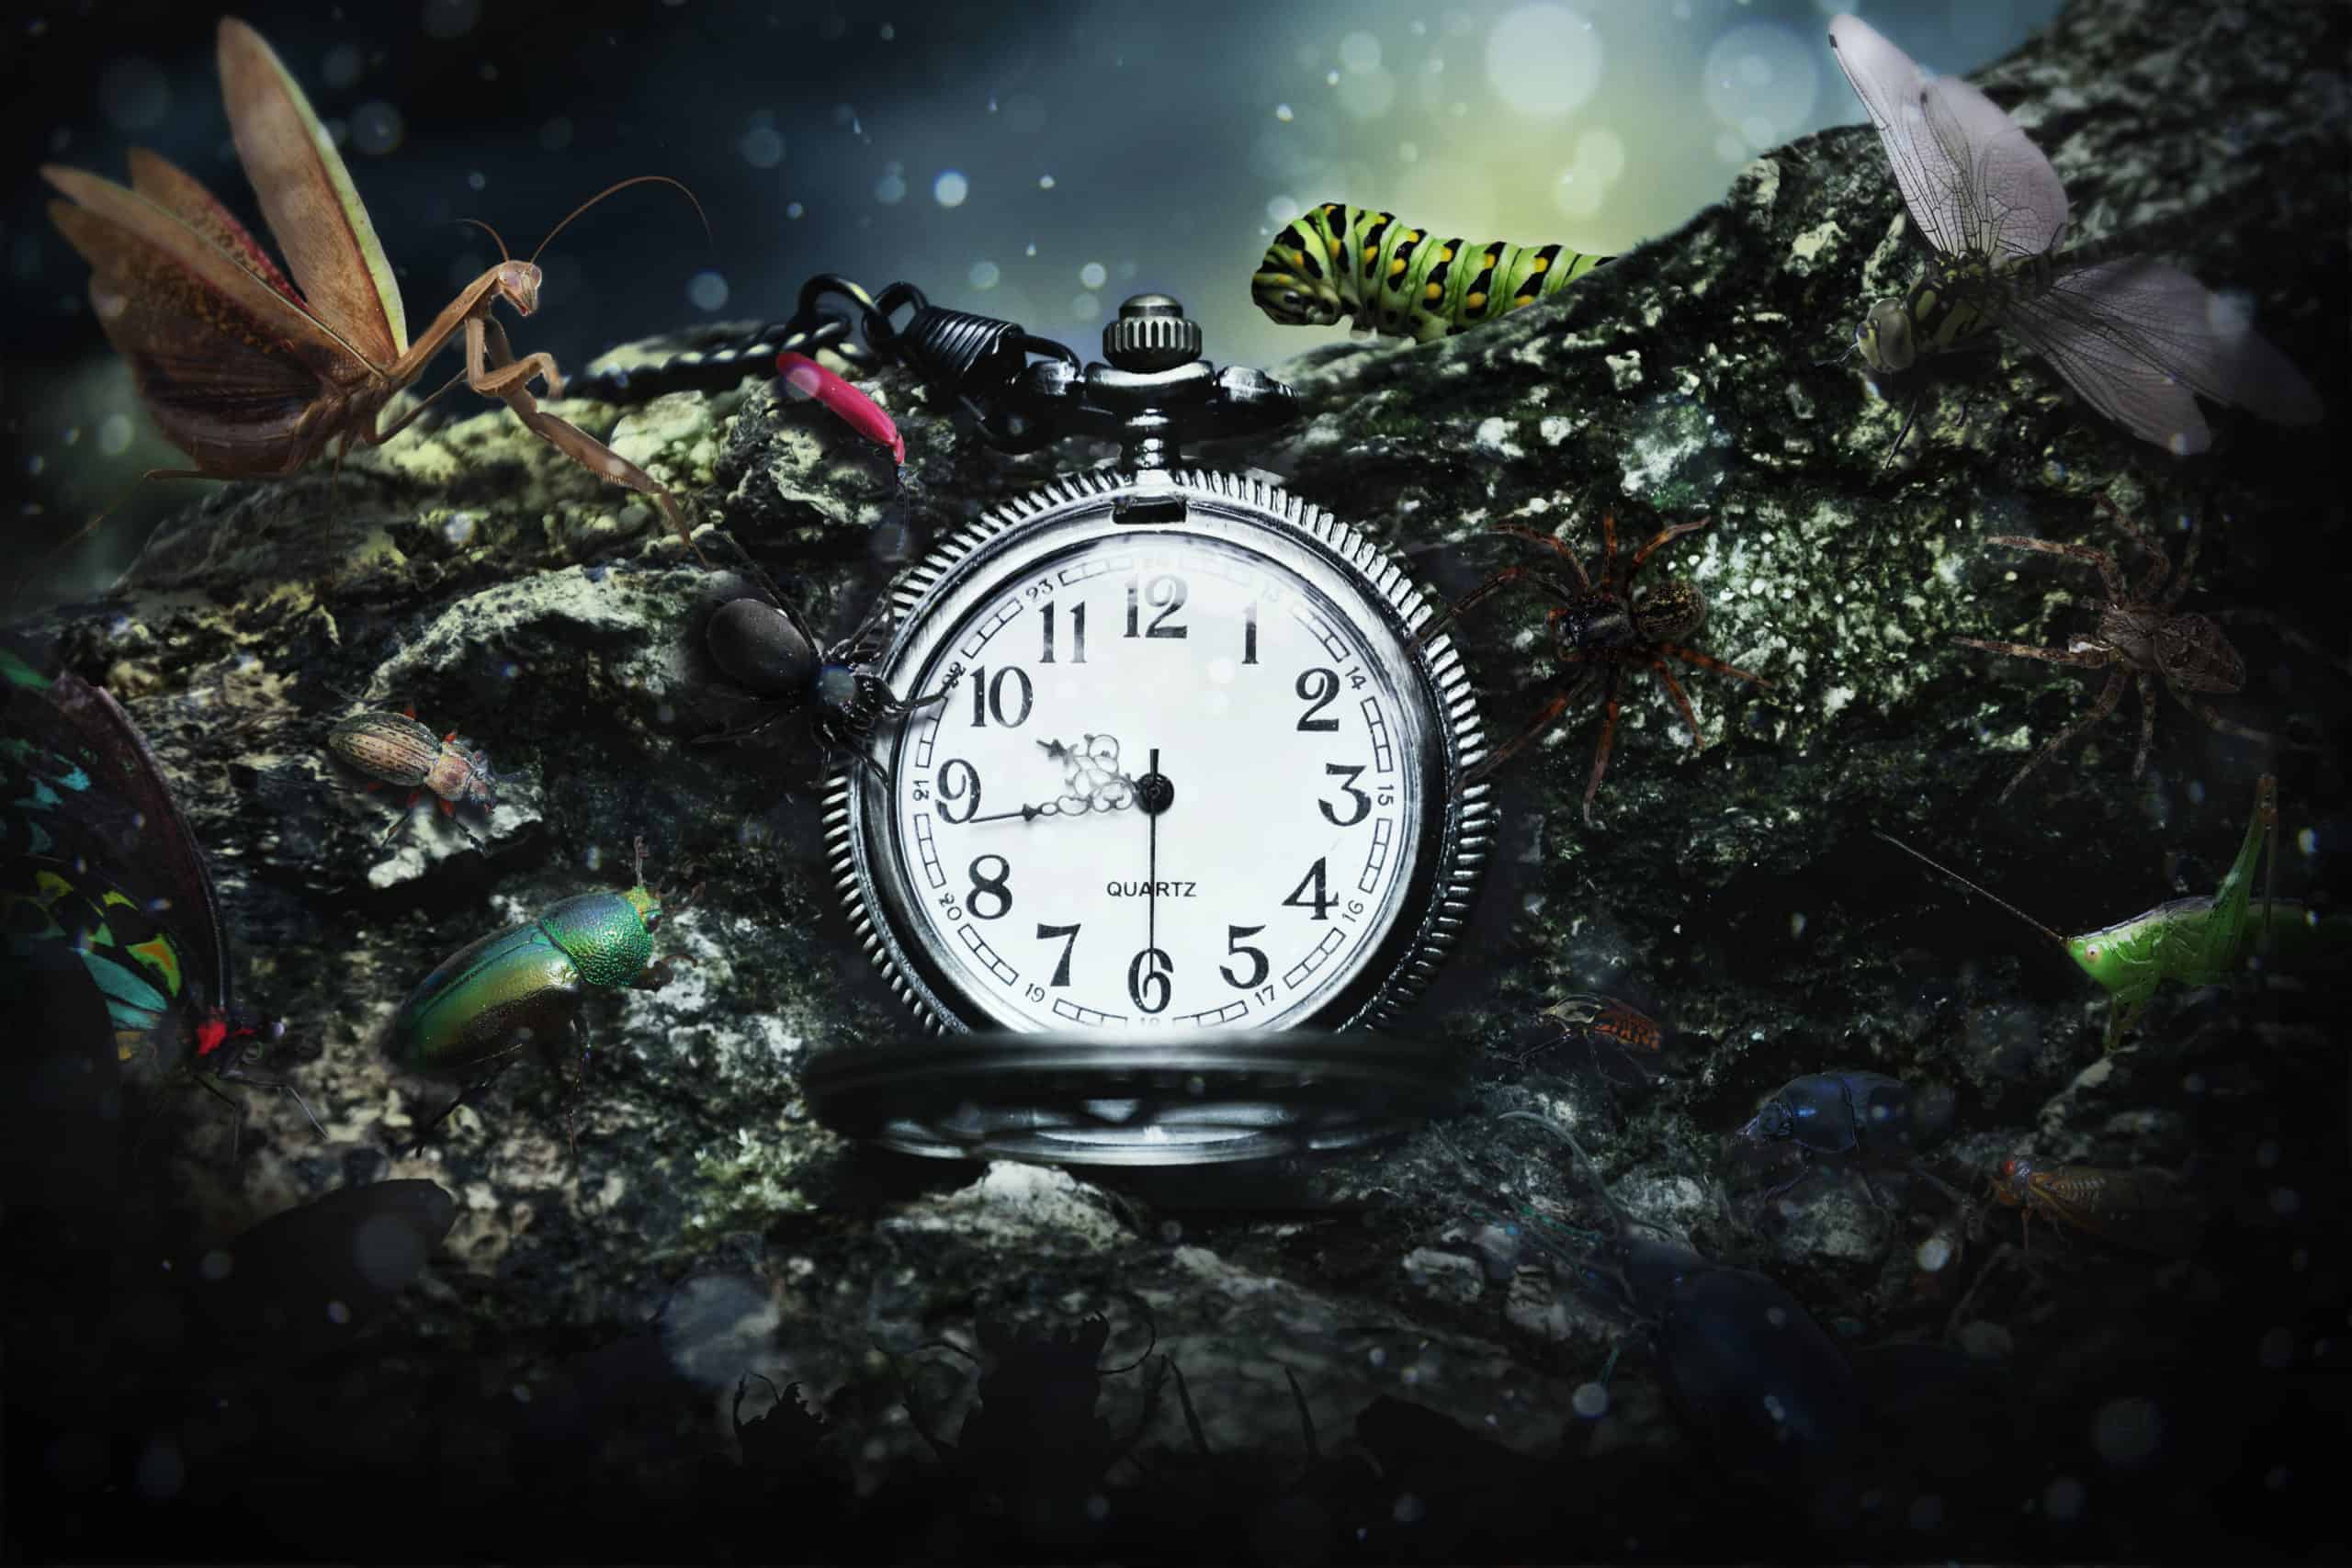
Final Results

Download the PSD
Tutorial by Maria Semelevich.
 Thank you very much for taking the time to study this tutorial! I hope you benefited it! I tried for you. I wish you lucked in your future achievements! I look forward to your feedback and creative works! You can contact me by e-mail – [email protected] or Facebook and Deviantart. You can visit my Facebook creativity page. I am open to suggestions and cooperation. With best wishes – Maria Semelevich.
9 responses to “How to Add Creepy Bugs to Your Photos”
-

Fabulous and clear tutorial . Congratulations Maria !!!
👍👍👍👍👍👍👍👍👍❤😉 -
Hey there, You’ve done an excellent job. I will certainly
digg it and personally suggest to my friends. I am sure they
will be benefited from this site. -
Thank you for the great tutorial! It has been very helpful to see a few techniques in action.
-
One of the best collection , I seen on internet , Thanks for sharing
-
very nice
-
Great tutorial!
-
didnt work.
-
yes it did g , try harder
-
-
nice work
Leave a Reply