


Step 36
Create a new layer and use a soft brush with the color #8e0909 to paint some more light red on the front, arm and head of the model. Change this layer mode to Overlay 100%.

Step 37
Make a new layer on top of the layers and use a small brush with the color #8e0909 to paint some red hair for the model’s head.

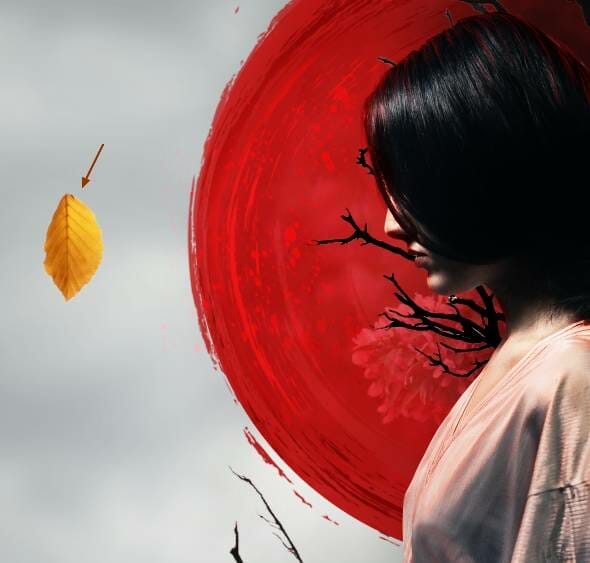
Step 38
Open the leaves image and take a leaf on the bottom of the branch to add to the middle left of the main document. Use Ctrl+T to rotate it a bit as shown below.

Step 39
Create a new layer and use the brush 38 from the splatter ones to paint on the top middle of the tree, remembering to set the foreground to #7b0808.

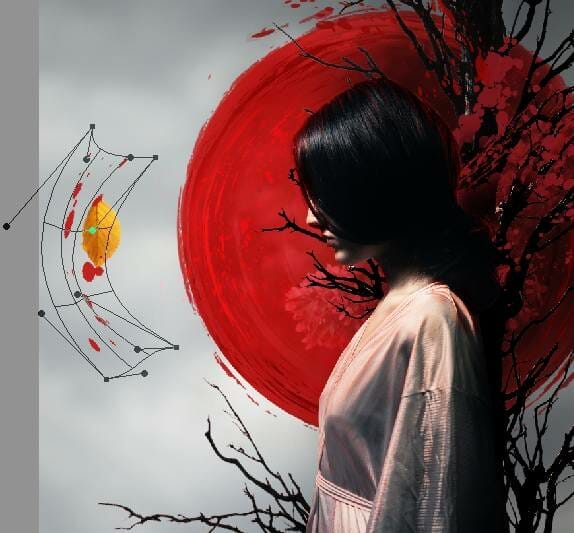
Step 40
Make a new layer and use the brush 62 with the color #c01819 to paint on the left of the canvas. Place it onto the leaf and convert this layer to a Smart Object . Use Ctrl+T with the Warp mode to tweak the form of the brush as shown below.

Step 41
Make four layers and use the brushes 19, 30, 32, 35 with the same color to paint around the tree , circle and model. Use Ctrl+T if needed to change the form of the brushes’ effect to fit the pose of the tree.

Step 42
Isolate the rose and place it behind the hair of the model.

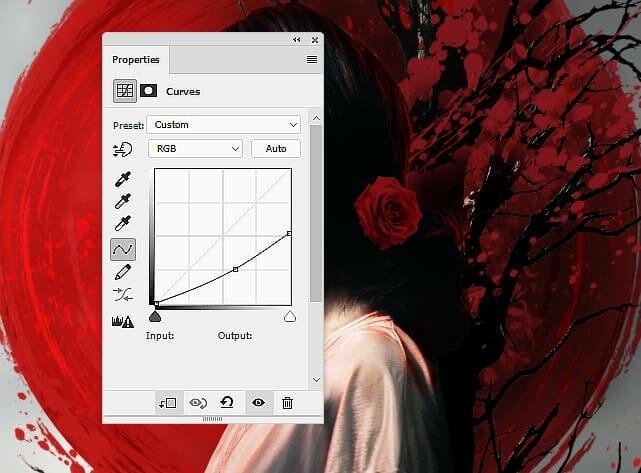
Step 43
Make a Curves adjustment layer to darken the rose to fit the lightness of the background.
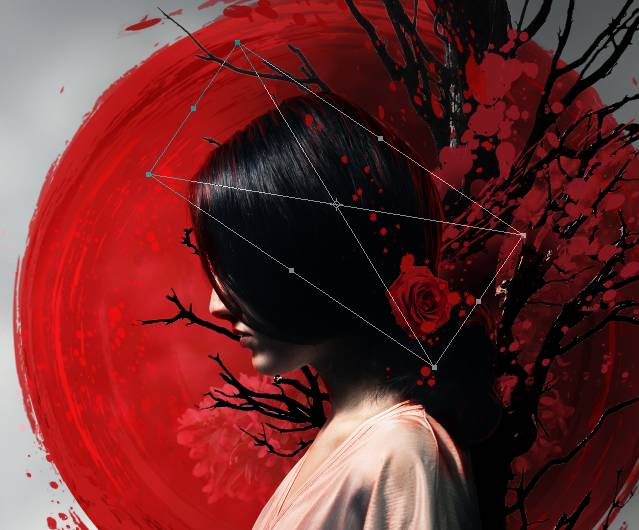
Step 44
Make a new layer on top of the layers and use the brush 35 from the splatter brushes. Set the foreground to #8e0909 and paint it onto the rose. Use Ctrl+T to rotate it to fit the direction of the branches around. Duplicate this layer and change it’s direction using Ctrl+T:

Step 45
Open the splatter image and use the Move Tool to place it onto the rose. Change this layer to Multiply 100% and add a mask to this layer. Use a soft black brush to blend the top with the rose and reduce the bottom of the splatter one.


Step 46
Double click this layer, choose Color Overlay and pick the color #850f18 with the settings below:

Step 47
Make a new layer, change the mode to Overlay 100% and fill with 50% gray. Use the Burn Tool to refine the shadow of the rose and splatter effect around it.
2 responses to “How to Create an Abstract, Fantasy Autumn Artwork with Adobe Photoshop”
-

Pity the Tutorial .zip does not work
-
Beautiful artwork ❤️
Leave a Reply