
Step 22
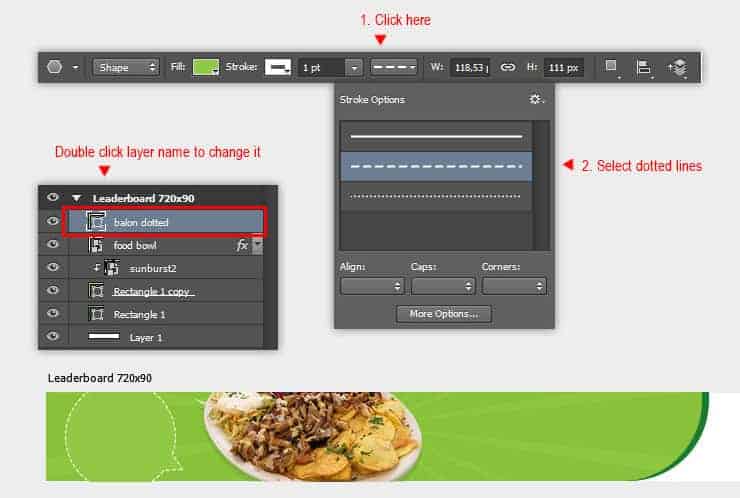
Change the stroke type to dashed lines from the option bar.
Step 23
Add white colored title text “DAILY DEALS” using Type tool. Select appropriate font that match with the food theme, in this example i use “DK Lemon Yellow”. Feel free to experiment with your own font collection.

Step 24
Add subtle Drop Shadow layer style for the title text. Set Drop Shadow Opacity around 10%, Angle: 90, Distance: 2 px and Size: 0 px.

Step 25
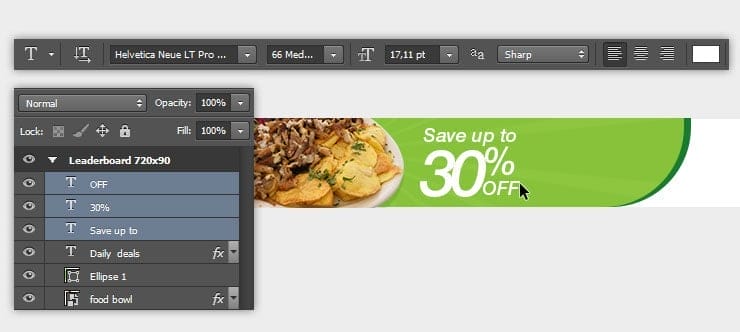
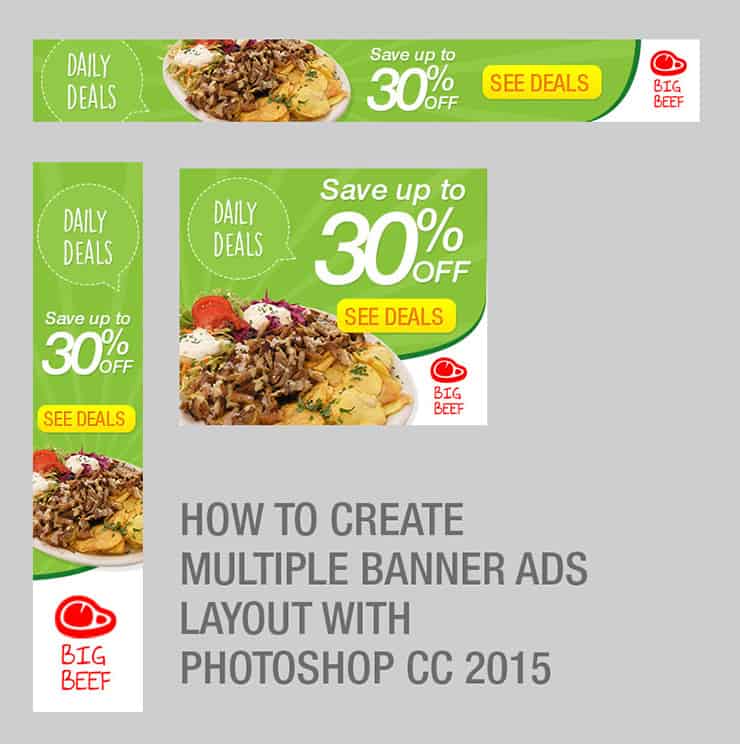
Add promotional texts “Save up to 30% OFF” in three separate text layers. Play around with text size and position to get a nice composition.
Step 26
Add Drop Shadow layer style for each text layers.

Step 27
Draw a yellow rectangle shape, next to promotional texts. We will make a nice call-to-action button with this rectangle.

Step 28
In Photoshop CC 2015, we can easily convert a regular rectangle into rounded rectangle. Go to View> Properties menu. Within the Properties panel, click the chain button then set corner value to 10 px. This way we can easily change corner radius value anytime in the future, without having to redraw the rectangle.

Step 29
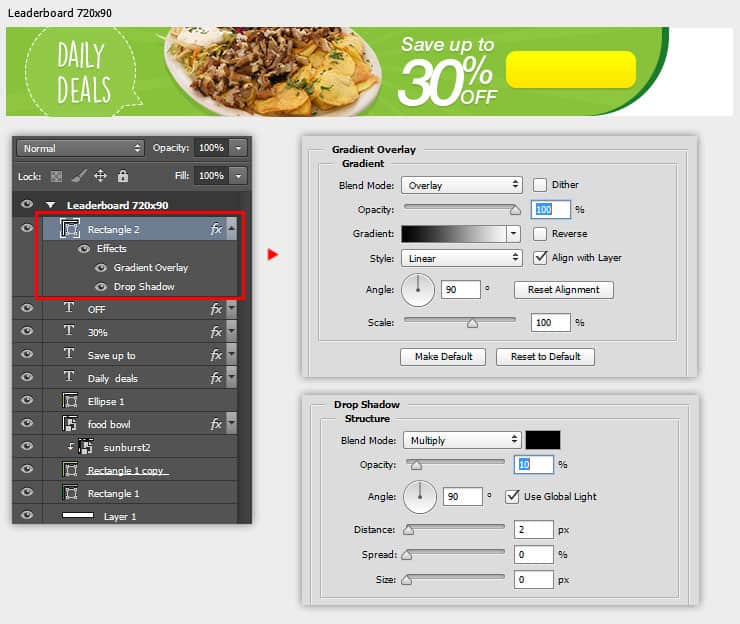
Once you’ve done appying rounded corner effect, add subtle Gradient Overlay and Drop Shadow layer style for the rectangle. You can see the settings I used in the image below.
Step 30
Use Type tool to add “SEE DEALS” text. Set the color to orange.

Step 31
Add Inner Shadow and Drop Shadow layer style for this text layer. You can see the settings I used in the image below.

Step 32
Next, we need to create the restaurant logo from scratch. Create a new document, set the size to 400 x 300 pixels wide.

Step 33
Using Pen tool, draw basic “meat” shape. Set the fill color to red, and stroke to none.

Step 34
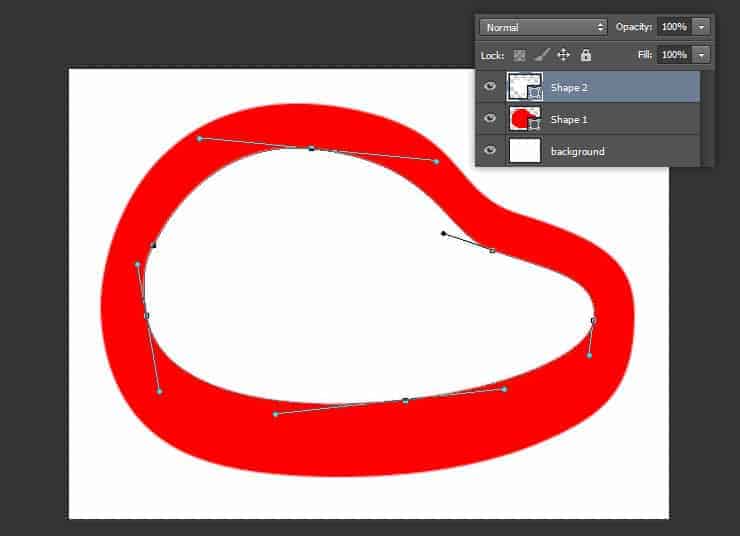
Draw smaller “meat” shape inside the previous one. Set the fill color to white.
Step 35
Draw the third “meat” shape, set the fill color back to red.

Step 36
Still using Pen tool, draw the last “meat”. See image below for your reference.
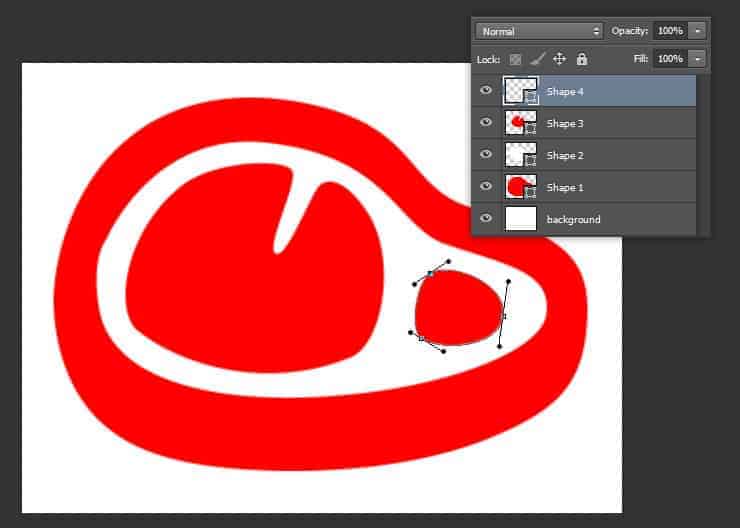
Step 37
Select background layer then press DEL to remove it, now the background is transparent. Save this illustration as .psd file. Name it “steak logo” or something like that.

Step 38
Go back to our artboard document. Insert steak logo.psd file from the File> Place Embedded menu. Downscale the steak logo to fit the artboard height. Don’t forget to drag steak logo layer inside our artboard group.
11 responses to “Creating Multiple Banner Ads Layout Using Artboard in Photoshop CC 2015”
-
Excellent guide, thanks
-
Keren mas bro..
-
I am stuck at this step
“We can repeat transformation and also copy the shape at the same time by pressing ALT+SHIFT+CTRL+T. Do this once to see how it works.”using latest photoshop version
-
In web design, it is essential to be able to get the banners all similar. This makes it much easier.
-
Very nice tutorial. I like making banner ads in photoshop, but I never have put them all on the same file. Thanks!
-
Your tutorial is so easy to understand and you express it very cleanly. Photoshop is really a wonder.
-
????
-
-
Thank your for sharing this information. Great tutorial
-
Great tutorial
-
Considero el banner muy sencillo pero efectivo, facil de elaborar bajo una idea sencilla y practica gracias
-
Great tutorial, Jayan! Having read many, many tutorials and created some myself, your attention to detail, along with screenshots, is wonderful. I am familiar with artboards in Illustrator, but have yet to work with them in Photoshop. I love what I am seeing and look forward to working through your tutorial for creating social media posts in different sizes for the different social media platforms. Thanks so much!

Leave a Reply