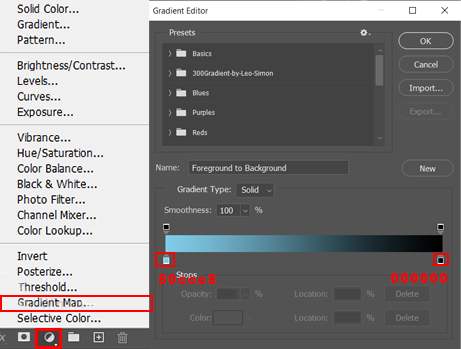

Step 28
Add Adjustment Layer “Curves”

Step 29
Add Adjustment layer “Gradient Map”

Step 30
Add Adjustment Layer “Gradient Map”

Step 31
When we finished all this, now merge all layers to one. Select the last layer and hold CTRL/CMD + SHIFT + ALT + E. Now we have a final layer, right click on mouse and select Convert to Smart Object. Then go to Filter > Camera RAW Filter. At its most basic, the Photoshop Camera Raw filter allows you to use the functions of the ACR interface at any time within Photoshop.

Step 32
Now in Camera Raw Filter, set the Value: Basic
- Exposure: -0.15
- Highlights: -10
- Shadows: -10
- Whites: +5
- Texture: +10
- Clarity: +10
- Vibrance: +13
- Saturation: -8

Color Grading
- Midtones: H34 S7

Color Grading
- Highlights: H65 S49

Gradulated Filter
- Exposure: -0.25
- Highlights: -34
- Shadows: -15
- Whites: -16

Radial Filter
- Exposure: +0.35
- Highlights: +5
- Shadows: +5
- Blacks: +5

And finally, everything should look like this.

Final Results


Leave a Reply