What a joy it is to feel the soft, springy earth under my feet once more, to follow grassy roads that lead to ferny brooks, where I can bathe my fingers in a cataract of rippling notes or to clamber over a stone wall into green fields that tumble and roll and climb in riotous gladness! In this Photoshop tutorial, we learned how to create a surreal scene. First, we created a background, then an Impala and Bridge and finally add some Leaves and finish with Adjustment Layers.
Preview of Final Image

Tutorial Resources
Step 1
First, go to File > Open and select Bridge photo. When we open a photo create a layer mask and use Pen Tool(P) and start selecting the Bridge. When finish the selection press right click and “Make Selection”. Feather Radius 0px, check Anti Aliased and press OK.


Select layer mask and press ALT+DEL

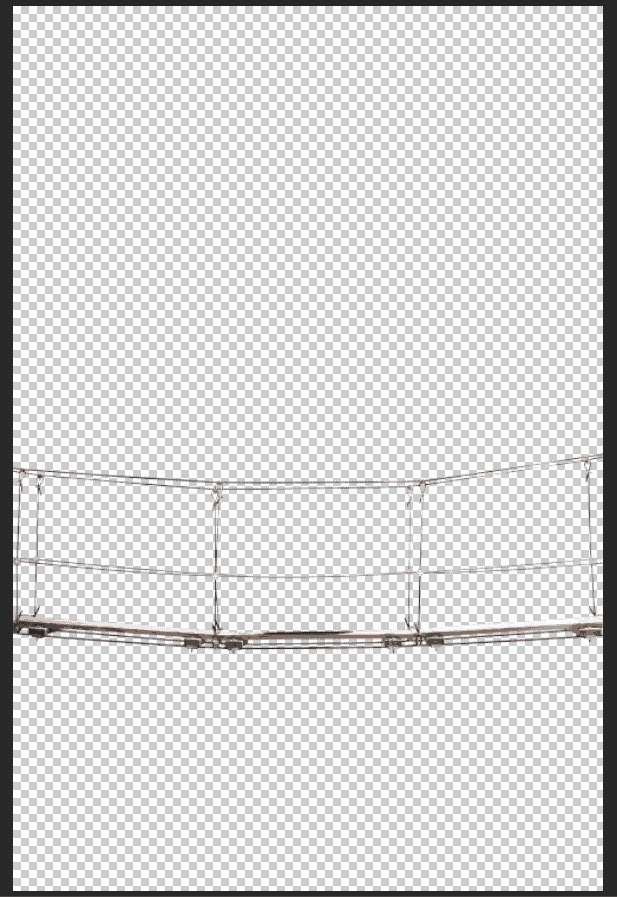
Repeat the same procedure several times so that you can select all parts of the bridge.
Step 2
Next we will open Background, go to File > Open and select Background. After you open the image, use Rectangular Marquee Tool(M).
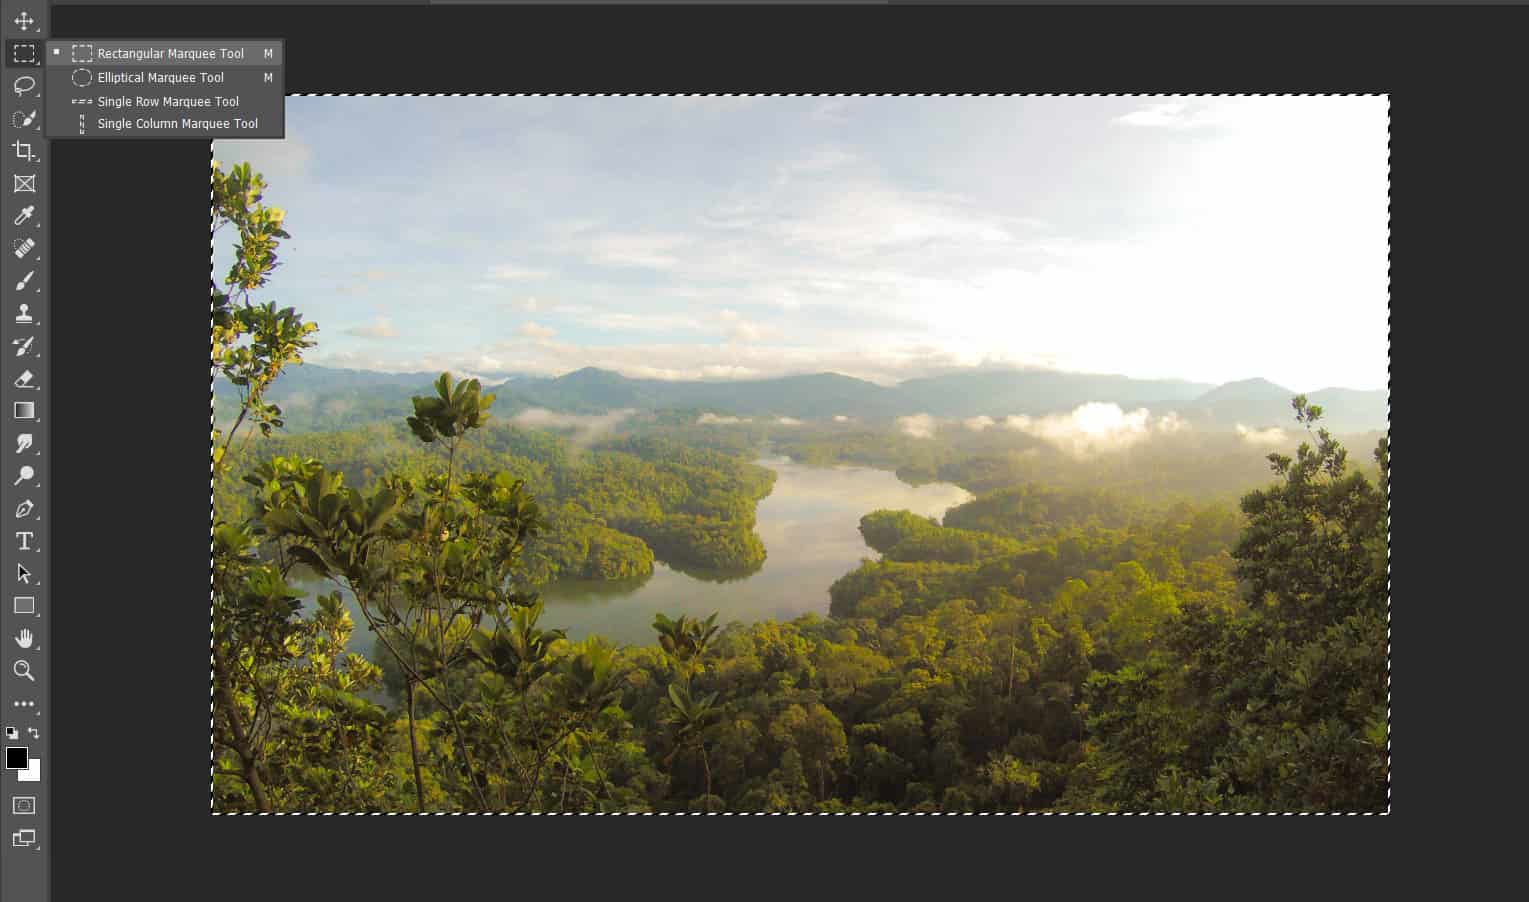
Step 3
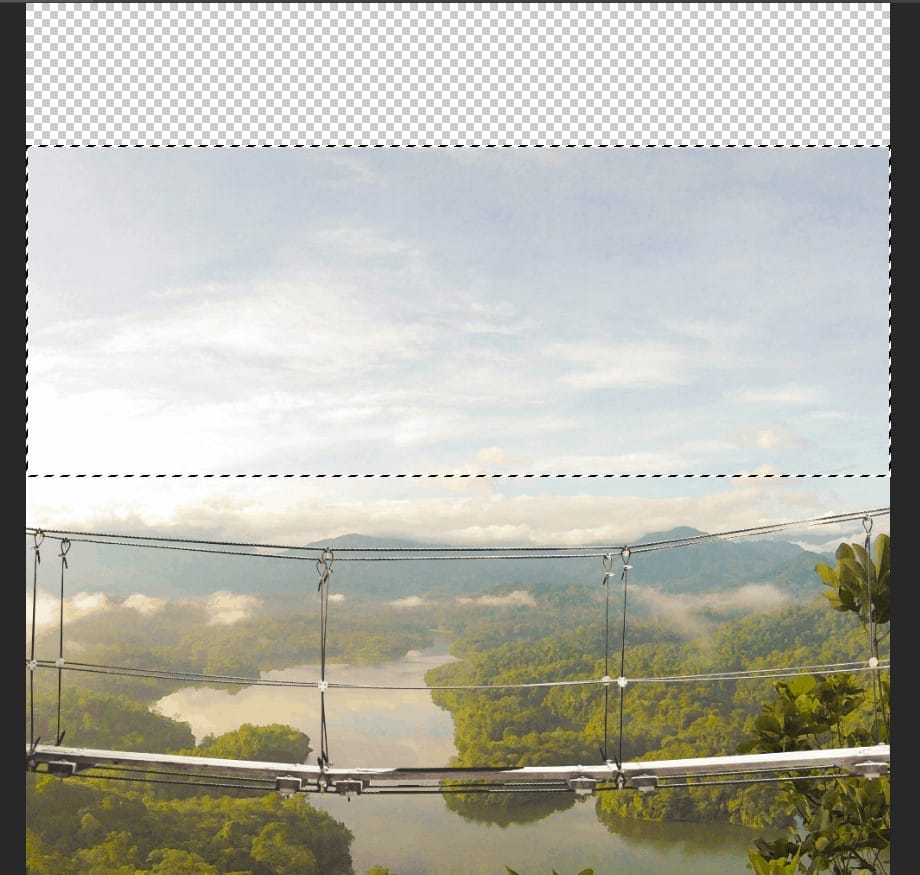
After the selection area has been created, simply copy (Ctrl / Cmd + C) and Paste (Ctrl / Cmd + V) it below the bridge. Then position the image with the transform tool (Ctrl / Cmd + T). Hold Alt + Shift and resterize like image below. In Photoshop CC only hold Alt to resterize al sides together.

Step 4
Next, use Rectangular Marquee Tool(M) and select the top of the sky and press Ctrl/Cmd + J to duplicate it.
Then move it to the top. Create a layer mask and use Brush Tool(B) Soft Round with foreground color black and paint to remove the line betwen sky.

Step 5
Now, merge it all to group. Hold Ctrl/Cmd and select Background and Sky then press Ctrl/Cmd + G.

Step 6
Add Adjustment Layer “Levels”

Step 7
Add Adjustment Layer “Curves”

Step 8
Add Adjustment Layer “Selective Color”

Step 9
Add Adjustment Layer “Curves”

Step 10
Add Adjustment Layer”Gradient Map” Blend mode change to Soft Light with Opacity 25%.

Step 11
Now select Bridge layer and add Adjustment Layer “Levels”

Step 12
Add Adjustment Layer “Hue/Saturation”

Step 13
Add Adjustment Layer “Curves”

Step 14
Now open next image, go to File > Open and select Impalas. Then use Pen Tool(P) and start selecting right Impala. Then pres right click on mouse and “Make Selection” Feather Radius set to 0px, check Anti-aliased then press OK.
One response to “How to Create a Breathtaking Bridge Scene in Photoshop”
-

Eye-catching work. Looking at the final result, it seems natural. The nice presentation I hope I can do this edit now. Can you please give me the tutorial source images link?
Leave a Reply