

Step 28
Add Adjustment Layer “Levels”

Step 29
Add Adjustment Layer “Hue/Saturation”

Step 30
Add Adjustment Layer “Curves”

Step 31
Next, put all in group. Hold Shift and select Leaves layer and Curves adjustment layer then press Ctrl/Cmd + G.

Step 32
Select group and duplicate it (Make two copies) press Ctrl/Cmd + J to duplicate. First copy put to left corner and add some blur. Go to Filter > Blur > Gaussian Blur and set to 6.5px. Use Transform Tool(Ctrl/Cmd + T) to rotate it. Now second copy put to left corner above it.. See the picture below…


Step 33
Now open a Vines, go to File > Open and select Vines. Then use a Lasso Tool(L) and select last and after the selection area has been created, simply copy (Ctrl / Cmd + C) and Paste (Ctrl / Cmd + V) it to our work canvas. Then position the image with the transform tool (Ctrl / Cmd + T). Hold Alt + Shift and resterize and Rotate like image below. In Photoshop CC only hold Alt to resterize al sides together.


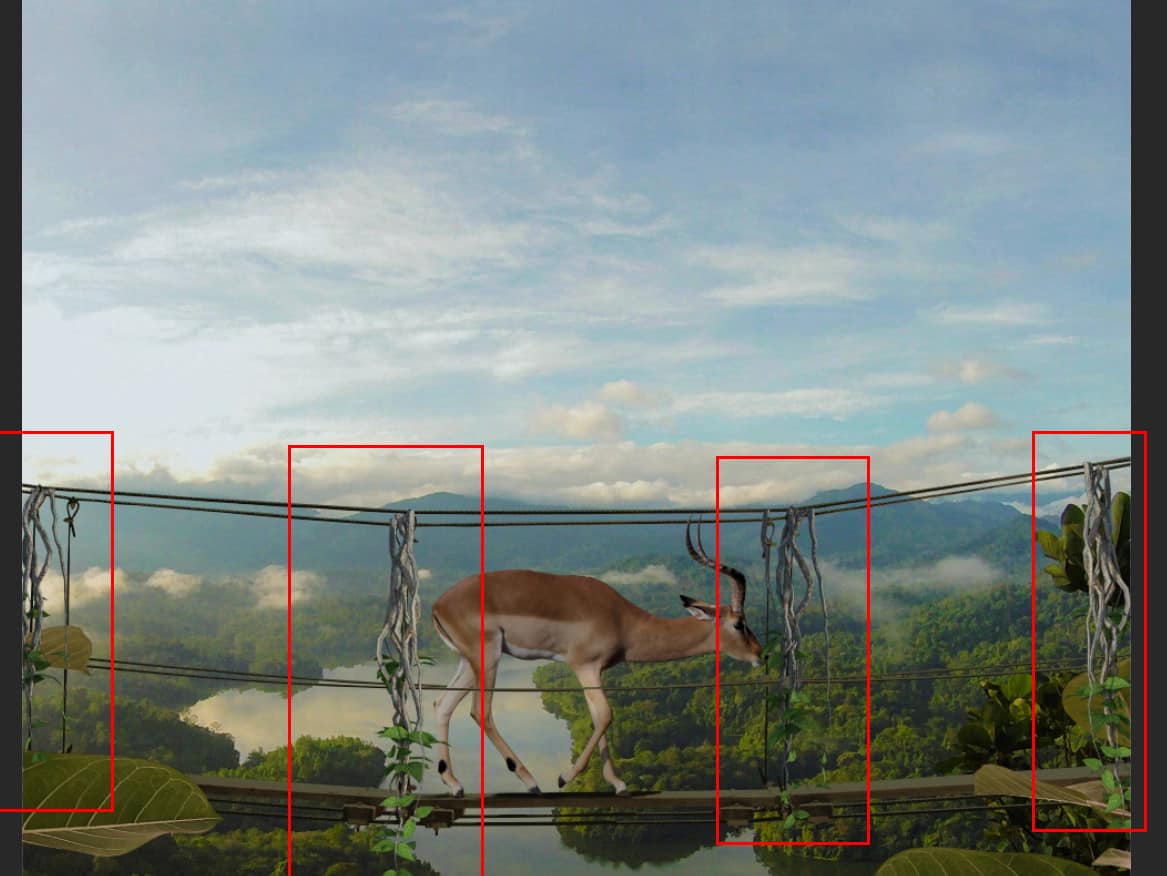
Step 34
Now take the Lasso Tool again and mark the all vines and simply copy (Ctrl / Cmd + C) and Paste (Ctrl / Cmd + V) it to our work canvas . Then position the image with the transform tool (Ctrl / Cmd + T). Hold Alt + Shift and resterize and Rotate like image below. In Photoshop CC only hold Alt to resterize al sides together. Place them as shown in the image below. And finally put them in a group, Hold Shift and select the first and last vine layers then press Ctrl/Cmd + G.

Step 35
Add Adjustment Layer “Levels”

Step 36
Add Adjustment Layer “Hue/Saturation”

Step 37
Add Adjustment Layer “Curves”

Step 38
Open a Ivy , go to File > Open and select Ivy. Next hold Ctrl/Cmd and click on layer to make a selection. After the selection area has been created, simply copy (Ctrl / Cmd + C) and Paste (Ctrl / Cmd + V) it to our work canvas. Then position the image with the transform tool (Ctrl / Cmd + T). Hold Alt + Shift and resterize and Rotate like image below. In Photoshop CC only hold Alt to resterize al sides together. Then make a three more copies(Ctrl/Cmd + J). Place them as shown in the image below and put them all in a group (Hold Shift and select first and last Ivy layer and then press Ctrl/Cmd + G).
One response to “How to Create a Breathtaking Bridge Scene in Photoshop”
-

Eye-catching work. Looking at the final result, it seems natural. The nice presentation I hope I can do this edit now. Can you please give me the tutorial source images link?
Leave a Reply