
Step 37
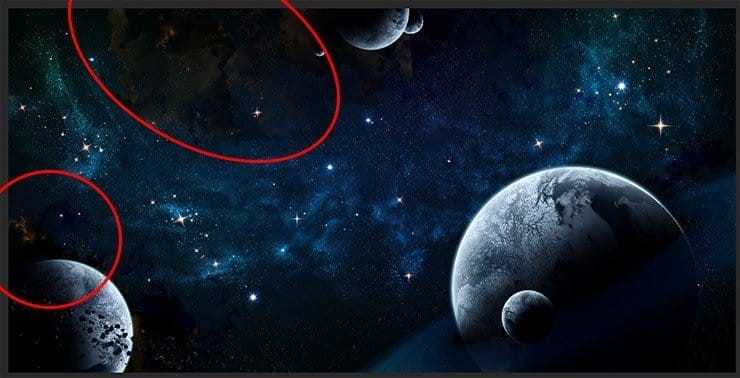
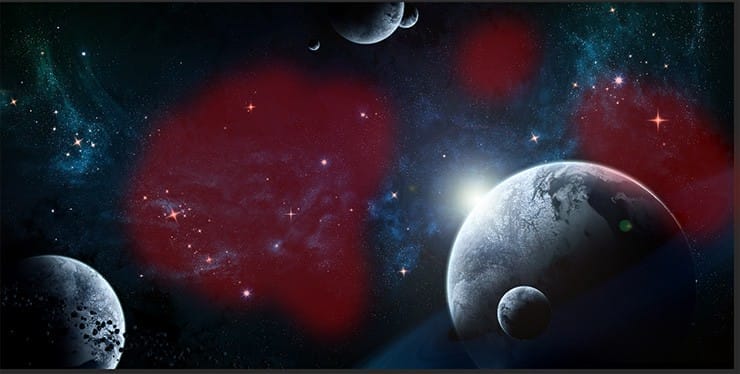
I did not like the ink glow of dark matter, so I added to each dark matter layer adjustment layer “Hue/Saturation”. They are almost the same (Hue: 215, Saturation: 41, Lightness: -56), but for the lower layer (shown in blue) I changed the value Lightness: -33. So it became much better.


Step 38
One last touch – add solar flare. Indeed, without the lighting picture will be incomplete and not realistic, so create a new layer (Cmd/Ctrl+ Shift + N). Fill it black color (D then X and use Cmd/Ctrl + Del). Convert this layer for Smart filters (Filter > Convert for Smart Filters) Add a filter “Lens Flare…” (Filter > Render > Lens Flare…). Set Lens type: “105mm Prime” and Brightness: 70%. Try to position flare on the edge of the planet, to create the effect of sun peeps.

Step 39
All good, but I do not want that glare is make a problem viewing the whole picture, and especially the center. I cleaned them on filter layer mask, used Brush Tool (B).


Step 40
I changed the color of flare that it harmoniously looked in the picture. To do this, I added an adjustment layer “Hue/Saturation” (Hue: 211, Saturation: 41, Lightness: 0). That’s it! Now everything is fine and the picture is ready! I hope you enjoyed it!

Final Results

Download the PSD
Deep Space.zip| 132 MB
Tutorial by Maria Semelevich

Thank you very much for taking the time to study this tutorial! I hope you benefited it! I wish all lucked in your future achievements! I thank the authors of resources for their excellent work and good quality! Thank you very much! If you have questions or need help, please contact me. I look forward to your feedback and creative works! You can contact me by e-mail – [email protected] or FacebookDeviantartBehance. I am open to suggestions and cooperation! With best wishes!
– Maria Semelevich.
22 responses to “How to Composite Your Own Space Scene from Scratch”
-
This is excellent. Thank you for the tutorial, I learned a lot!
-
This was very useful. Thank you.
-
Will this work in PS 2021?
-
That’s what I’m using and it’s working good so far!
-
-
The most detailed tutorial that I saw. Great! Thank you!
-
Very nice and detailed tutorial with a nice looking image.
Thanks for sharing. ;-) -
Really Awesome !!!
-
The best as usual!
-
Step 7 is fairly confusing, I followed the steps but when i try to remove excess stars it comes out white and looks horrible, confused as to what I should do.
-
That’s only because you weren’t coloring on a layer mask! Make sure that after you apply the layer mask, you click on the second thumbnail on the layer. After doing so, begin coloring in a black brush. Anything colored black on a layer mask will actually be erased. If you want to make the stars reappear, simply color it white.
-
-
Every great tutorial. I need some help on Step 25. After I delete the center of black area the rings, the effects also disappear too. I still can’t figure out how to make the rings effects and without black area. Thank you.
-
Hi Dylan, Thank you very much for your letter! Try to create rings, select all the layers with rings right click on layers > Convert to Smart Object. Select a dark circle (Elliptical Marquee Tool (M)). Add a layer mask (Layer > Add Layer Mask > Hide Selection or hold Opt/Alt and click on “Add layer mask” icon). This should remove the black circle. Then convert the layer to Smart Object again and you’re done. Also, this happens if you are working on a background layer.
If you have any more questions, feel free to ask them! And I will answer you.
-
-
This is a really great tutorial, thanks for this, Maria!
http://i.imgur.com/RjttyDI.jpg
This is how it turned out for me (for some reason, it’s darker when posting online, looks better in PS)! As you can see, I tried to make a larger star/sun closer to the planets, as it’s not realistic to have such shine from a nebula.I’m not very happy with how the sun turned out, could you give me an idea on how to make a better sun? Thanks!
-
hey i ve created a pic via photoshop plz tell me howss it ??? plz plz plz reply soon
-
I am having problems with step 9: I keep clicking Ctrl and F for the “Difference clouds”, but nothing seems to happen inside the nebula, apart for at little shift in the stars, and I have clicked ALOT of times!
-
Hi Tommy, It’s strange, because everything should work. Are you exactly set “Color Dodge” blending mode for nebula layer? If the blending mode everything is fine, then try to apply filters through Filter > Last Filter or Filter > Render > Difference Clouds. Surely set the default colors (D on keyboard) before you apply a cloud filters. Repeat steps 8 – 9 for nebula on a new layer if the problem does not go away. Make sure that you have made a colored background, otherwise Nebula did not appear. Write to me if the problem is not solved.
-
-
Answer a survey to see the tutorial? Nope
-
Filling in a free and quick survey would have been much quicker than filling in this form to leave a comment and would help support the author of the tutorial who has given up their time to create this excellent walk through.
-
-
Exactly what i was looking for :) thanks
-
I’m very glad that you enjoyed it! I hope you will find a lot of useful information.
-
really a lot of useful information .. do u made this tut ?!
-
Thank you so much! Yes, I’m author of this tutorial and write it.
Here is my page https://www.facebook.com/MariaSemelevichPhotography?ref=bookmarks.
and I write to you from my a personal profile :)
-

Leave a Reply