
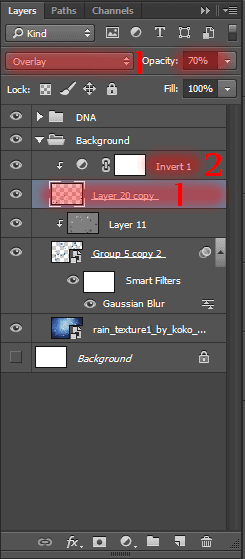
Duplicate this texture twice (Cmd/Ctrl+ J) without adjustment layer and move it above adjustment layer “Invert”. Reduce the size of both layers (Ctrl/Cmd+ T) and position them as shown in image below. I merged the two layers in one (Cmd/Ctrl + E) and set the Blending mode “Overlay”.

Step 29
Now I’ll create a texture on the molecules to create the effect of movement and space. Create a new layer (Cmd/Ctrl+ Shift + N), fill it black color (Cmd/Ctrl + Del). Go to Filter > Noise > Add Noise… and set following settings; Amount: 25%, Distribution: Gaussian and set checkbox on “Monochromatic”.

Increase texture proportionally to 200% (Cmd/Ctrl+ T), so that the noise particles become more and convert it for Smart Filters.

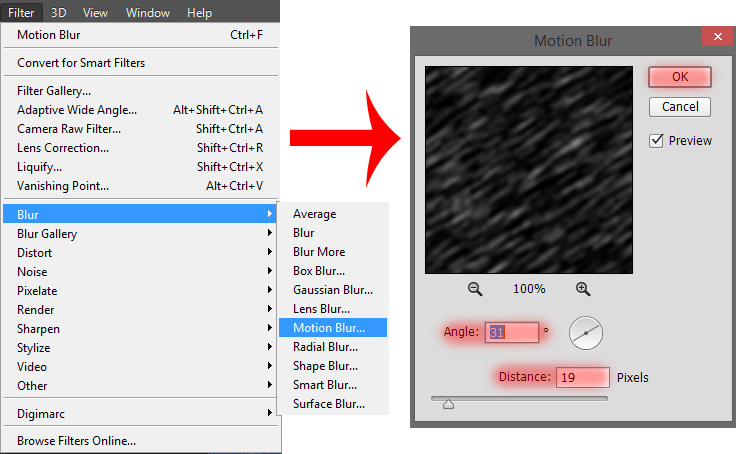
Create the effect of motion of these particles. Go to filter > Blur > Motion blur… Set Angle: 31, Distance: 19px. Set Blending mode “Screen” and Opacity: 65 %.
Step 30
Now reduce the noise density of the particles and change their color. At first, change the color. Add adjustment layer “Hue/Saturation” (Layer > New Adjustment Layer > Hue/Saturation…). This layer we will paint the noise that he did not stand out of the picture and reduce the brightness. Be sure that set chekbox “Colorize”.

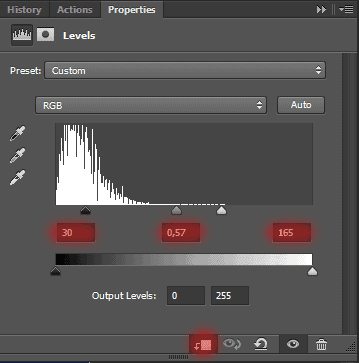
Next adjustment layer is “Levels” (Layer > New Adjustment Layer > Levels…). This layer, we remove the black and gray of the texture and increase the amount of white noise to transform in flying pieces and had a clearer form.
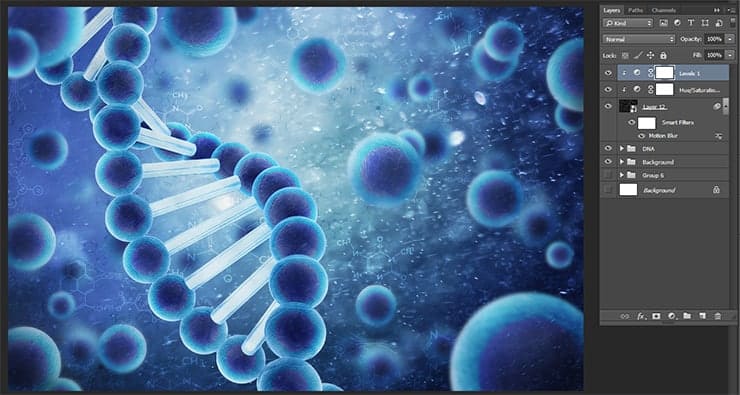
Here’s my result. You should get something like that.
Step 31
Now proceed to draw part of this tutorial. Now we will create a Bokeh brush. Go to tab “Brush” on right panel. Set following settings on each tab. As bases, use hard brush. First, we need to increase the distance between the brush to circles were not crowded. Then change the value of the allowable size of the brush has become diverse in size.

On the next tab, you do spread to the brush was not a single line, and be as small cloud. The final tab, we change the value of the permissible opacity to each circle had a different meaning transparency. So it will be a little volumetric. Save this brush by clicking on icon “Create new brush” in lower right corner.
8 responses to “Create This Abstract Medical Image of DNA with Photoshop”
-

no
-
It’s a good thing that some images come with what’s written… Too many mistakes from picture to writting…
Even the size of the doc is wrongly written….. That’s just poorly written Tut…. -
some pic is not found, please repair it, thank you!
-
Nice one
-
What is RMB?
-
This is the right mouse button.
-
-
thx!
I’d like to learn more same techniques) -
Arne Zou, na das ist ja was für uns.^^
Leave a Reply