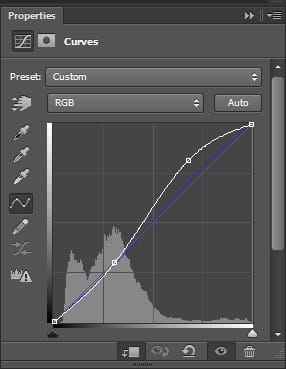

Step 12
Open the Dead Tree 1 stock photo and select this specific part. Use Color Range to extract it as we did with the forest in step 2. This is a very good chance to try out this tool.


Step 13
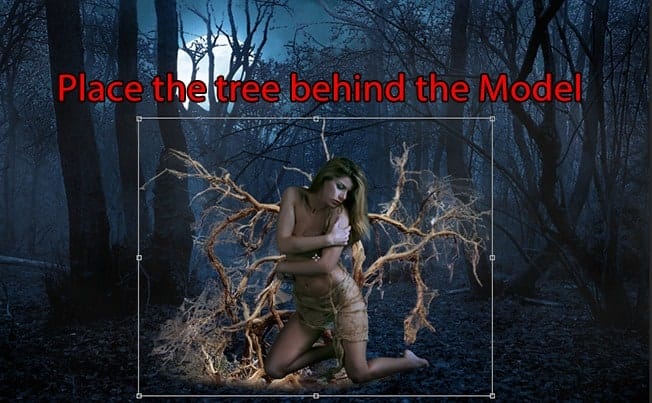
Place the extracted dead tree behind the model.
We don’t want those white pixels remain on the dead tree so we will seek the help of Refine Edgeto get rid of these annoying thing. Select the dead tree by Ctrl + Left Click on its layer and hit Ctrl + Alt + Rto open Refine Edge.
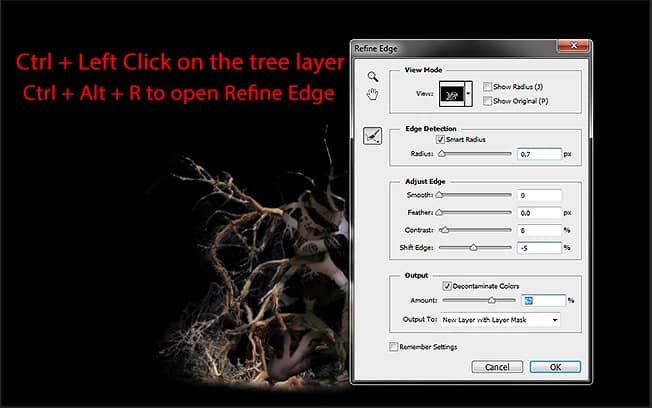
Just with a few tweaks, the white pixels are gone!
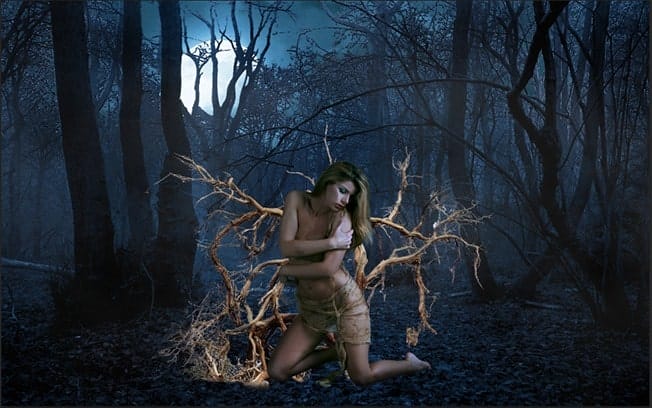
Step 14
Apply following adjustment layers to the dead tree.
Brightness/Contrast-> Exposure-> Photo Filter


Here is the result

Step 15
Open the Dead Tree 2 and extract the following part

Place it behind the model.

Add an Exposure adjustment layer

And we have some extra dead tree for the girl!
Step 16
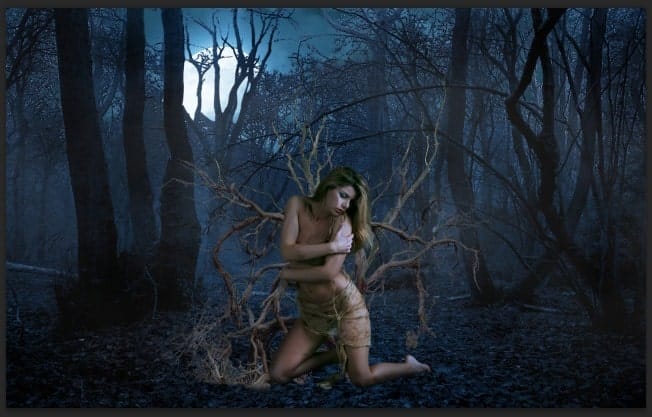
This is a very interesting step and I recommend you try it out by your free will. We will make the model being tangled by the dead tree’s branches. Open the Dead Tree 1 stock again and get any piece of branch you want. For example this one

Paste it to our document, right-click on its layer and choose Convert To Smart Object, in this way we can transform the branch freely without fearing the quality reduction.
Now you can bend, twist the branch at your free will. Hit Ctrl + T to bring up the Transform tool, right-click to choose the option. In this picture I use Warp to bend the branch.

Continue duplicate and bend the branches. Make them twist around the model.

Step 17
Continue creating twisted branches as many as you like, just don’t overdo it.

Create a new layer and paint some shadow to the part which the branches are on the model. Change the Blend Modeto Overlay.

Step 18
Group all the branch layers into one group (Hold Shift and Left Click on the branch layer at the top then click the branch layer at the bottom of the list to select all of them, Ctrl + G to group). Apply these adjustment layers to the group.
Brightness/Contrast-> Curves

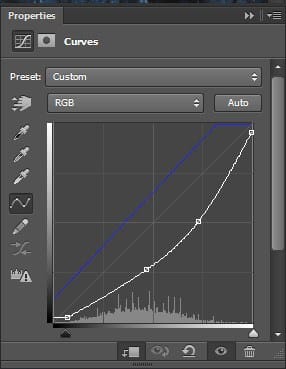
Also we want some extra shadow on those branches so create a new layer, Create Clipping Mask with the group and paint some black on the branches.
5 responses to “Create an Alluring and Magical Forest Photo Manipulation”
-
cool Photoshop tutorial..
-
cool
-
THANK YOU!! I have been trying to learn to create fog forever
-
The pixabay link works on my side using Safari and Chrome
-
I want to try this tutorial but the images on Pixabay don’t work. It’s telling me this: “Oh snap! Something went wrong! Don’t panic!! You can try reloading this page to solve the problem.”


Leave a Reply