


Duplicate the hair 1 layer. Move the duplicate to the lower position at the model’s back. Take the Free Transform tool (Ctrl+T) and warp the duplicate layer to alter its shape.
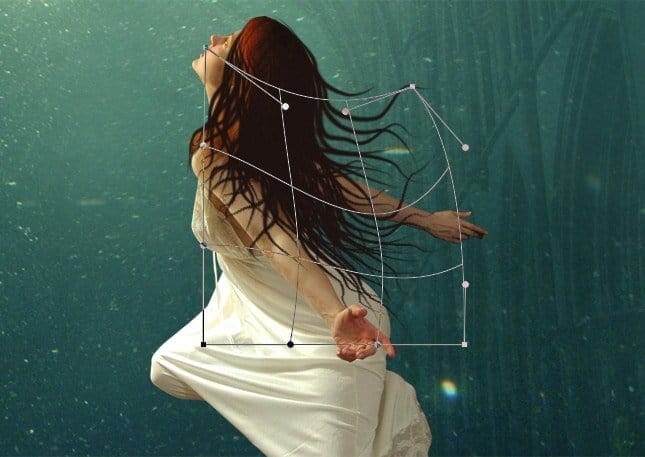
Select the original hair 1 layer and give it a layer mask (layer > Layer mask > reveal all). Mask some hair in red highlight.

Mask the duplicate layer as well to hide the hair on the left arm.

Step 8
Create another new layer (Shift+Ctrl+N) between the original hair1 and the duplicate layer. Name this layer, say, hair 2. Using given paths, paint highlight of the hair by stroking the paths. Use the color of #8e2c10.
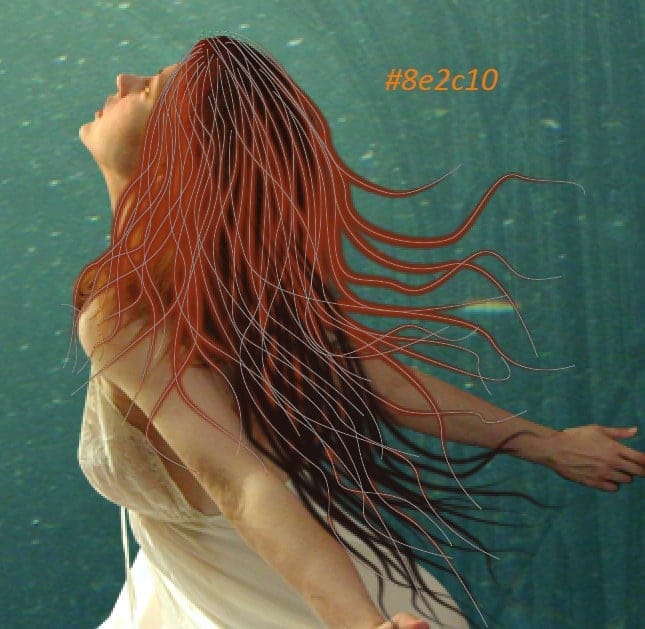

Set this layer to normal at about 8-10% opacity. This will give a reddish brown highlights to the hair.

Step 9
Now create again a new layer above all the other hair layers. Name this layer, say, hair 3. With a smaller brush with a size of 3-4 pixels and color #662f16, stroke the path to paint more highlights.
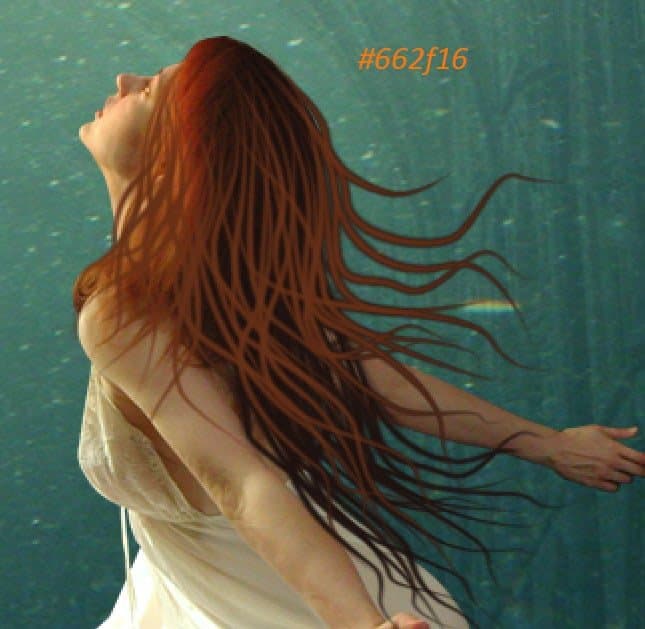
Given this amount of color, set this layer to normal at 5-7% opacity. This will give more highlights to the hair.

Step 10
Finally, create another new layer above the hair 3 layer. On this layer, stroke the same paths with a smaller brush of 1 pixels with lighter brown color.
Given this amount of color, set this layer to normal at about 15% opacity.
In a similar way, create more hair strands to the model.

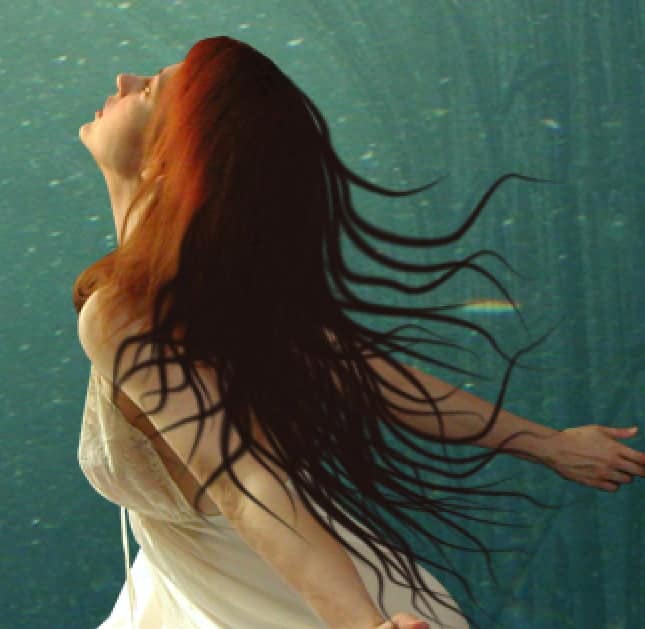
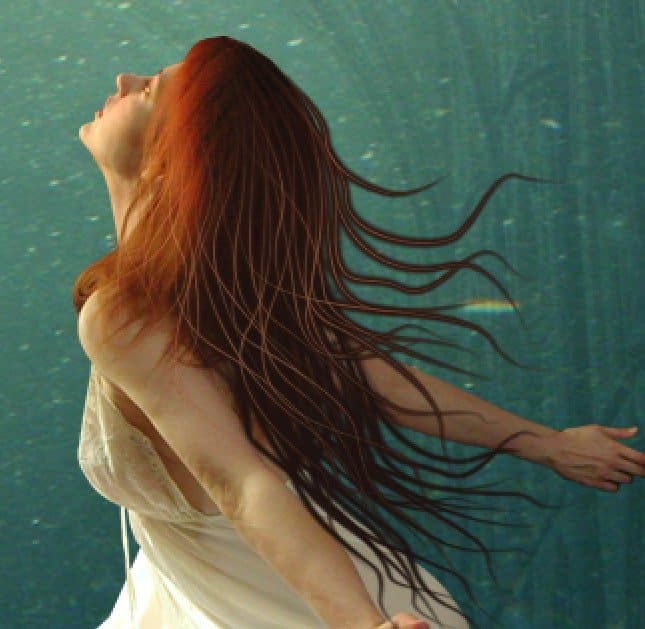
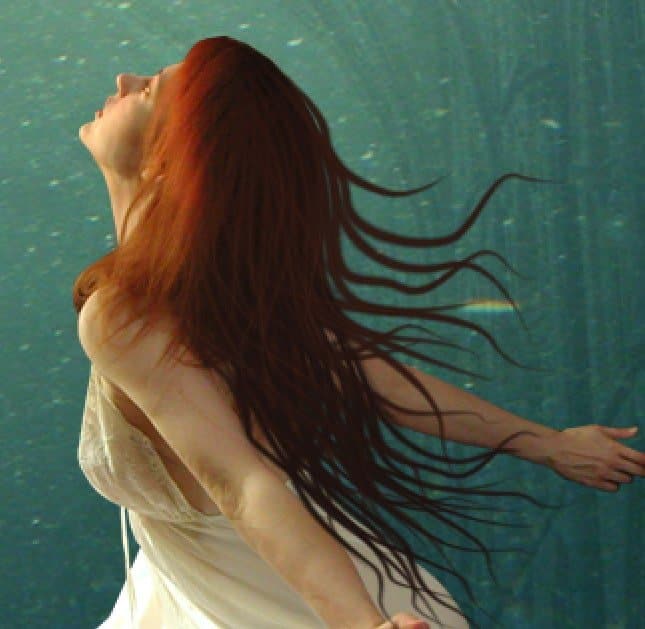
Here is the result so far. Select the model and all the hair layers. Hit Ctrl+E to merge them into a single layer. Name this new layer, say, model.
Step 11
Proceed to give this model some retouching on the skin and dress. Go to filter > camera raw. Prior to giving it the filter, convert this layer into a smart object by going to layer > smart objects > convert to smart object. Use the value below:

Given this values, the result should be like this:
Hide the effect of this filter on areas around the hair by masking the filter.

Step 12
Now we will do some color adjustment to the model to make it be well blended with the whole scene. Firstly, we give it a new fill layer with a clipping mask. Go to layer > new fill layer > solid color. Use the color of #01848c.
17 responses to “Create an Underwater Dreamscape in Photoshop”
-

DAYUMMM bro ! you give us every detail in every step AWOSEM
-
really good one. i’ve learnt a lot from this tutorial-
-
you are the best. thanks a lot
-
Can not see the tutorial. how do I see it?
-
The detail with the hair is something I would not have even messed with. Thank you for the tips on that!
-
The first time I ever heard of Photoshop actions I never thought I would use them. Now, I cannot get through a project without using at least one.
-
The best tutorial I’ve found! You didn’t leave out any steps. Everything was thorough both in explanation and in photos. If only I could get the hair paths to look more natural… :X
-
Nice tutorial, but a lot of unnecessary steps. The pic from the original girl that we cropped to the girl we added 20 different steps to enhance her has very little difference.
-
This would be a really cool album cover or the cover of a fantasy styled book. Great tutorial!
-
super awesome!!
-
I love your work, I’m new at this, your tutorial is very clear, I followed your guide and I made it,I hope you can make more tutorial like this, thank you very much.
-
I feel the same way. It is amazing how easy these tutorials are to follow.
-
-
Wow. This is stunning! Great job here. And thanks for sharing the steps on how you achieved this, will give it a shot when I have some spare time.
-
Great :)
-
Enjoy
-
Cineamtic
-
Awesome..
Leave a Reply