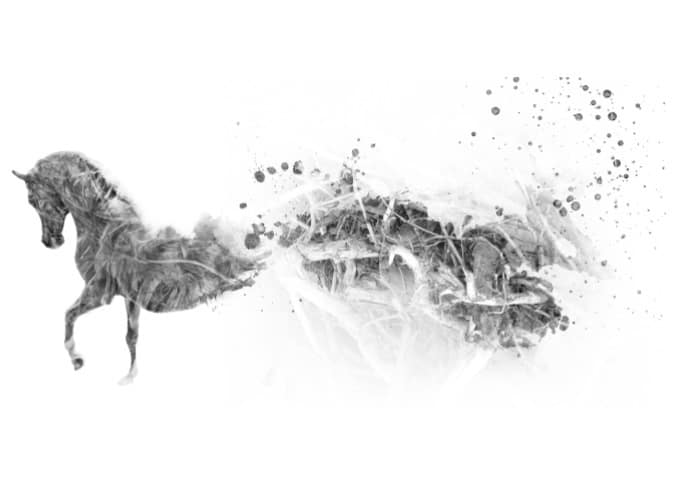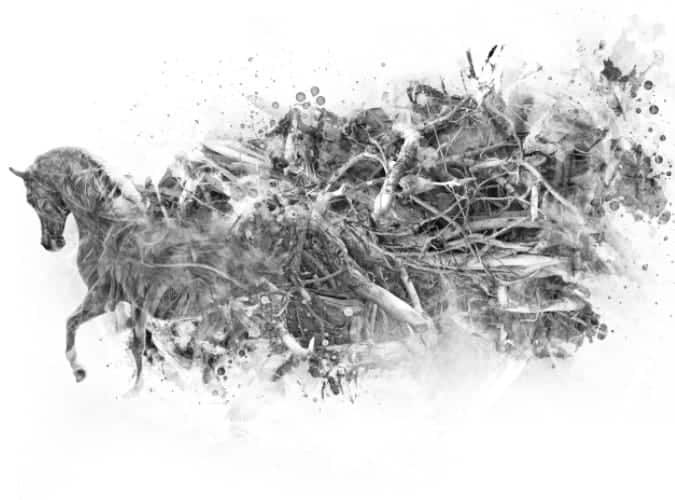

Use this brush, opacity 100%, and paint with white # ffffff on the layer mask.


Now when you know how to create this, I will start add roots to the image.
IMG_5598_ver.01

IMG_5598_ver.02

IMG_5598_ver.03

IMG_5598_ver.04

Right click on the layer and choose “Convert to Smart Object”. Now we are ready to add some Shadow/Highlights (Image > Adjustments > Shadow/Highlights).
Settings:


IMG_5603

Right click on the layer and choose “Convert to Smart Object”. Now we are ready to add some Shadow/Highlights (Image > Adjustments > Shadow/Highlights).
Settings:


IMG_5596.psd

Right click on the layer and choose “Convert to Smart Object”. Now we are ready to add some Shadow/Highlights (Image > Adjustments > Shadow/Highlights).
Settings:


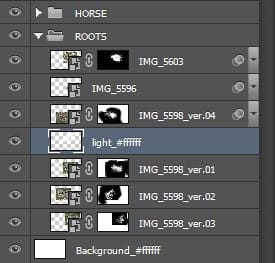
Layer structure.

Between roots layers add new layer (Layer > New > Layer or Shift+Ctrl+N).
Use soft brush and paint with white # ffffff, it will give us some lights. Brush opacity 30-50%

Screen with selection of the light layer.

Add another light layer between roots layers. (Layer > New > Layer or Shift+Ctrl+N).
Use soft brush and paint with white # ffffff. Brush opacity 30-50%

Screen with selection of the light layer.

Above Horse folder add another light layer. (Layer > New > Layer or Shift+Ctrl+N).
Use soft brush and paint with white # ffffff. Brush opacity 30-50%


Change layer opacity to 20%
Screen with selection of the light layer.

Layers structure at this stage.

The whole image at this stage.

Step 5
In this step I will paint Horse hairs. For this I will use Smudge tool.

Use this brush. Brush size 70px.

Brush settings.

Before you start painting turn off roots layers, we need only horse visible.
One more thing, we need to apply image, to do this add new layer (Layer > New > Layer or Shift+Ctrl+N) then go to Image/Apply image. Don’t change anything, just click OK.
Now we are ready to paint.

Paint in the arrows direction.

Quick steps.

Use Rectangular Marquee Tool (M) make the selection, then press Ctrl+J and cut out the head.

Click on the “Add layer mask” icon on the bottom of your Layers palette.
21 responses to “How to Create a Breathtakingly Artistic Winter Horse Illustration in Photoshop”
-
so, for those who don’t get the line-
“Apply a Roots photo layer to the Horse layer
To do this, press and hold Ctrl/Cmd and point your cursor above the red line. You will see an icon – click on it.”
I’m using CS6 and for rest of you guys are not using this version no problem the method I’ve used compatible with all versions.
1)take lasso tool(i took polygonal lasso)
2)selection around the horse pic because we want enter the root image into the horse image.
3)take the root image file>open
4)CTRL/CMD +A to select the whole root image then CTRL/CMD+C to copy
5)edit option>paste special>paste into
6)the root image will be entered into the horse image as based on your selection -
Excellent tutorial
-
????
-
Great tutorial, really inspired me very much. Thanks a lot for sharing a nice photo manipulation tutorial with us.
-
Beautiful, creative and acutely enjoy able!
-
I don’t get this step:
“Apply a Roots photo layer to the Horse layer
To do this, press and hold Ctrl/Cmd and point your cursor above the red line. You will see an icon – click on it.”I don’t see an icon show up and I am using CS6, as shown in the tutorial. If the short cut method does not work, what is the manual process .
-
Same problem I can’t see any red line there:’)
-
-
Please tell me how you applied a root photo to the horse layer
-
Heres my attempt: http://i.imgur.com/OYcYedL.jpg
Excellent tutorial! Tanks :D
-
-
I like your results more great work!
-
-
Nice tutorial man. Cheers from Atlanta
-
thanks
-
Realy very nice. Can you pls make video for this tutorial.
-
Impressive bud
-
Thank you guys!
Follow me on facebook, new tutorials soon! :)https://www.facebook.com/markiw.design
http://www.behance.net/MarkiwDang Hien
Just paint with sharpen tool set to luminosity, use soft brush. -
Help me plz, i don’t know how the horse was maked like 2 last pics.
-
Excellent tutorial sr, inspired..
-
I agree! haven’t seen these type for a while! But I am happy to see different artists sharing their techniques and knowledge, its becoming more and more open! I appreciate every bit of it! thanks to pstutorials for grabbing this one! cheers to Markiw!
-
Hey, Do u know the link of photoshop CC? please Reply!
-
-
Great writeup – hadn’t seen this type of tutorial for awhile


Leave a Reply