Step 27
Repeat the same process from step 24 to step 26 for the Octave layer, but change the blend mode to Multiply in the end. If done correctly, you’ll get result as shown in the screenshot below.

Step 28
Open another stock image we got from here, the new york cityscape. Copy and paste the cityscape into our work, place it under all layers.This is also the time to pick the right part from the cityscape to show, maybe rotate it a bit to get a better look.

Step 29
Go to Image> Adjustment> Desaturate to desaturate the cityscape image. Next, reduce the layer opacity around 40%.

Step 30
Create new layer above the cityscape layer, you can rename the layer as you like, mine is “black vintage” (i know that’s lame, please deal with it). Now grab the Brush tool, pick the soft brush (the one with Hardness 0%) and lower the brush Opacity to 30%.

Step 31
With the brush tool, paint the canvas edge with black. More opacity on each corner as shown in the screenshot below.

Step 32
Now create a new layer above the “black vintage” layer, i call it “white exposure” (feel free to give it another name, i won’t mad! :). Still using the brush tool, this time paint the middle areas with white. See image example below.

Step 33
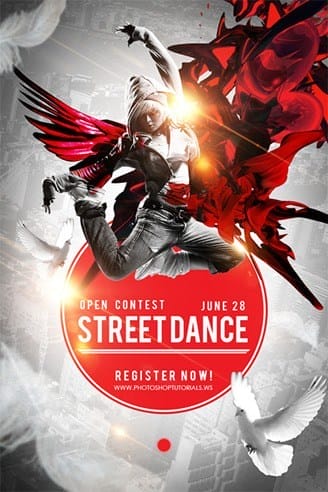
Open up the dove image we got from here. The fastest and easy way to extract the bird was using the Quick Selection tool. Grab the tool and start creating selection by click and drag around the bird.

Step 34
Sure that’s a quick selection we’ve done there, but anything that was done quickly, often sacrificing quality. Go to Select> Refine Edge menu to show the Refine Edge dialog. Here, activate the Smart radius checklist and play around with the Adjust Edge settings to smoothen the selection’s edge. Click OK to apply.

Step 35
Copy and paste the bird above the red circle layer. Use the transform command to adjust the bird’s size and position as shown in the example below.

Step 36
You may notice the subtle black colored edges around the bird, we can remove that easily by going to the Layer> Matting> Remove Black Matte. Be gone!

Step 37
Duplicate the bird by pressing [CTRL] [J], flip it horizontally by going to menu Edit> Transform> Flip Horizontal. Now place it on the left side of the red circle. Make it smaller by using the transform menu.
20 responses to “Create a Captivating Street Dance Competition Poster with Photoshop”
-
thankyou yaaa i enjoyed
-
really enjoyed following your tutorial!
-
Thanks for sharing such useful tutorial. i am big fan of street dancing and making the poster for street dancing that will be awesome. Definitely going to follow your tips in the next poster of street dance.
-
That poster would get my attention!
-
great!! thanks for the technique
-
Thanks for offering this! I learned some new tricks as I worked my way through your tutorial. You have a very artistic eye, too.
-
Thanks! I learned new tricks as I worked my way through your tutorial!
-
I’ve always wondered how these posters were made, now I know! I really like the subtle touch of the bird’s feathers. Thank you for sharing. I’m looking forward to using some of these techniques in my own work.
-
класс!!!!!!!!!!
-
Thank you for the time and efforts!
-
Awesome resources.Huge collection.Great job.Very useful post.
-
Nice turotial and I learned what is the smart object use in photoshop. Thank you.
-
thanks . Awesome tutorial. I learned another something useful from your tutorial :)
-
Thank You1
-
Awesome tutorial. Managed to get it right and learned a few things along the way. Thank you!
-
glad you like it ^_^
-
-
Halo Mas Jayan Saputra, salam kenal..
-
halo salam kenal juga :)
-
-
Step 10 is confusing. Please elaborate
-
draw an ellipse shape, set the fill color to red and set the stroke width/size to 5px, pick white as stroke color (i made this with photoshop cs6)
after that, just add layer style Stroke
-


Leave a Reply