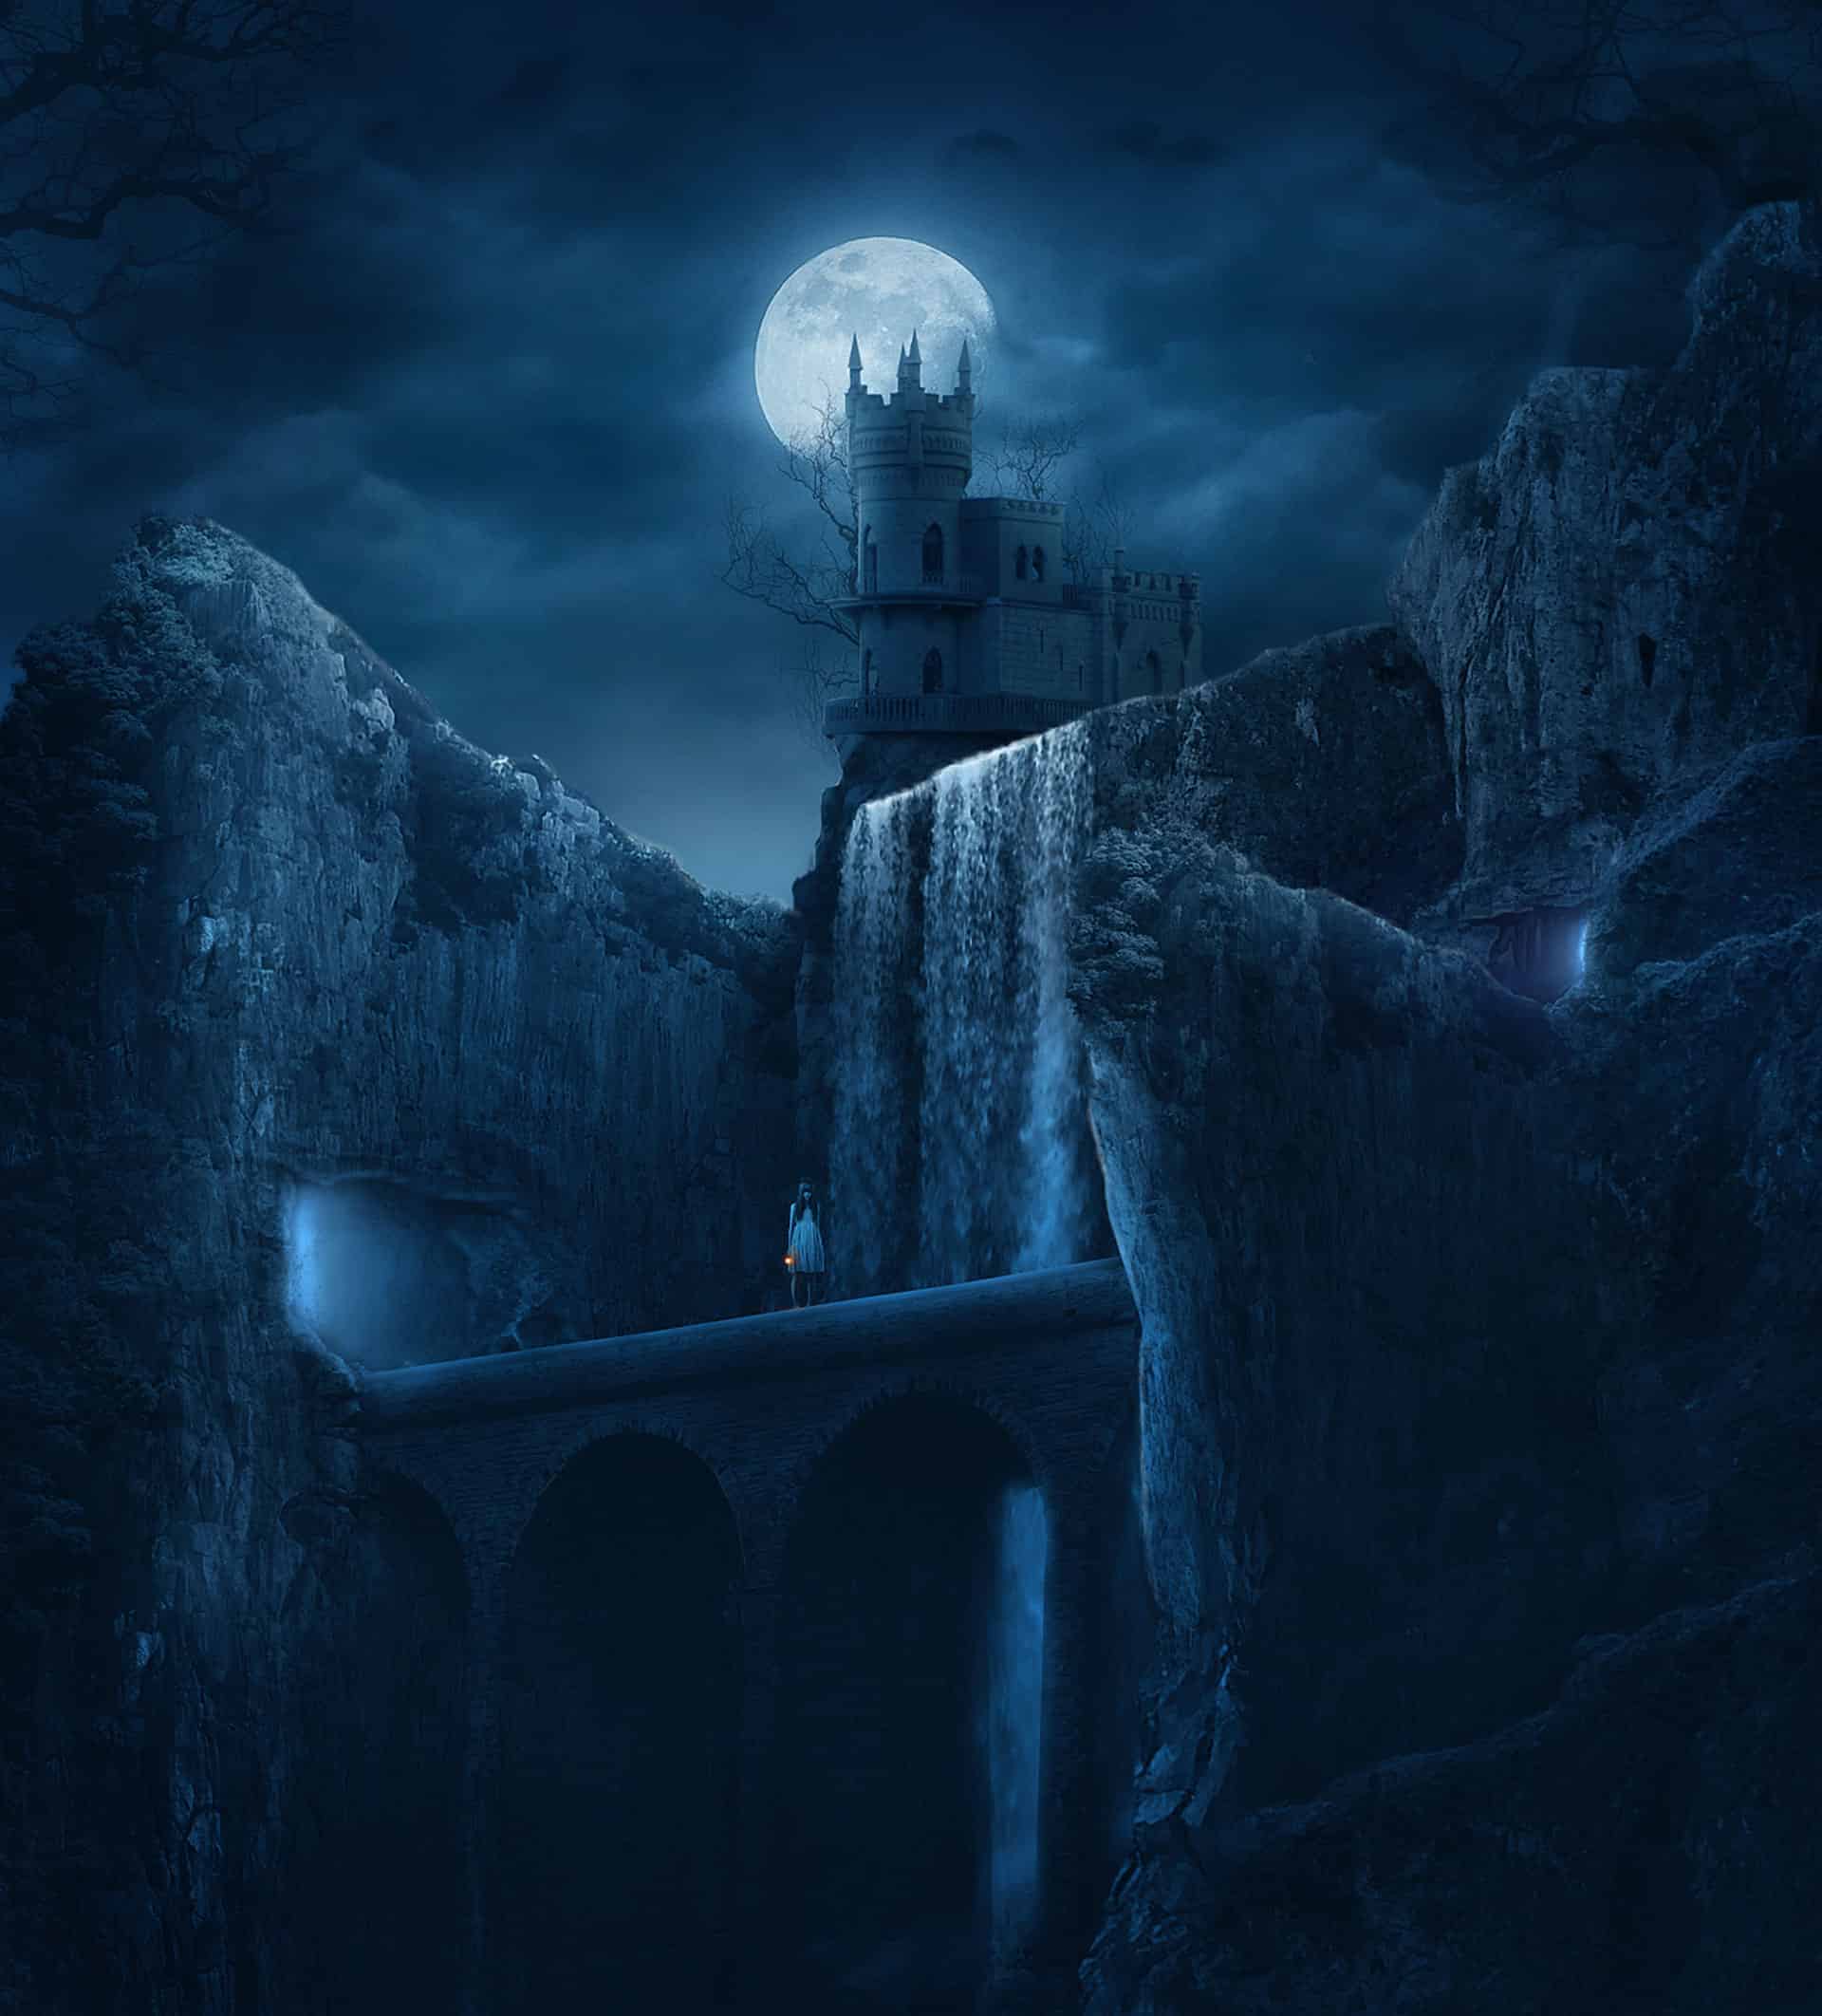


Step 7
Proceed to add another object in the scene. Place the castle image in the main document. Scale its size and position it behind the rock folder created in previous step 3.

Hide the background of this image by masking it.


Step 8
We need the other stock image to be added to the scene. We use this image for this purpose. Cut out some part of the rock in the image.

Add the cut out in the document. Scale its size and place it in front of the right rock layer. Rotate its position to have the one as I did:

Mask parts unneeded.

Step 9
Now add the bridge to the scene. Scale its size to the one we need. Position this layer in front of the waterfall between the right and left rock.

Step 10
In this step, we will add tunnels or caves ( I am not sure myself what they are….LOL)in the scene. We use this image to fulfill this purpose. Cut out the part needed.

Add the cut out to the scene. To blend it to the rock behind, mask the edge of the cutout. I named this cut out left cave.

Duplicate the cave layer. Flip the duplicate horizontally, scale the size, and place it in front of the rock on the right. Mask areas where needed.

Step 11
Finally, we will add cloud and moon as the background for the scene. Place the cloud image in the scene. Make sure to position this layer behind all the other layers. The moon will give dramatic nuance to the scene, so it will something fantastic if we position the moon right behind the castle. Don’t you agree? So be it…..!

We need to fill the blank part of the background. We do this just simply by duplicate the cloud layer. Scale the size of the duplicate to the one needed and move it to the left to cover the blank. Where is the moon? The moon is now covered by the cloud.

Give the duplicate layer mask and mask areas round the moon to reveal it. Here it is now:


Step 12
I decided to hide some areas on the rock 2 layer by masking them. So go to the rock folder created in previous step 3. Open the folder and select the rock 2 layer. Give this layer a layer mask and mask some areas around it as indicated in red color.
18 responses to “How to Create a Dark Mysterious Hideout from a Rough Sketch”
-

Does’t work to just copy and paste images to new document. Can’t transform. Needs another way to be able to move the cut out images into the new document and still be able to transform.
-
Hey! Dek Wid,
My bad ;) I missed the link to next page. Beautiful work. I really love the way you combined different Images. Looking forward to see more from your side.
Cheers -
You have not shown the complete tutorial. Want to see rest of the steps after step 14 till that blue mysterious atmosphere… ;)
Ajay Yashpaul
-
Thank you very very much…I had finished 98% this tutorial:) .Just some step last example nebula, girl … is difficult
-
Brilliant Tutorial. I will add it to my next years calendar.
More please Dek. -
Marvellous creativity. I love it!
-
amazing tutorial so far! Two thumbs up!
-
There’s something wrong with the perspective of the castle I suppose
-
good work and continue we are waiting for more
-
good work and continue we are waiting for more
-
Nice work buddy.. you are real artist..!!
-
xiexie
-
厉害!谢谢分享
-
(⊙o⊙)?
-
-
Dek your tutorials are the best on this website
-
This is a great tutorial, this is what we want, a tutorial with quality.
Thanks Photoshop Tutorials and Dek Wid for this powerful tutorial. -
plis can u kindly teach us…we want to know more plis…post it!
-
i love this job
Leave a Reply