
Duplicate the brightness/contrast layer. Set the original layer to normal at 100% opacity and the duplicate set to normal blending at about 50% opacity

The last overall adjustment layer: selective colors. Set this layer to normal at about 70% opacity. Select all the adjustment layers and group them in a folder. I named this folder general adjustments.


Step 21
Proceed to add some light to the tunnel. Open the nebula image in the document. Scale the size and place it above the left tunnel. Set the blending of this layer to screen at about 85% opacity. With the free transform tool, warp the image to alter its shape. Mask some areas where needed.

Here is the result after giving light to the other tunnel.

Step 22
Now we will add more illumination inside the two tunnels. To do this, create a new layer above the general adjustments folder. Fill (Shift+F5) this new layer with black and set its blending mode to color dodge at 100% opacity. Take a very soft brush set to 20-30% px size at 3-5% opacity. With white color, stroke the brush on areas where needed to illuminate them. Here is the look of the layer in normal blending for your inspiration.

The result should be like this:

Step 23
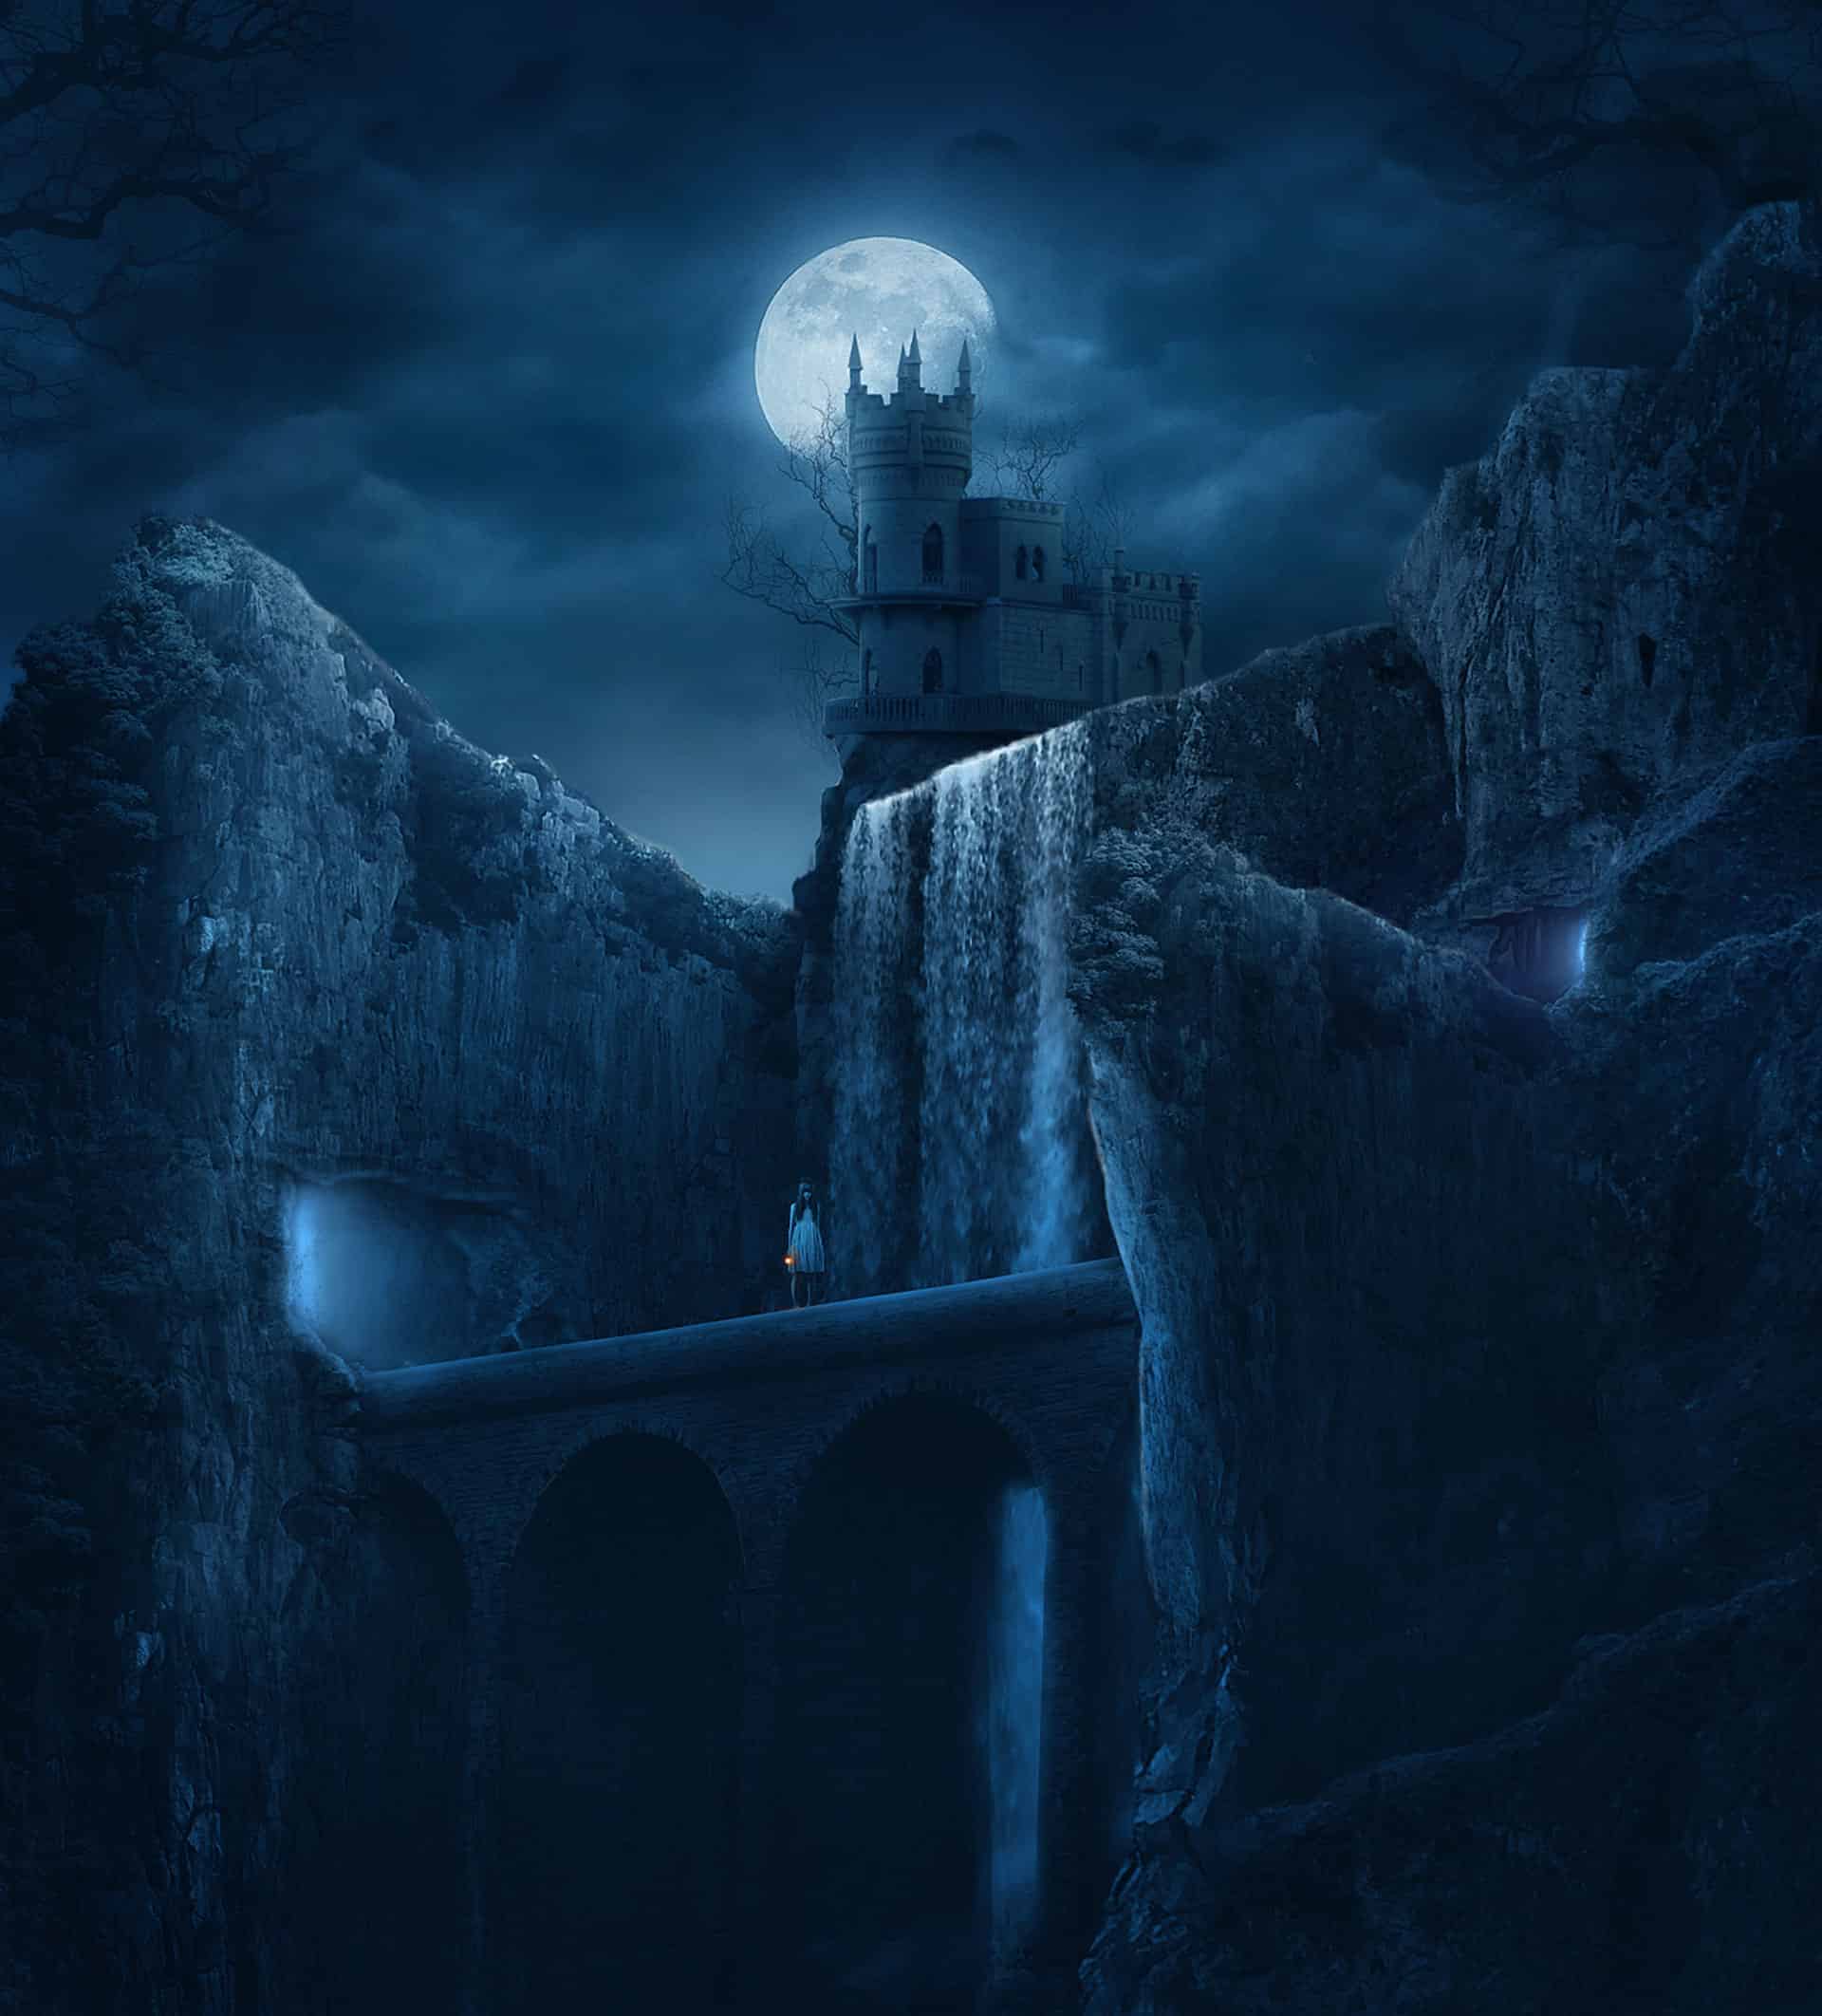
To give nuance of life in the scene, I decided to add a figure in it. I used this model as the figure.

Here is the figure will look like after I did some retouching on it

Add the figure to the main scene. Place this figure layer on the bridge. Scale its size to the proper one.

Step 24
Finally, we will add some light to the hand of the figure. Create a new layer above the general adjustments folder created in the previous step 20. Set this layer to hard light blending at 100% opacity. Take a soft round brush set to about 10 px size at 100% opacity. On this new layer, click the brush with the color of #fe7303 on the right hand of the figure, this will give an orange spot on it. Now set the brush to a smaller size at about 8-9 px. With white color, click the brush once again on the orange spot. This will give nice brightness to it.

Step 25
Finally, we will do the last adjustments to some objects in the scene. Create another new layer above all the other layers and folders. Set this layer to hard light blending at 100% opacity. On this new layer, we will do the final touch to the screen. Take a very soft round brush set to about 15-20% opacity. On this layer, paint some soft dark blue color on certain areas around the upper, lower, left, and right edges of the scene. Then, take white color to paint some more highlights on the upper edges of the rocks and waterfall. Use a small soft round brush to do this. I also painted some contour inside the right tunnel. For our inspiration here the layer I created the look:
18 responses to “How to Create a Dark Mysterious Hideout from a Rough Sketch”
-

Does’t work to just copy and paste images to new document. Can’t transform. Needs another way to be able to move the cut out images into the new document and still be able to transform.
-
Hey! Dek Wid,
My bad ;) I missed the link to next page. Beautiful work. I really love the way you combined different Images. Looking forward to see more from your side.
Cheers -
You have not shown the complete tutorial. Want to see rest of the steps after step 14 till that blue mysterious atmosphere… ;)
Ajay Yashpaul
-
Thank you very very much…I had finished 98% this tutorial:) .Just some step last example nebula, girl … is difficult
-
Brilliant Tutorial. I will add it to my next years calendar.
More please Dek. -
Marvellous creativity. I love it!
-
amazing tutorial so far! Two thumbs up!
-
There’s something wrong with the perspective of the castle I suppose
-
good work and continue we are waiting for more
-
good work and continue we are waiting for more
-
Nice work buddy.. you are real artist..!!
-
xiexie
-
厉害!谢谢分享
-
(⊙o⊙)?
-
-
Dek your tutorials are the best on this website
-
This is a great tutorial, this is what we want, a tutorial with quality.
Thanks Photoshop Tutorials and Dek Wid for this powerful tutorial. -
plis can u kindly teach us…we want to know more plis…post it!
-
i love this job
Leave a Reply