image014
Next, let’s create another layer (Ctrl/Cmd + Shift + N) and then name this new layer: “Darken 2”. Now, activate the Brush tool (B) once again and then input the following:
  • Brush size: 1800px
  • Hardness: 0%
  • Opacity: 15%
  • Flow: 100%
  • #: 000000
When you’re done, we can now start painting:
image015
The result of that should be similar to this:
image016

Step 3: Create the Water in the Room

In this step, we will be filling this room with water. To start, let’s open the “Stormy Sea” by darkrose42 stock. Once open, activate the Rectangular Marquee Tool (M) and select the sea from this image.
image017
image018
Now that you’ve created a selection area around the sea, activate the Move tool (V) and drag the sea to our canvas and position this layer above the “Darken 2” layer. Position it in the canvas as shown on the image:
image019
Now rename this layer to “Water”. Activate the Transform Tool (Ctrl/Cmd + T) and resize the “Water” as shown on the image below:
image020
The result:
image021
Now that that’s done, we will now darken the water to make it blend with the light of the room. To start, create a new layer (Ctrl/Cmd + Shift + N) above the “Water” layer and name it “Darken Water”. Once you’ve done that, right-click on the layer and choose Create Clipping Mask so that the brush’s paint would only be within the “water” and not spread to the “Wall”.
image022
Now that you’re done, activate the Brush tool (B) and input the following:
  • Brush size: 300px
  • Hardness: 0%
  • Opacity: 30%
  • Flow: 100%
  • #: 000000
Now, let’s paint:
image023
The result of that should be similar to this:
image024
When you’re done, select all the layers that you’ve created and then group them together to avoid confusion. To group layers, simply select all the layers that you wish (in this case, all the layers) and then press Ctrl/Cmd + G. After that, you’d notice that they are all on one folder.
image025
Note: You may rename the group to “Background”

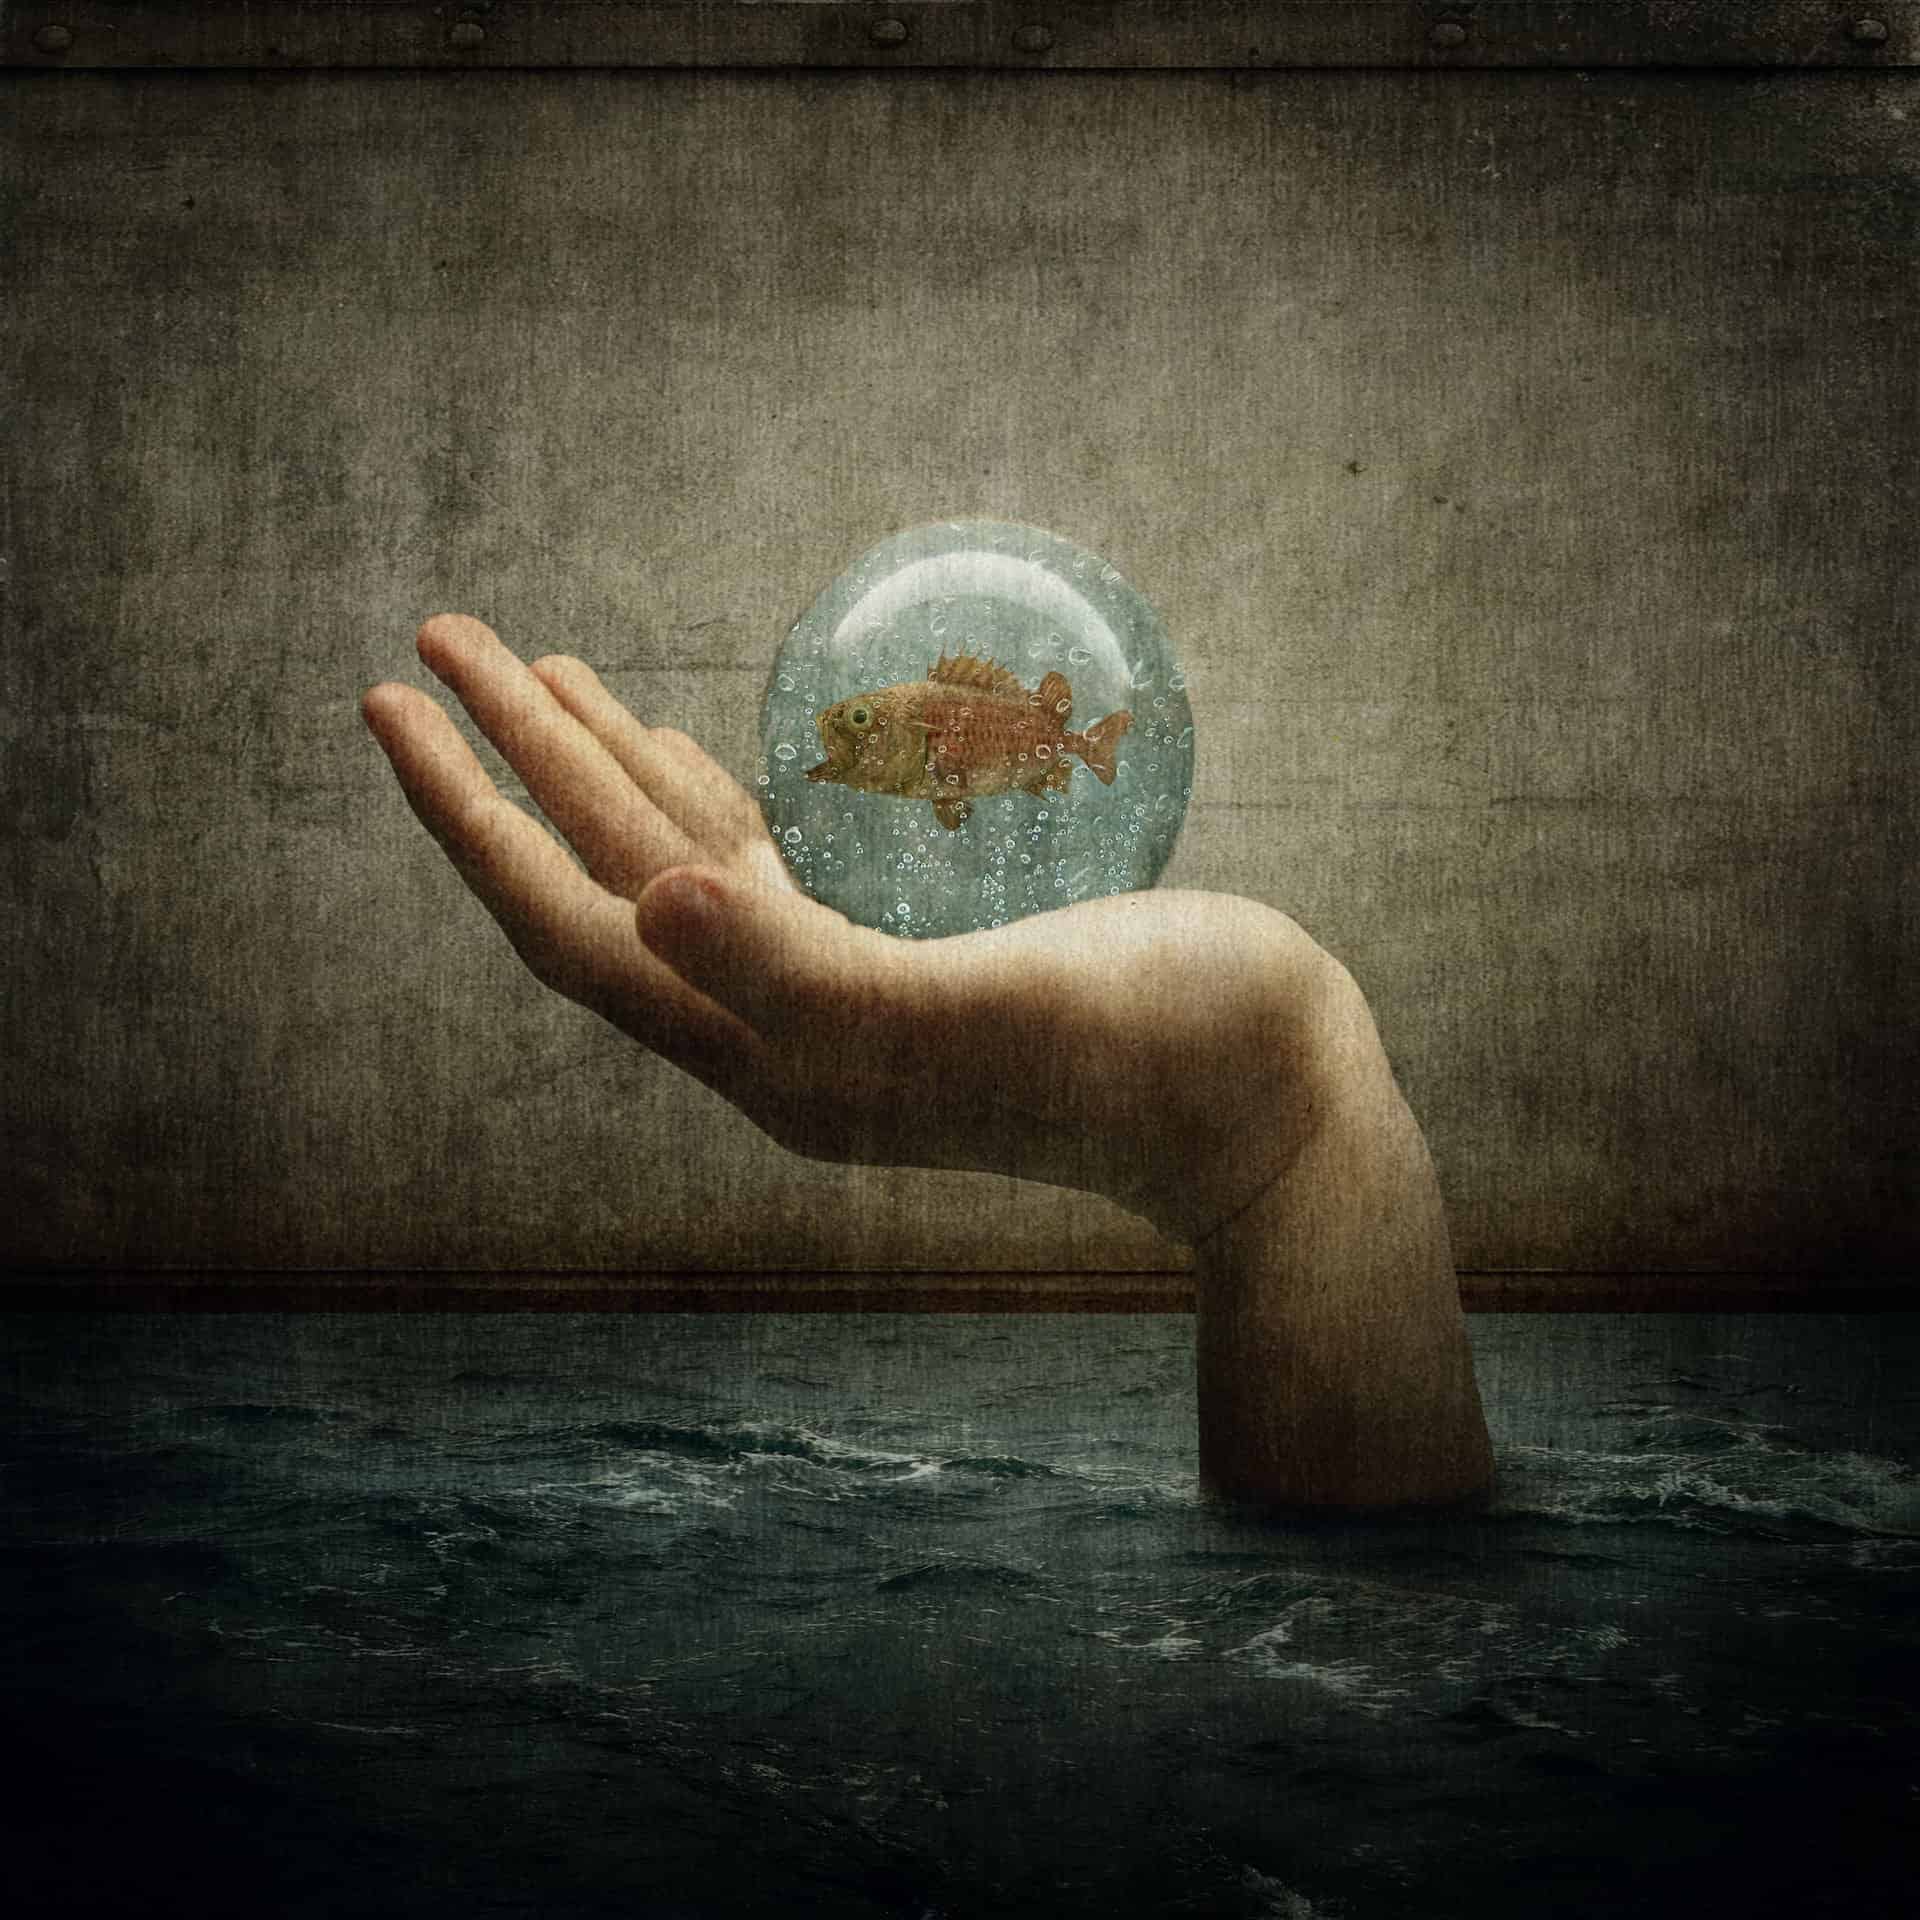
Step 4: Create the Hand

Now, we will be adding a giant hand within the room. To start, open the stock image “ball 3” by LuckyStock. Once it is open, activate the Magnetic Lasso Tool, as shown on the image below:
image026
Now, create a selection area around the hand.
image028
Once you’re done, activate the Move tool (V) and drag the hand to our canvas. Position the hand as shown below:
image029
Rename the layer now to “Hand”.

Pages: 1 2 3 4 5

11 responses to “How to Create a Disturbing Scene of a Flooded Room with a Giant Hand Carrying a Fish”

  1. snowglobefal Avatar
    snowglobefal

    this tutorial was so easy to follow! thank youuuu

  2. Linda A Perdue Avatar
    Linda A Perdue

    I clicked on the link for the ‘water in the ball’ and it doesn’t appear to be there?

    1. Photoshop Tutorials Staff Avatar
      Photoshop Tutorials Staff

      All the stock resource links seem to be working on my end. Where are you seeing the link for the water in the ball?

    2. Linda A Perdue Avatar
      Linda A Perdue

      Water on glass 1? https://www.deviantart.com/deadenddoll-stock/gallery/5088128#/dd4c0w …..doesn’t show me an image? unless it is a very dark image that has a diagonal line through the middle – doesn’t seem to have anything and I’m not sure if I am missing something – wanted to start working on your tutorial today.

  3. Lois Avatar
    Lois

    I love this tutorial!! Very clear and precise steps, and Great results! Thank you!

  4. Ryan Avatar
    Ryan

    I’m not sure if you’re still posting since this is kind of an old tutor, but you are an awesome artist! Great walkthrough

  5. chris Avatar
    chris

    a great tutorial and your work flow is fantastic and professional

  6. MyoMinThant Avatar
    MyoMinThant

    well done! Thank you.

  7. Jen Avatar
    Jen

    Great tutorial! The steps are very thorough and easy to follow. Thanks!

  8. pascale Avatar
    pascale

    thank you very much, I liked very much your work ;)

Leave a Reply

Discover more from Photoshop Tutorials

Get the latest Photoshop tutorials, download and updates delivered to your inbox.

Continue reading