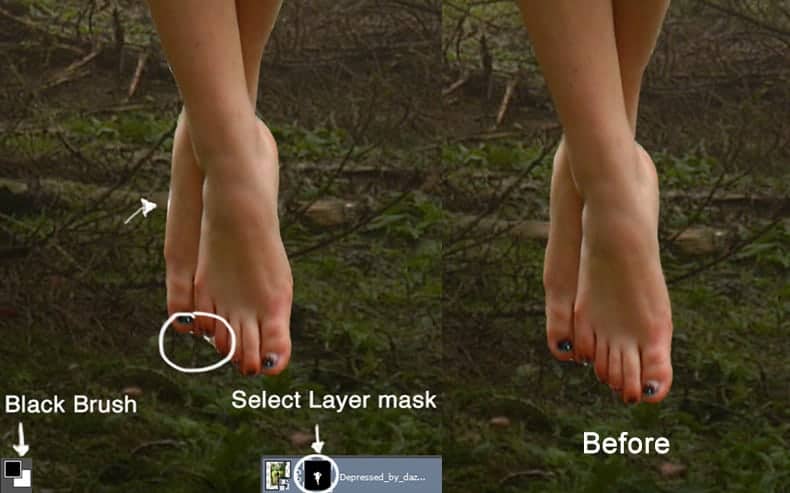
Step 7
If your selection have some inaccurate parts you can fix them now with a small brush. You have to paint over the layer mask with the black brush.
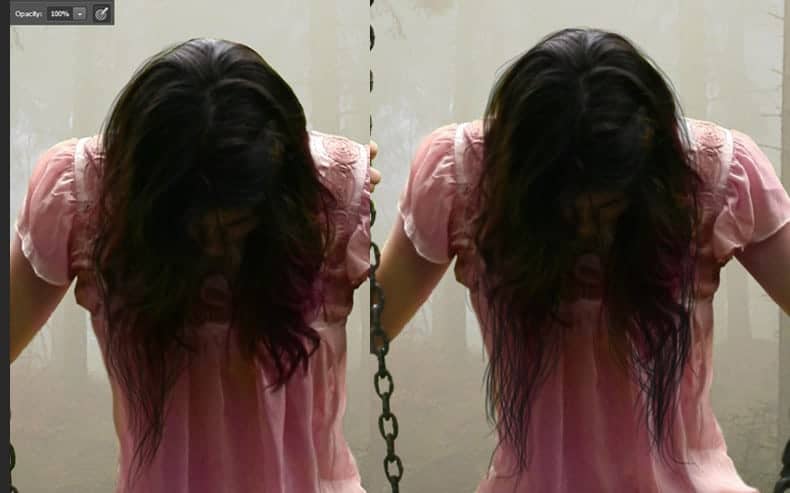
Step 8
Go to the menu Filter – Liquify. Use the Forward Warp Tool to make her dress smaller. The size of the brush is 70 and the Pressure can be set at 20 to 25.

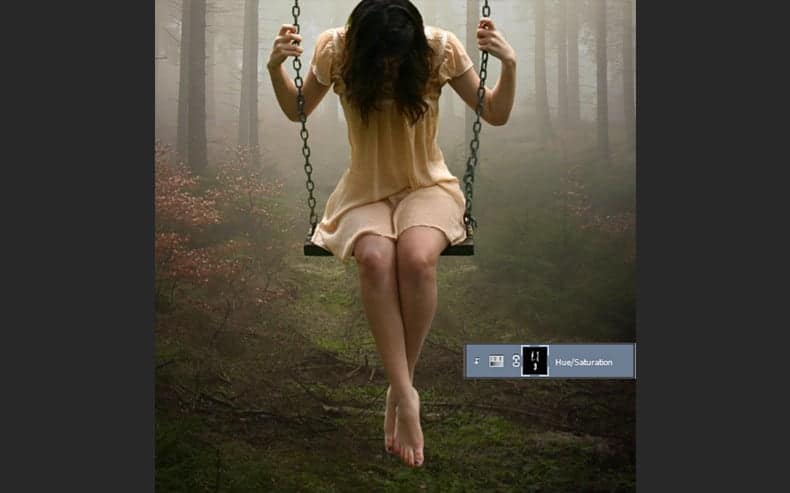
Step 9
To make the model less saturated go to the menu “create a new fill or adjustment layer” and select the option “Hue/Saturation” reduce the Saturation to -48.

Step 10
A clipping mask is very useful to affect just an element of the composition. Since you are working with the model creating a clipping mask will help you to make the changes only to the selected layer. To do this press right click over the layer you create before “hue/saturation” press right click in the thumbnail and choose the option “Create Clipping Mask” then you will have something like this, that means that this layer is only going to be affecting the one that is underlined.

Step 11
If you want that just her skin less saturated then in the layer mask of this adjustment layer press (Ctrl + I) to invert the selection and have the layer mask completely black. Paint with a white brush (50% opacity) over the parts you want to be affected. In this case just paint over the skin. You can use a big brush and don’t have to worry about the edges because you are using the clipping mask so the background is not going to be affected at all.
Step 12
To change the color of her dress you are going to choose again “Hue and Saturation” and chage the Hue to -53 and the saturation to -18 remember to also add this layer as clipping mask to affect only the model. So be cafeful and don’t paint over her skin.

Step 13
In a new layer (Shift + Ctrl + N) pick a chalk brush and paint hair strands. You can use the color picker to use the same exact color of the hair. A tablet will make this easier, if you don’t have one you can use hair brushes or paint with the mouse. Brush size 3 or 2 opacity: 100% set it to pen pressure.
Step 14
In a new layer with a lighter brush make more hairs to create highlighting to the strands. Repeat the same process as before.
22 responses to “Create a Dreamlike Photo Manipulation of an Emotional Girl with a Dramatic Lighting in Photoshop”
-

wow its very nice tutorial Thank You
-
Looks a decent instructional exercise, tragically two stages (stepson and 12) have pictures missing so we can’t perceive what you did to get any impacts. Additionally, a portion of the stock is never again accessible, yet we can work around that.
-
Hi !
Thank you so much for sharing your tutorial.
It helped me a lot. I Came up with this…
http://fav.me/dd0x9t4-
Wow that’s impressive! Thanks for trying out the tutorial!
-
-
Thank you!
-
Awesome! Thank you Andrea!!
-
thank you very much for this tutorial
-
Wow!…verry cool tutorial,…thanks
-
Great tutorial, thank you!
-
good work , help me to create a good idea
-
Thank you, Andrea, for this lovely tut. Didn’t follow it completely, but your work sure inspired me :-) !
My result. -
pretty neat tutorial. I use PSE 9 so I couldn’t follow along exactly, but I still learned a lot and it was fun! Mine didn’t turn out exactly like yours but pretty close. http://jdyjdyjdy.deviantart.com/art/Tutorial-dreamlike-561989308?ga_submit_new=10%253A1442991390
-
A very good tutorial
Well done -
Sencillamente Excelente!!!
-
Looks a nice tutorial, sadly two steps (steps11 & 12) have pictures missing so we can’t see what you did to get any effects. Also, some of the stock is no longer available, but we can work around that.
-
Thanks so much learned alot from this
-
I’m glad
-
-
Awesome, I really love it. Thanks you. <3
-
I’m glad you like it!
-
-
Thank you so much. This is fantastic and so helpful.
-
Amazing!!
-
I’m glad you like it
-
Leave a Reply