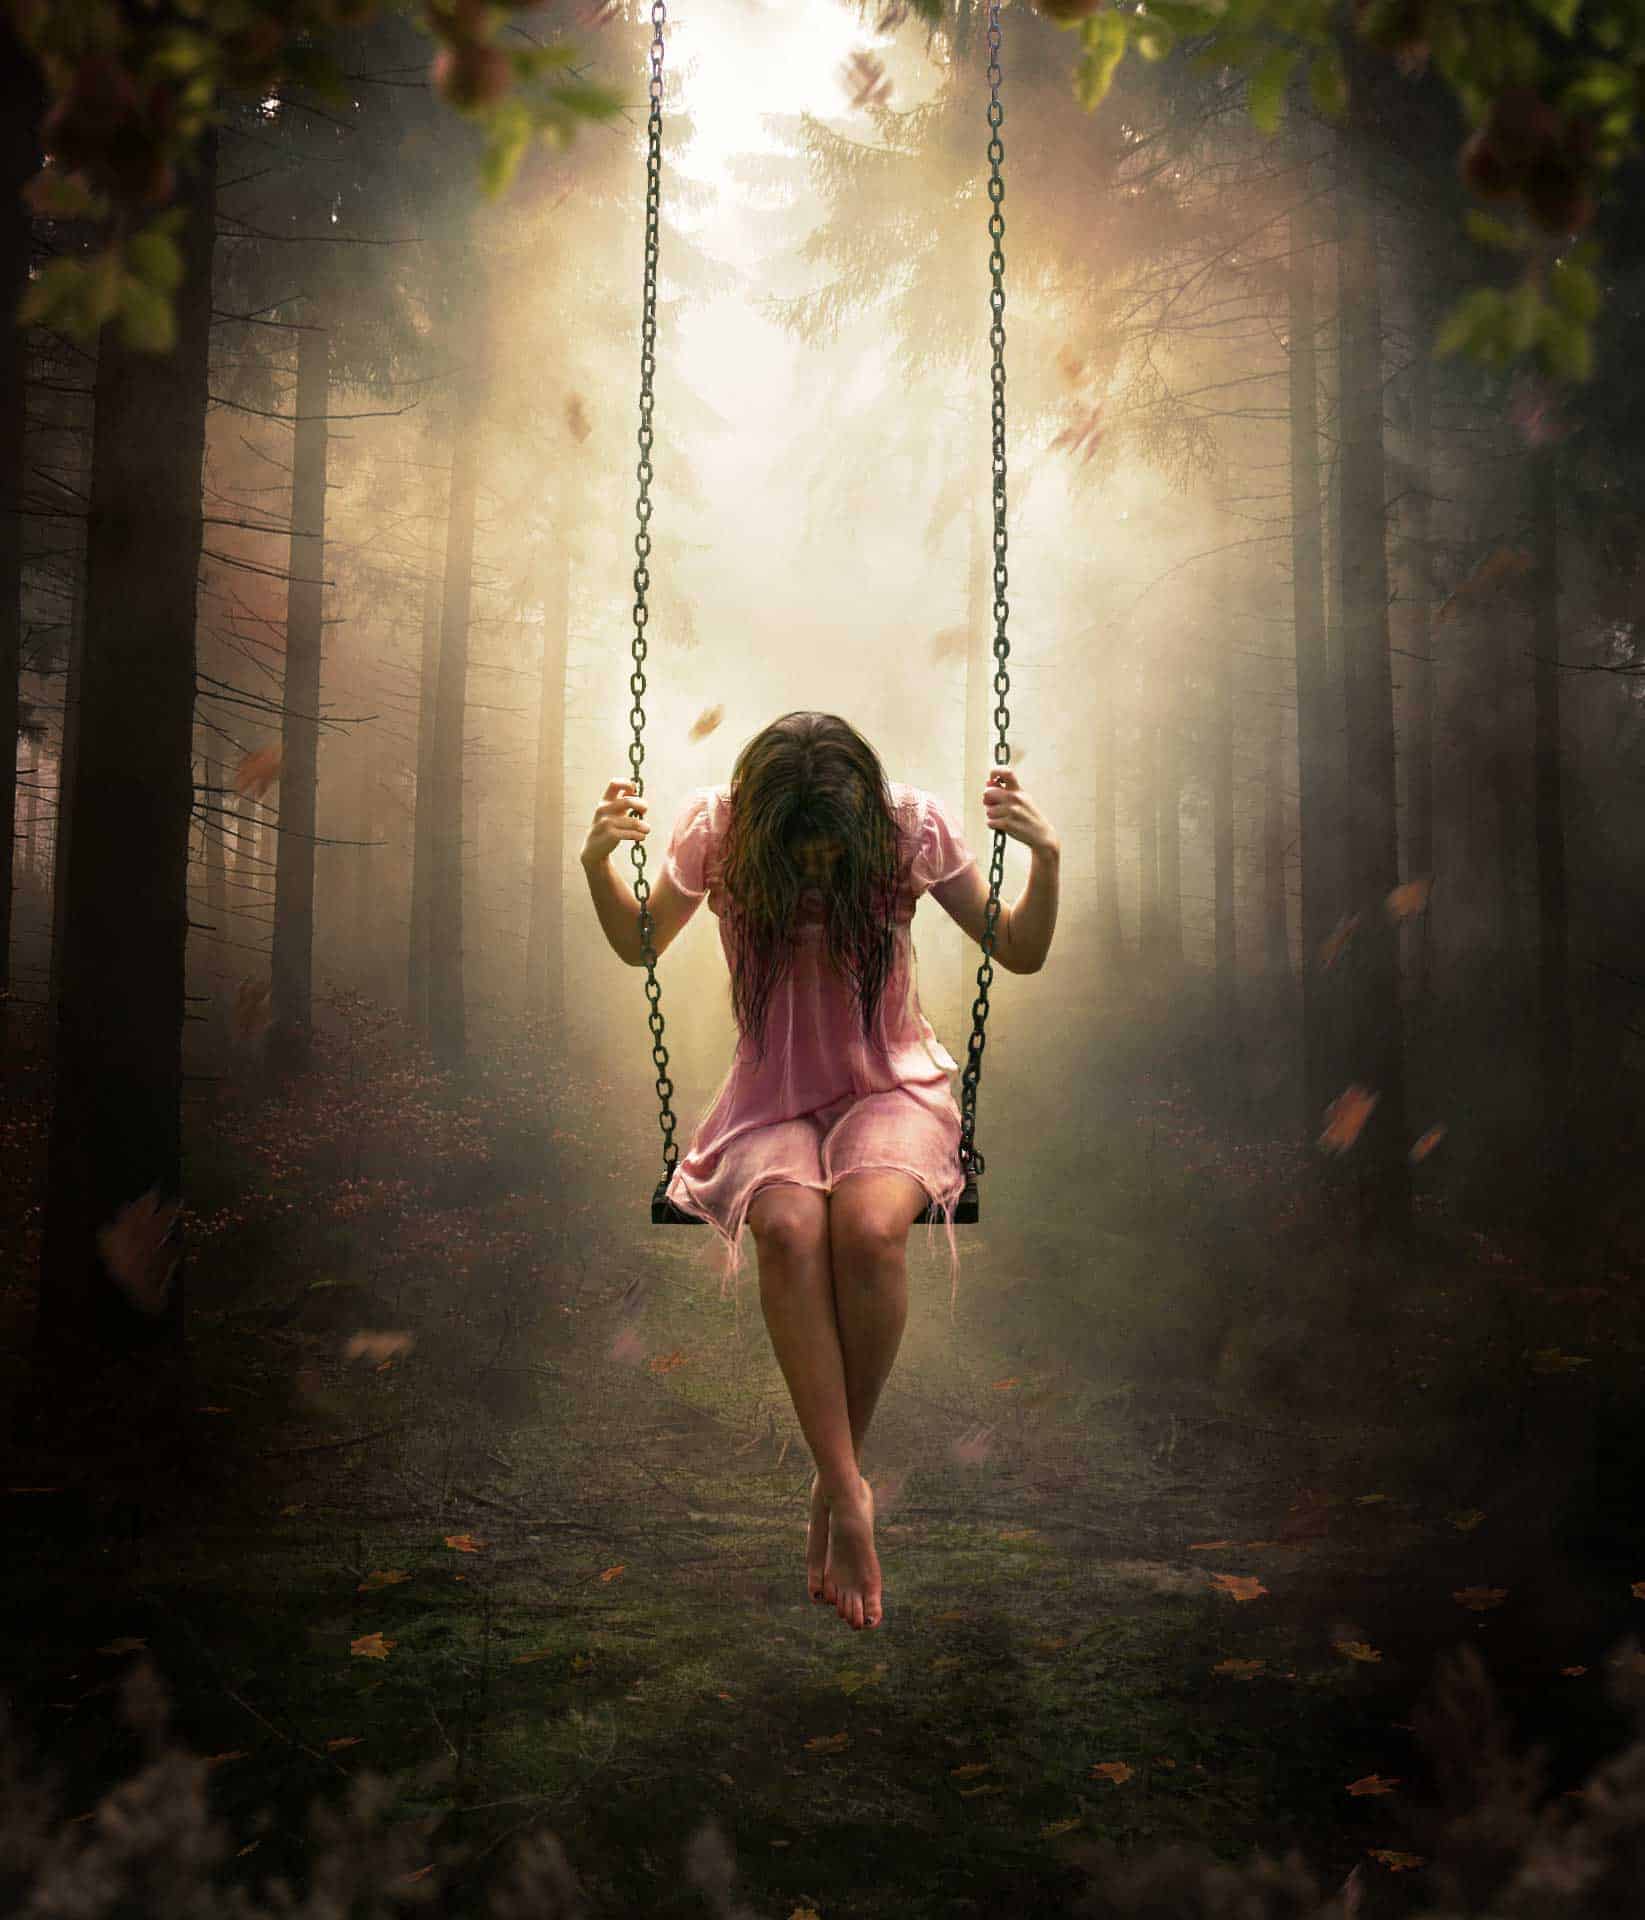

Step 15
To make the dress more interesting paint some threads, choose the same color with the color picker tool and use a small brush just like the hair you did before. You can also pick a lighter color to make the dress stand out more.

Step 16
In a new layer with a soft round brush size 200px and 20% of opacity paint over the model like this:.
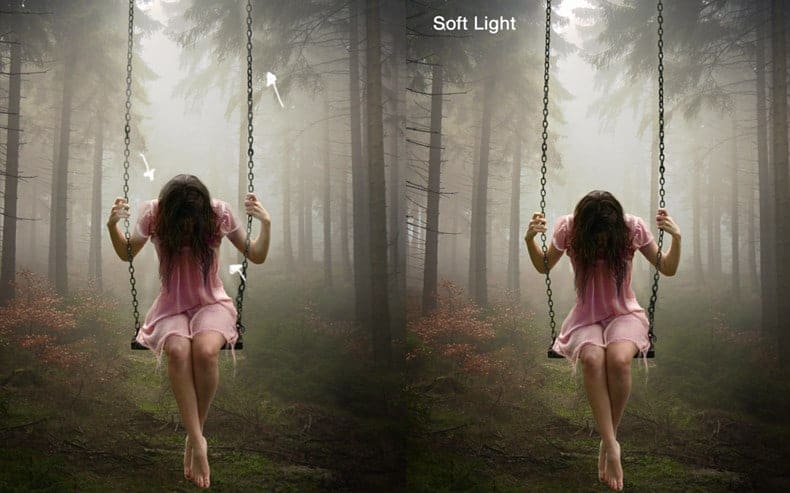
Step 17
Create a new layer and paint in the top of the image you can use light brushes. Use the color # ffeb99 opacity 50%. Use the layer in soft light mode.

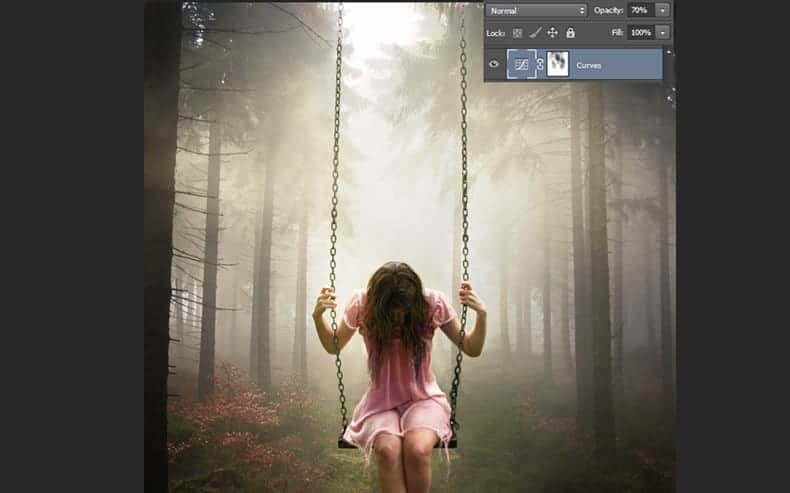
Step 18
Go to the menu “new fill or adjustment layer” and pick the option curves. Change the option to something like this:

Then in the layer mask paint over the places where the light is too strong to decrease the effect also change the opacity of the layer to 70%
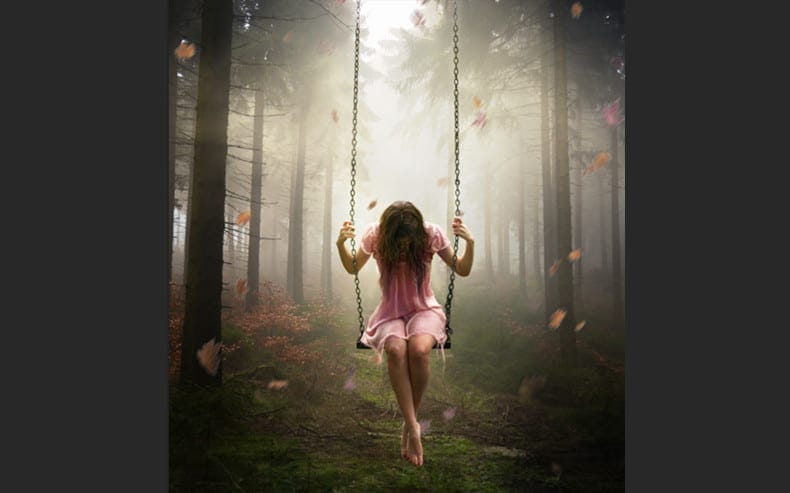
Step 19
Add some leaves to the image to create a motion effect. Place the leaves in the image, make sure this layer is below the one with the model.

Go to Filter – Blur – Motion Blur. Se the angle to 53 and the distance to 40.

Step 20
Create a new adjustment layer “hue/saturation” and reduce the saturation to -45 make sure you use a clipping mask to affect only the leaves.

Step 21
Create a layer mask to the layer of the leaves and hide some of them also you can reduce the opacity of the whole layer if you need to.
Step 22
To add leaves to the floor you need to change the perspective of the image. When you place them they are going to look like the image above so press right click and select the option “Perspective”
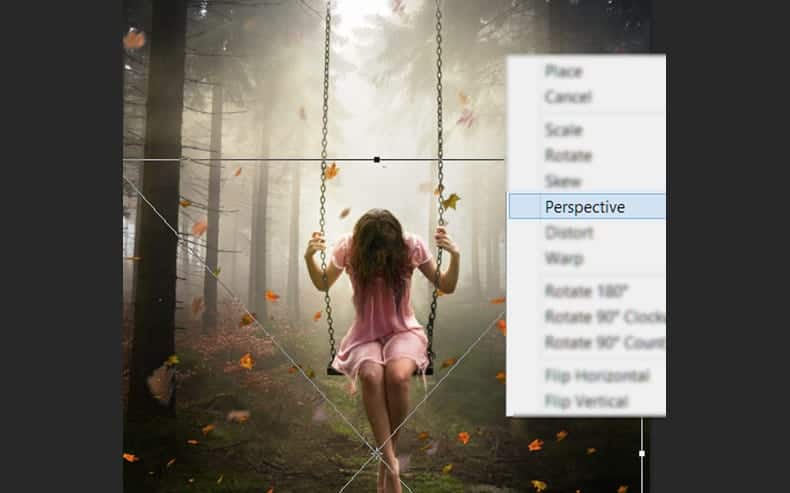
Pick the right corner of the top, press shift so that the image will not be distorted. Push it to the center of the image.

Now pick the corner of the bottom and do the opposite, push it away from the center. Press enter so save the changes.

Step 23
You can continue with the perspective until you are satisfied. Place the image correctly add a layer mask to the layer and hide the undesired part. Also reduce the opacity of the layer to 60%.
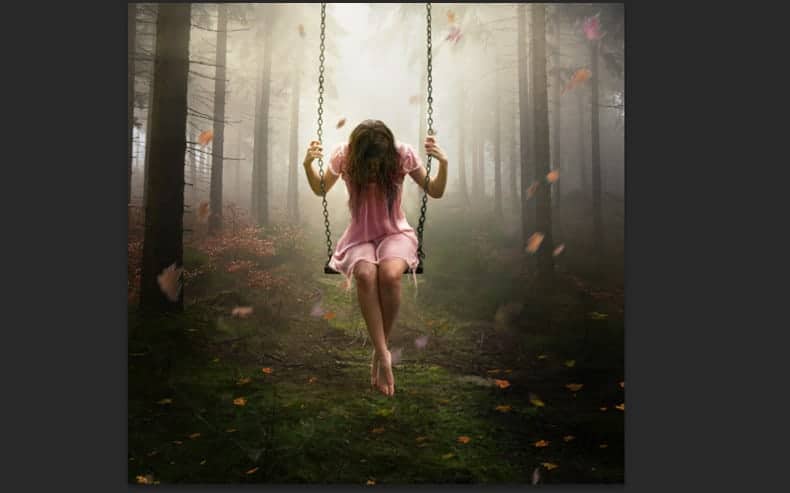
Step 24
Let’s add some bushes in the bottom of the image to do that, place the image of the bush. Then go to filter – blur – Gaussian blur. Use 5 of radius.
22 responses to “Create a Dreamlike Photo Manipulation of an Emotional Girl with a Dramatic Lighting in Photoshop”
-

wow its very nice tutorial Thank You
-
Looks a decent instructional exercise, tragically two stages (stepson and 12) have pictures missing so we can’t perceive what you did to get any impacts. Additionally, a portion of the stock is never again accessible, yet we can work around that.
-
Hi !
Thank you so much for sharing your tutorial.
It helped me a lot. I Came up with this…
http://fav.me/dd0x9t4-
Wow that’s impressive! Thanks for trying out the tutorial!
-
-
Thank you!
-
Awesome! Thank you Andrea!!
-
thank you very much for this tutorial
-
Wow!…verry cool tutorial,…thanks
-
Great tutorial, thank you!
-
good work , help me to create a good idea
-
Thank you, Andrea, for this lovely tut. Didn’t follow it completely, but your work sure inspired me :-) !
My result. -
pretty neat tutorial. I use PSE 9 so I couldn’t follow along exactly, but I still learned a lot and it was fun! Mine didn’t turn out exactly like yours but pretty close. http://jdyjdyjdy.deviantart.com/art/Tutorial-dreamlike-561989308?ga_submit_new=10%253A1442991390
-
A very good tutorial
Well done -
Sencillamente Excelente!!!
-
Looks a nice tutorial, sadly two steps (steps11 & 12) have pictures missing so we can’t see what you did to get any effects. Also, some of the stock is no longer available, but we can work around that.
-
Thanks so much learned alot from this
-
I’m glad
-
-
Awesome, I really love it. Thanks you. <3
-
I’m glad you like it!
-
-
Thank you so much. This is fantastic and so helpful.
-
Amazing!!
-
I’m glad you like it
-
Leave a Reply