Step 14
Import the debris brush. Create a new layer and create some debris using black color.

Step 15
Add a layer mask to the debris layer and hide all debris that falls outside our guy by painting with black over the areas you want hidden.

Step 16
Create a new layer. Choose the standard Chalk Brush and lower its size to 30 pixels. Using red and black paint some wounds on the chest, abs and his left arm. In order to create a wound paint with red a loose line and then gently paint with black around it.

Step 17
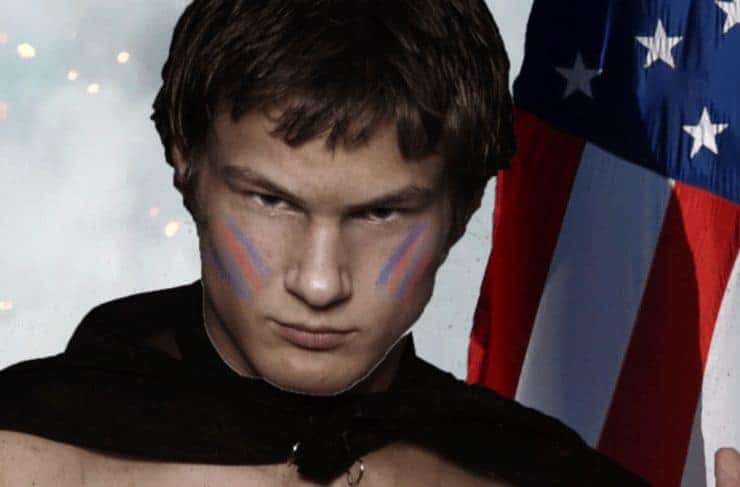
Create a new layer. Use red and blue to paint some war paint on the guy’s cheekbones. I sampled the colors directly from the flag.

Step 18
Open the resource “Statue of Liberty”. Copy and paste the statue into our working document. After you’ve converted the statue layer into a smart object add a layer mask and using a round soft brush paint over the layer mask to hide some of the bottom parts of the statue. This will make the statue blend nicely with the background sky.

Step 19
Make a new layer and clip it to the statue layer. Change the blending mode to Overlay. Paint with some blue sampled from the flag the right side of the statue and with some red paint the left side.

Step 20
Open the resource “Flare1”. Select the upper left lens flare using the Rectangular Marquee Tool. Copy and paste the flare into our working document and convert it to a smart object. Place it as indicated below.

Step 21
Change the blending mode of the lens flare to screen.

Step 22
Open the resource “Lens Flare2”. Unpack the archive somewhere on your disk. You will see that there are 130 lens flares. Choose lens flare 059 and open it in Photoshop. Copy all and paste into our working document over the already existing flare. Convert the lens flare into a smart object and change the blending mode to screen.

Step 23
You will notice some subtle but visible hard lines around our lens flare. Group the two lens flares together (Shift-click on each and press Ctrl + G). Add a layer mask to the group and using a round soft brush hide the hard edges by painting over them in the layer mask with black.
6 responses to “How to Create an Electrifyingly Patriotic Manipulation in Photoshop”
-
Amazing result, such a great image choice! Thanks! :)
-
Well..That is very cool !
-
Where are the great artists as Jenny Le, Santhosh Rao and Daniela Owegoor?
This man is badly cut, there is no retouch this image.-
looks just as good as those artist imo
-
-
But how do I photo shop abs like that? Asking for a friends okcupid profile.
-
for a ‘friends’ profile haha ;)
-


Leave a Reply