
Step 5
When you finish select sky add Layer Mask to remove background, use button in Layers panel or by going to Layer > Layer Mask > Reveal Selection. Once duplicate this layer, because we will need it later. To do this, use Cmd/Ctrl + J or go to Layer > Duplicate Layer.

Step 6
Use Brush Tool (B) with settings Size: 175px, Opacity: 20-65%, Hardness: 0%, Flow: 100%. On Layer Mask remove some of the mountains and texture from the first image to get a smooth transition of the landscape. Use different values brush Opacity to make the transition a realistic and correct. The most important thing that you could not see edge of the back image and texture of the first image exactly transitions to the second.


As can be seen from the previous picture, I remained almost invisible places on the seam of images, so I moved a copy of the desert under the previous layer (Cmd/Ctrl + [ ) and reduce the size of the texture (Ctrl/Cmd+T or Edit > Free Transform) to become more shallow ( only very little, it will create the effect of an inhomogeneous soil). Work on the two layer masks to get a smooth and harmonious landscape. Here’s what I got.

Step 7
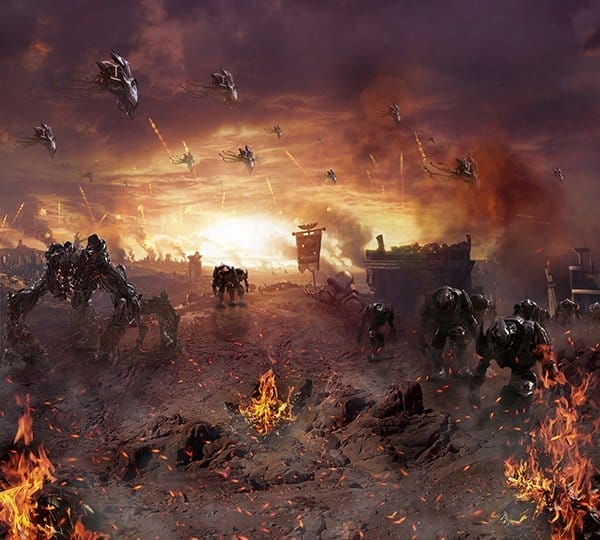
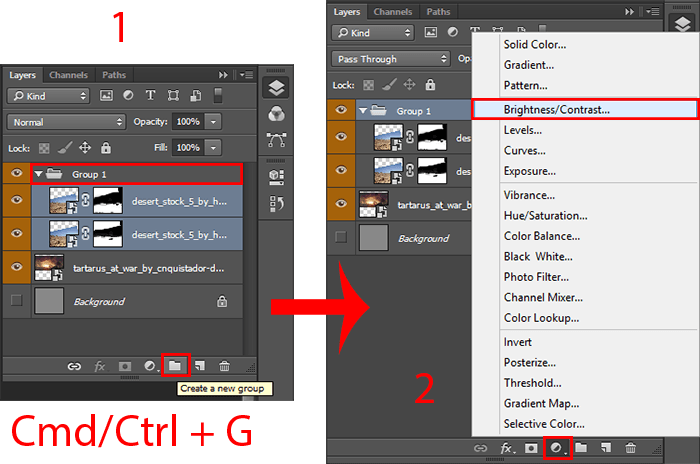
I was satisfied with the result and start colored ground to make same color as main image. For this I used two adjustment layers. But first, I have group with the soil layers into one group (Cmd/Ctrl + G or go to Layers > Group Layers) and applied the adjustment layers to it.
Step 8
We now proceed to adjustment layers. Add first adjustment layer “Brightness/Contrast” (Layer > New Adjustment layer > Brightness/Contrast… or click on icon on a Layer panel). Set Brightness: -150, Contrast: 100. So I did the soil is very dark and you can now begin to color. Be sure to clip adjustment layer to lower group. Set Opacity: 77% to this layer.

Step 9
And now I worked with ground color and add adjustment layer “Color Balance” (Layer > New Adjustment layer > Color Balance…). Set to Midtones and Shadows settings, like on image below. That ground is suitable shade, I made the shadows and midtones more purple.
10 responses to “How to Create an Epic Scene of Alien Invasion in Photoshop”
-

boring :)
-
lol
-
hiii
-
-
Can we get the PSD thanks!
-
Great tutorial!
-
wowww amazing artwork kindly upload PSD file i am your big fan.
-
U should try it ??
U can download the app easily.. portable app -
????
-
gooddd
-
Very good!! Thank you for sharing
Leave a Reply