

Create normal new layer and make a big spot on a book with Brush Tool (B) (Size: 700px, Opacity: 100%, Color #4ccafe). Set for this layer Blending Mode “Color”. Therefore, the next new layer is the flight to your imagination and desires. I added to the niche flying particles. You can use whatever you like. There are no restrictions. I made a small list of the used brushes if you want to repeat my result. Use different values of Opacity (30% -100%), change the brush size, form (I use brushes “NagelSeries37-Spots01”, “NagelSeries37-Spots02”, “The Fairy Dust Brush”, “Sampled Brush 1 6”, “splatter 2”) and use different combinations of colors (I use #4ccafe and 97dffe). All you want. In this brush set a very different brushes.

Mandatory condition is create a new layer after every one or two strokes, it will allow you to change the Opacity of every stroke and merge there layers (Cmd/Ctrl + E).

Step 27
Now freeze a book :). For this purpose on two new layers (there layers as Clipping Masks and above the layer with book shadow) I use brush “Sampled Brush 2 40” (Size: 80px) with color #95a2a8 I drew on the cover of book the frost. Change Opacity (40% -70%) to achieve better results.

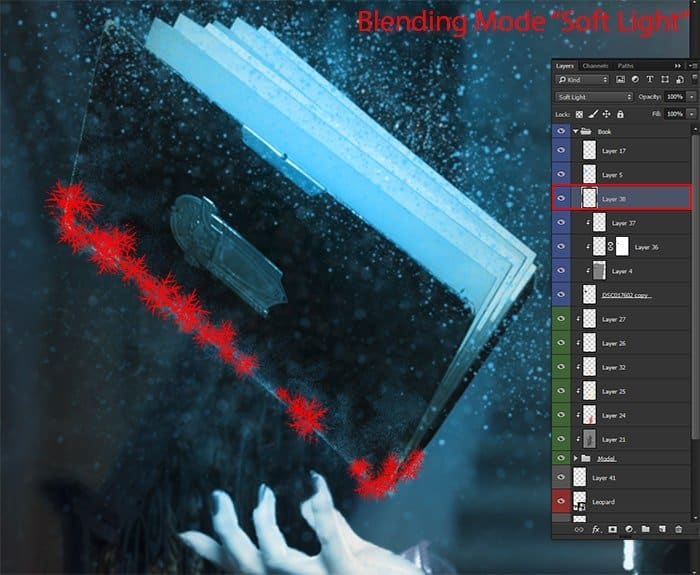
Add the final layer for outside snowflakes. This layer is located under a layer with a blue glow and not like Clipping Mask. Brush form “Snowflakes”, Size: 30-40px, color #95a2a8. Layer Blending mode – “Soft Light”. That’s it! With a book on this, we finish. A little later, when we will add basic lighting effects, we will add a few details, and now add the flying pages.
Step 28
So, the flying sheets. For the beginning we were a little scattered them on the floor to further understand how placing flying sheets. Place image “burnt_music_sheets_png_by_frozenstocks-d5prud7” into working document and that return to Step 8 (where you make a floor), place sheets, but in this case, I recommend a little to reduce its size. Layer with notes is located under a layer of shadow on the model. Create a group “sheets” and work with it there (Cmd/Ctrl + G). So you do not get stuck in layers.
25 responses to “Create This Charming Magician with Enchanting Effects in Photoshop”
-

Awesome!!!!
-
Amazing tutorial, though some images just won’t load.
-
love this tutorial… thanks!
-
Excellent tutorial. Thanks!
-
wowwww magnificent work its really coooool i love it can u upload PSD file
-
This looks better than in some of the games.
Good work
-
PTS please tell me, thanks.I enjoyed it.
-
Why not have the psd file
-
The “Fire stock” image is deleted from deviantart :(
-
please give the PSD to me,thanks.I very like it.
-
Awesome !!
-
how can i get the full materials, the pictures the exact one
-
Yw
-
Thank you! :)
-
Thank you very much!
-
actually I‘m a Chinese, I think it’s a pretty good tutorial, and unfortunately, as a Chinese I can’t download the materials, thanks a lot. (sob~sob~)
-
-
Very Impressive
-
Good
-
Thank you!
-
-
Nice
-
In love with it <3 <3
-
Thank you very much! I am very pleased!
-
-
amazing magical effect….totally awesome
-
Thank you sooo much! I´m really glad you like it!!
-
wclm…dear
-
Leave a Reply