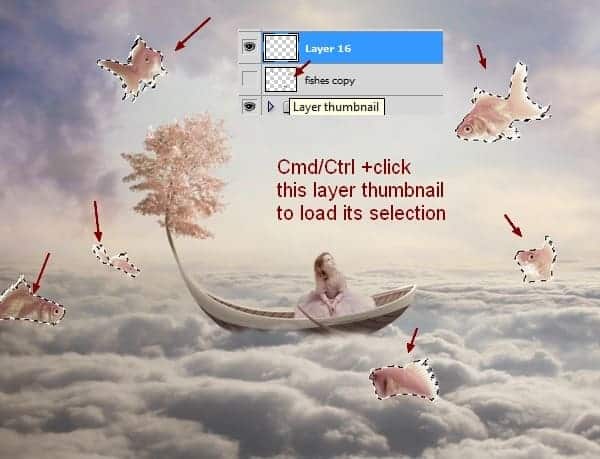
Step 40
Make a Hue/Saturation adjustment on the top and change the Yellows settings:

Here is the result after erasing the top left and the middle right of the pic with a soft black brush:

Step 41
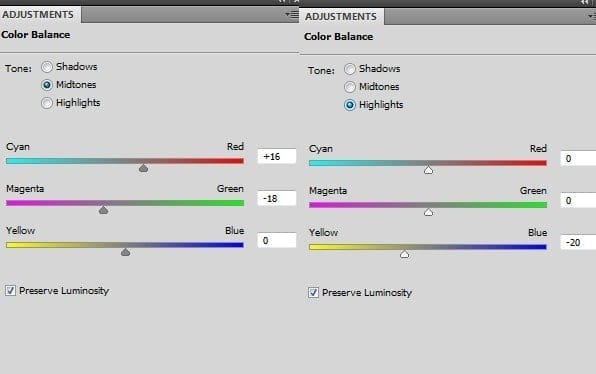
I used Color Balance to give the scene some sublte cool color:

On this layer mask use a soft black brush with the opacity about 20-25% to erase the most of the clouds part:

Step 42
Use Photo Filter to add more warm color to the scene:

Erase the right edge on its layer mask:

Step 43
I used Vibrance to boost the final color:

Reduce the saturation of some parts below:

Step 44
Final step (optional): Press Cmd/Ctrl+Option/Alt+Shift+E to merge all visible layers. Go to Filter > Sharpen > Unsharp Mask:

On the Filter Mask use a soft black brush to erase the details you find sharper than you expected:

Download the PSD
Final Results

Tutorial by Jenny Le
17 responses to “Create a Fantasy Fish Scene above the Sky”
-
perfect👍
-
Thank you for this… I learnt a while lot
-
Love this Photoshop Tutorial.
-
Beautiful lesson
-
can someone please tell me the settings at step 5 ?
-
kerrreeeeennn….
-
Very interesting, easy and useful for everyone. Thanks for sharing.
-
I tried before but not properly.. here is the link of my image
I am a photographer and want to do something new like this
-
Has anyone ever tried this? I have CS3 and CS4 can I do this tutorial in either one of these?
-
I think I know, masking already stated to change on evry enterface ie face! Working with layer manupulation can sort your background too.
-
I LIKE this tut! Can’t wait to give it a try!
I wanted to share a link for goldfishes if anyone is interested:http://artistengg.deviantart.com/art/Goldfish-Stock-216387973
Su
-
I just read that this file is to be used only on DeviantArt, so, my apologies!
-
-
Thank you for this tutorial fantanstique I had fun doing:
http://cartes-mireilled.eklablog.com/montage-scene-imaginaire-couleur-pastel-a112633738 -
Nice Tutorial..
-
очень нежная работа!!!!!!
-
I l!ke blending, masking, adjsuting colors using CS4 photoshop too, keep us uptodate then,, I like ambigious pictures u know.
-
do u know any good background changer app?
-

Leave a Reply