Tip: Is important that all you elements or at least most of them, are smart objects because you can always go back if you make a mistake, is a lot easier to fix it.

Step 14 – Layer mode
Change layer mode to screen and reduce the opacity of the layer to 50% and the fill to 80%

Step 15 – Fire
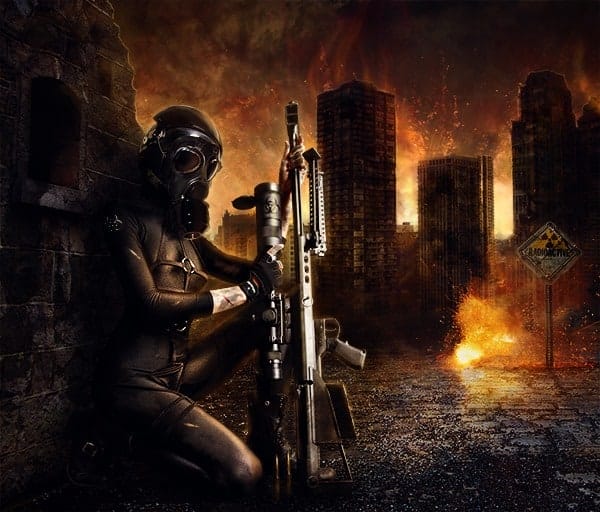
Add another layer with the fire and repeat the process add a layer mask to it and hide the edges to blend the image.

Step 16 – Screen
Change layer mode to screen
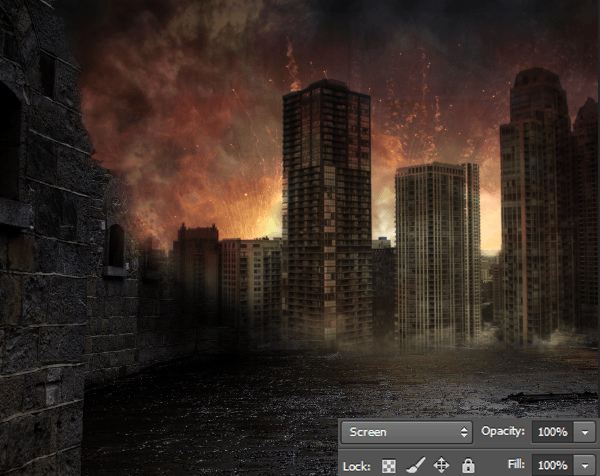
Step 17 – Duplicate
Duplicate the layer and rotate the image, to make the fire from behind the building

Step 18 – Reduce Opacity
Change the opacity of the layer to 55%
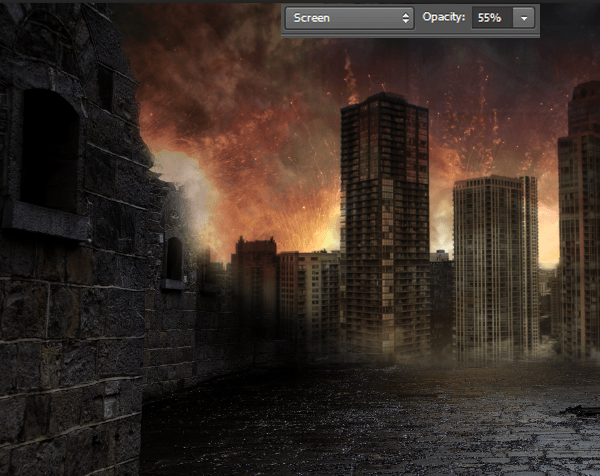
Step 19 – Decay
Add some texture to the buildings, for this you can use images or brushes or also mix both. For the front wall you can use an image, place the image and reduce the opacity so you can see underneath that layer.
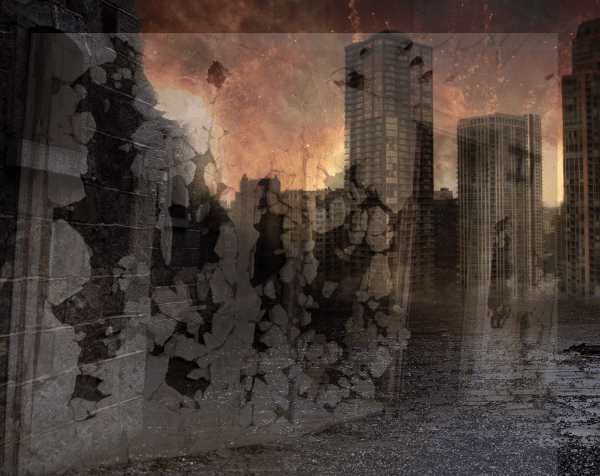
Then create a layer mask and hide most of the layer just leaving some of those holes in the wall like this:

Change the layer to soft light and reduce the opacity to 70%

Step 20 – Cracks
For the city buildings far away you can use crack brushes with a layer in soft light mode, you can change the opacity of the layer and also of the brush to get better results.

Step 21 – Fog
You can add some dark fog in the bottom of the buildings to blend the image. The brush can be set at 40% of opacity. Also you can change the opacity of the layer to 70% or 60% if you think is too strong.

Step 22 – Painting fire
Now paint some flames on the top of the buildings, use orange and yellow tones to create the flames, you can start making some lines like that

Create a new layer and create bigger flames and with less opacity, you can set your brush to pen pressure or use it at 30% use a soft round brush 
Now pass the blur tool to it, to the first ones you made also you can use the smudge tool

Add more blur and also create a new layer and paint more around the flames, reduce the opacity of the layers to 60% and you will have something like this:
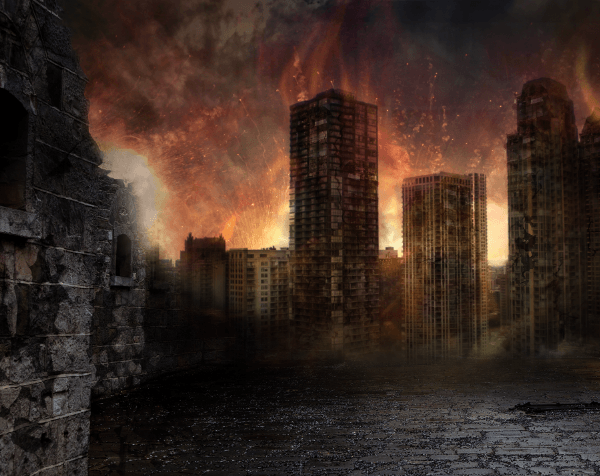
Step 23 – Shadow
Add a new layer and paint with a soft round brush to paint at the bottom of the buildings.

Also add shadows over the buildings too.

Step 24 – Reflection
Now pick a yellow tone and a fine brush can be 5px and paint in the edge of the wall to create the reflection from the fire behind
9 responses to “Create a Fiery City War Scene in Photoshop”
-
I just review your every single blog post related photoshop work..and it was awesome..will be back to read this blog soon.
-
This is really fantastic. The unlimited access makes it even better
-
please give me a link to YT video for that work
-
This is a decent tutorial, but be mindful of the perspective on the buildings in the background. It is way off as the picture you pulled it from was taken from atop another building, but the camera in the collage is at ground level. Just an FYI.
-
Its awsome!
-
Hi
Im realy Like this
why you not attach pdf file ( this Learn in PDF ) for easear learn and download that ? if that happens its will be perfect
sorry for My bad english :)-
easear = easier ;)
-
-
no commet? very good!!
-
DRTFIPHGFFLKJH]HG

Leave a Reply