Learn how to create photo manipulation of a house in a gloomy yet panoramic scene with Photoshop. In this tutorial, you’ll learn how to turn ordinary house image into a dreamy scene by adding some dramatic lightning and subtle rays of light. Throughout the tutorial, you’ll learn techniques that will help you create better photo manipulations. In this tutorial, we will create a gloomy scene of a house with dramatic lightning. We will use some essential techniques for doing photo manipulation. We will use masking, brush tool, some filter, color adjustments all through the steps in this tutorial. Use Adobe Photoshop CS3 or higher, don’t forget a glass of coffee and optionally a pack of cigarette for your companion. Ready?
Tutorial Resources
- House– Freeimages
- Cloud– RiskAlittleLight
Preview of Final Results

Step 1
First of all, open the house image in photoshop. This image will be the background layer in the layer panel. Duplicate the house image (Ctrl+J) one time. Rename this duplicate layer house.

We can resize the document into a smaller size by going to image > image size. Set the size as the one indicated in the screenshot below.


Step 2
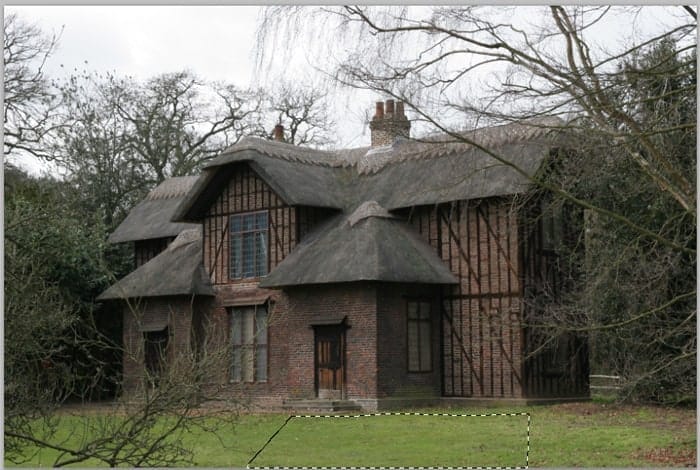
We will do some editing on the house by hiding some parts unnecessary like the twigs in front of the house. To do this purpose, we will cut out some parts of the lawn and use the cut out to cover the front twigs. The screenshot below shows the part of the lawn to be cut out. It is indicated in the red part.
Take the cutting tool that is familiar to you (I myself usually use the pen tool(P) to do this) and make a selection to the part to be cut out. After selecting the part, duplicate (Ctrl+J) to cut out it into a new single layer.

Now give this cutout layer a layer mask by going to layer > layer mask > reveal all. Mask the edges of the layer to make it well blended. Use a very soft (0% hardness) round brush (B) with low opacity to do this purpose. Here is the result:

Duplicate (Ctrl+J) the cutout layer one time. Move the duplicate to the part where the twigs are still visible.

Mask some the edges of this layer to have the result like the one below:
12 responses to “Create Gloomy House Scene in Photoshop”
-

totally helpful:)))
-
How do I “Mask some the edges of this layer”? I have cut out the section of grass as instructed, but there is a line on the edge of the cut out that I have not been able to remove or blend so the line is not seen. Guidance would be appreciated.
-
Step 21 – #fdg601? (cs 5.1 doesn’t appear to be taking the ‘g’ in this color?) is this my mistake?
-
I believe that’s a 9 – not a g.
Sorry for the confusion! I’ll update step 21 to clear things up.
-
i had the same problem
-
-
I am working on this tutorial and thus far this is great!!!! I do have a few little questions and that is like in step 28 where the value in the radius appears to be 3,7 ? what is that suppose to be with a comma between the two numeric values?
-
It should actually be a period; not a comma. So the correct value is 3.7 and not 3,7.
-
-
The second time I do a lesson and find new secrets. Excellent lesson. There is much to learn, very useful. I’ll come back to it and do a third time. Thank you very much. It’s my pic http://j-p-g.net/if/2015/09/15/0335689001442323082.jpg
-
Wonderful tutorial with detail. Thanks.
-
Stunning lesson. THANKS!
-
I’ll try it ^-^
-
Que Maravilla de Foto
Leave a Reply