
See the result of shadow painting (as yours should looks like this).
Change blending mode of this layer to Multiply.

Step 26
Add new layer (Layer > New > Layer …, Shift + Ctrl + N or marked shortcut). Choose big soft round brush and set its opacity to around 25% and color to light blue – #829ab6. Draw some light strokes on trees. At first, take care of trees which are far away. Light source will be in the centre of image, remember :).

For more gently effect, decrease opacity of this layer to around 50% and change its blending mode to Screen.

Step 27
Add new layer (Layer > New > Layer …, Shift + Ctrl + N or marked shortcut). Choose big soft round brush and set its opacity to around 25% and color to light blue – #829ab6. Draw light stroke on tree in the left side of picture (the one which is close to viewer).

Step 28
Duplicate this layer – drag it and drop to “New layer symbol”. Then transform it (ctrl + T – or go to Edit > Transform > Free) and fit it to tree on the right side – at first, flip it horizontally (by free transform or Edit > Transform > Flip Horizontal), then drag it and drop where is shown.

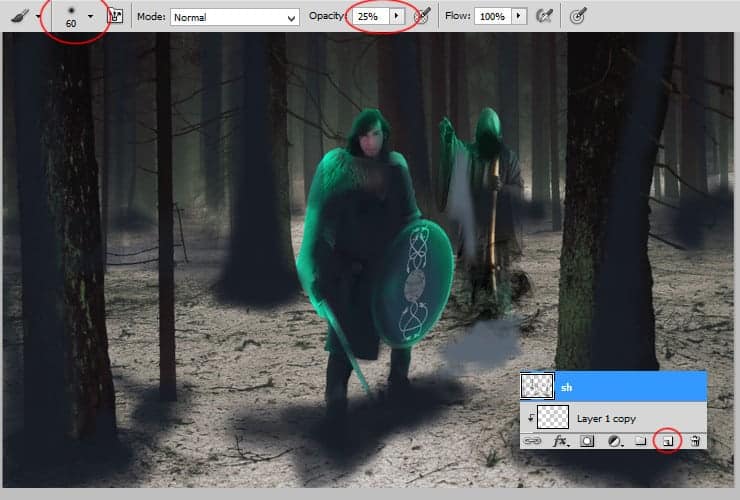
Step 29
Add new adjustment layer (Layer > New Adjustment layer > … or marked shortcut). Decrease saturation, by adding Hue/Saturation layer.

Step 30
Let’s cooler atmosphere. Add new adjustment layer (Layer > New Adjustment layer > … or marked shortcut) with color fill. Then, change blending mode of this layer to Hard Light.

Step 31
Make just more lights from magical epic swirl, which we’ll place. Add new layer (Layer > New > Layer …, Shift + Ctrl + N or marked shortcut). Choose soft round brush, around 50px. Set its opacity to around 50%. Use #06a999 color and draw strokes of light on characters and trees.
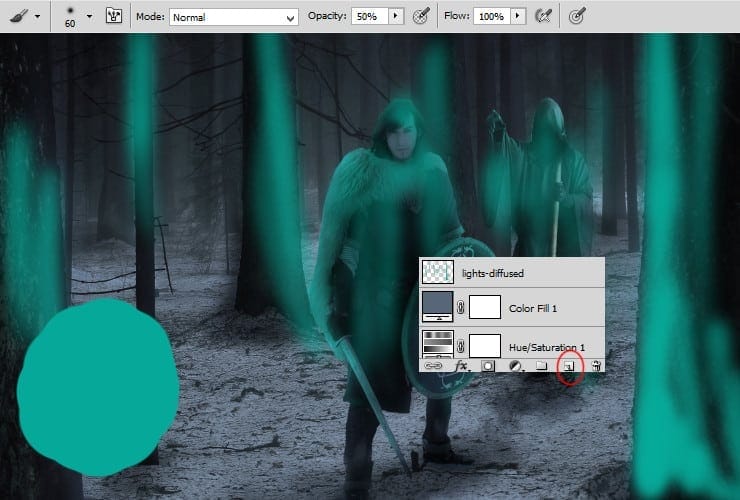
Now, change blending mode of this layer to Soft light. It will be looking like diffused light.

Step 32
Prepare your picture to magical swirl – make frame of particles. Drag and drop “background_61” to your file. Choose big, soft round brush and mask everything, beside right bottom corner of picture. Trust me :).
8 responses to “How to Create a Gothic Photo Manipulation of a Brave Warrior in Photoshop”
-

Awesome tutorial! Just none if the images want to load for me :(
-
Hey thanks for letting us know :)
The tutorial images have been fixed!
-
-
How to Design Responsive School ID in Photoshop. please make a tutorial. thank you.
-
Thx
-
msRiotte, Thanks.Another amazing lesson. You wonder. I experienced a huge plantation during this lesson. http://j-p-g.net/if/2015/09/24/0926954001443114217.jpg- my work
-
Please help me , i have a problem with the brush.
Look this http://es.tinypic.com/r/2sbx1r8/8 , my brush dont paint like you brush, dont have the same effect and i cant do a lot of projects.
Please why?? -
thanks for the very great tutorial, since i was new in this ps photo manipulation and i can’t do everything like u do, so i take couple of layers from your psd, i combine my layers with yours, is that ok?
by the way here is my final result photo :
http://williambunarto.deviantart.com/art/Green-Wizard-521571979-
sir.. william. can u help me.. can u send me ur photoshop format a PSD on that Photoshop toturial. thank you
send me via my email
[email protected]
-
Leave a Reply