
Today I will show you how to create an awesome ice cream text effect! The process is simple enough for any level Photoshop lover. We will use the basic tools and effects along to achieve the final outcome in short time. So let’s begin!
Tutorial Details
- Program: Adobe Photoshop CS6
- Estimated Completion Time: 45 minutes
- Difficulty: Beginner-Intermediate
Step 1
Open a new file (File > New) in Adobe Photoshop with the following settings.

Step 2
Fill background with the color #aff8fd.

Step 3
Using soft brush with white color #ffffff and draw a dot light in the center of background, then lower Opacity = 72% .

Step 4
Pick the Rectangle tool and set the values like this

Step 5
And you’ll get a vertical stripe. Fill it with white color #ffffff. Then we duplicate (Cmd + J) the stripe and place them as this image below.

Step 6
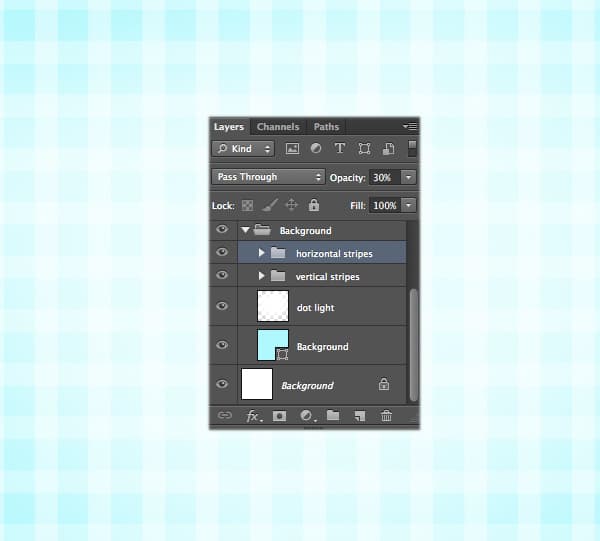
We place all of vertical stripes to a new folder. I named this folder as ” vertical stripe ” then lower Opacity = 40%

Step 7
Duplicate the (Cmd + J) the ” vertical stripe ” older , then we rename it as ” horizontal stripe “, and rotate this folder to 90 degree then we set lower Opacity = 30%
Step 8
We’re done with the background. Now we use Arial Black font and create this text. Right – click and rasterize the text. Place this text to a new folder and name it as ” Cone ” . Place a copy of the text shape off to the side of the artboard, which we will use later.

Step 9
Double – click on text layer, from menu choose Blending mode . Add ” Bevel & Emboss “.

Add ” Inner Shadow “

Add ” Inner Glow “

Add ” Inner Glow “

And we got result like this

Step 10
Add layer mask for the ICE text, then we use hard brush to erase some parts like this image below.

Step 11
Duplicate the (Cmd + J) the ICE text, place the ICE copy under and move it down a little bit, keep the layer style as the way it is, but the ” Gradient Overlay “.

And we got result like this.

Duplicate the (Cmd + J) the ICE copy text, place the ICE copy under and move it down a little bit.

Step 12
Next, we will create stripes for the cone biscuit. Grab the Rectangle Tool and draw some lines like this image below.

Step 13
Collect all of the stripe layers into a single group. Merge all of the shapes together. You can do this by selecting the groups by holding the Shift key, then right-click to open the options window and choose Merge layers. Now the shapes turn into image. Double-click on this layer and from menu choose Blending mode . Add ” Bevel & Emboss “.
11 responses to “Create an Ice Cream Text Effect in Photoshop”
-

Merci
-
poopy but awesome!
-
woaaaaaaaaah
-
wow
-
I have just tried this great thanks for sharing.
-
It’s really nice
-
quite interesting :)
-
this is really good <3
-
how i can download this tutorial with pdf
-
ctrl + p = print
then save as pdf
-
-
Wonderful
Leave a Reply