

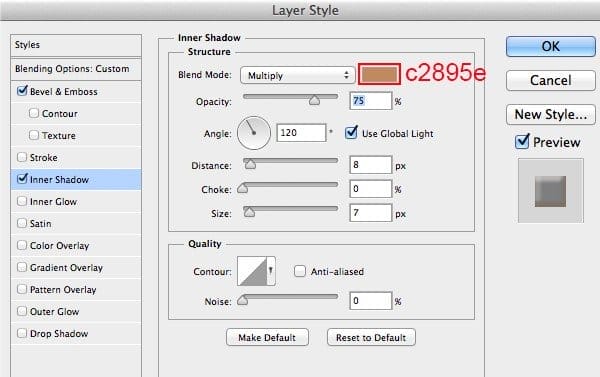
Add “Inner Shadow “
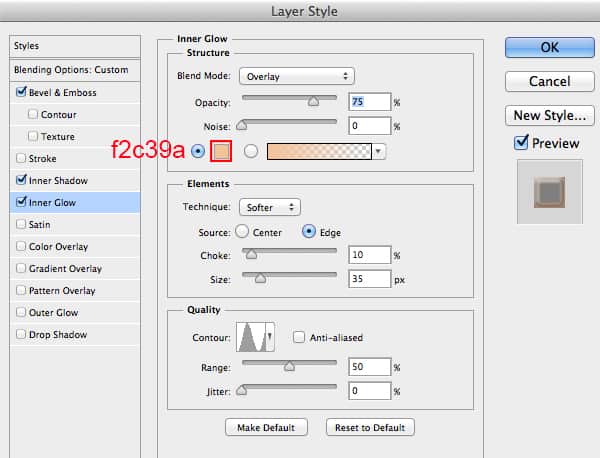
Add ” Inner Glow “
Add ” Gradient Overlay “

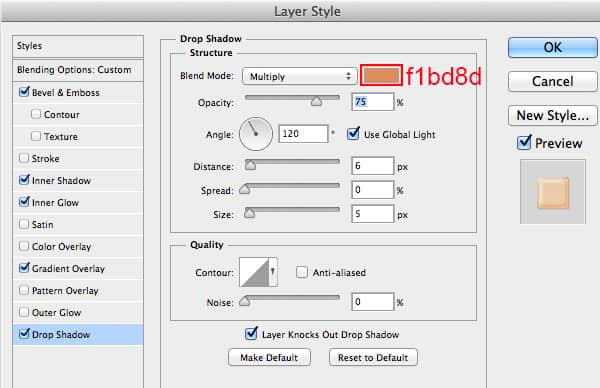
Add ” Drop Shadow “
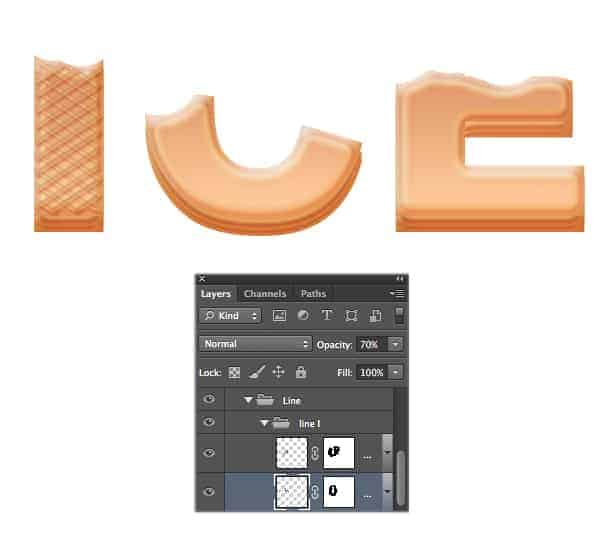
Then we lower Opacity = 70% and we got a result like this.

Step 14
Now we add layer mask and use hard brush to erase some parts like this image below.

Step 15
Duplicate this group, and go to Edit > Transform > Flip horizontal and we got a result like this.
Step 16
Repeat the previous steps for the rest of the text. And you should get result like this.

Step 17
Now we will create ice cream. Back in Step 8, I mentioned placing a copy of the text shape outside the Artboard. Go ahead and grab a copy to work with. Place the text shape as shown in the image below.

Step 18
In this step, we will create pink ice cream for the text shape ” I “. Double-click on this layer and from menu choose Blending mode . Add ” Bevel & Emboss “.

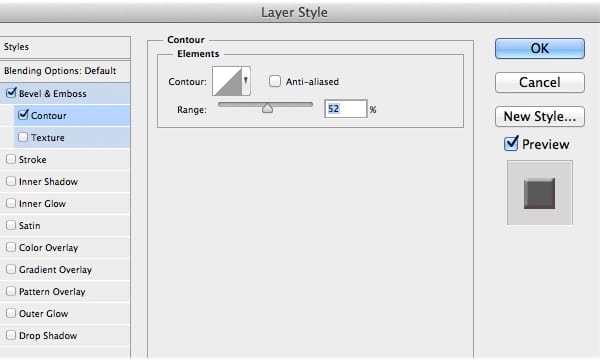
Add ” Inner Shadow “.

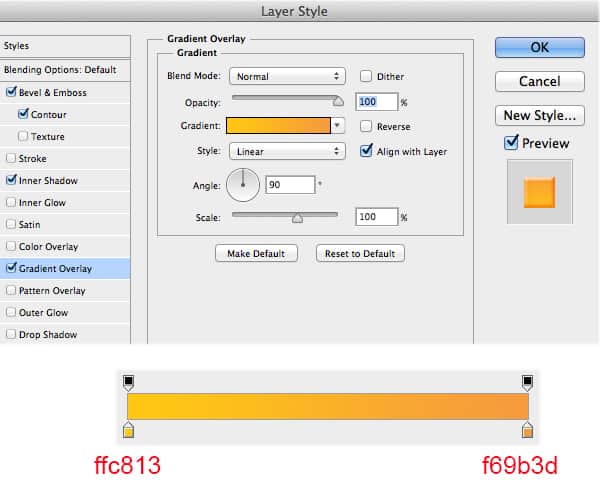
Add ” Gradient Overlay “.

And we will get a result like this.
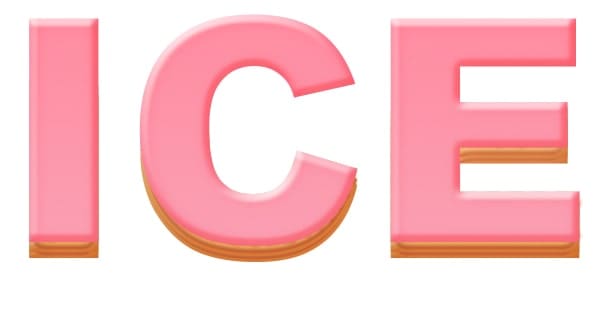
Step 19
As you know , the ice cream is never perfect. Now we add layer mask on this layer and use hard brush to erase some outside part of the ice cream.

Step 20
Duplicate the ice cream part that we had created. In this step, we will create yellow ice cream for the text shape ” C ” . You should delete the layer mask for the text shape copy. Double-click on this layer and change the setting.

We change ” Inner Shadow ” setting.

We change ” Gradient Overlay ” setting.
And you should get result like this.

Step 21
Now we add layer mask on this layer and use hard brush to erase some outside part of the ice cream.

Step 22
Repeat the previous step to create green ice cream for the text shape ” E “. Double-click on this layer and change the setting.

We change ” Inner Shadow ” setting.

We change ” Gradient Overlay ” setting.

And you should get result like this.

Step 23
Now we add layer mask on this layer and use hard brush to erase some outside part of the ice cream.

Step 24
Create a new layer and place it below, now we add shadow for the ice cream. We use soft brush with color #a25229 and draw the shadow then lower Opacity = 81%. You can use the layer mask to erase unwanted shadow area.

Step 25
Now, we will create chocolate syrup over the ice cream. First, we grab a copy of ICE text shape and place it on top of layers. Double – click on text layer, from menu choose Blending mode . Add ” Bevel & Emboss “.
11 responses to “Create an Ice Cream Text Effect in Photoshop”
-

Merci
-
poopy but awesome!
-
woaaaaaaaaah
-
wow
-
I have just tried this great thanks for sharing.
-
It’s really nice
-
quite interesting :)
-
this is really good <3
-
how i can download this tutorial with pdf
-
ctrl + p = print
then save as pdf
-
-
Wonderful
Leave a Reply