
Step 12
Proceed to add fire to the head of the model. Create a new layer above the fire on shoulder folder. On this new layer, paint white particles and fire around the model’s head.

Duplicate (Ctrl+J) the fire and place it above the new layer. Scale its size and give it a clipping mask:


Finally, duplicate the BG layer and place the duplicate above the fire layer. I named this layer gradient. Give this layer a clipping mask and set this layer to overlay at 40% opacity. Select all the layers and group them in a folder. I named this folder fire on head.

Step 13
Add the fireflies image above the fire on head folder. Scale its size and take warp to alter its shape a bit. Set this fireflies layer to color dodge blending at 100% opacity.


Step 14
Create a new layer above the fireflies layer. Fill this layer with black. Set its blending to color dodge. Take a very soft round brush set to opacity of about 5%. On this new layer, paint some color which is white, orange and yellow to give some highlight on the model.

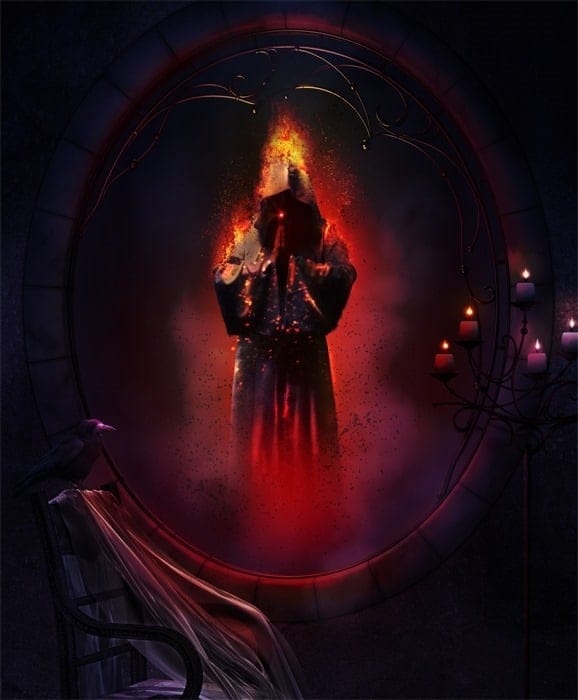
Here is the result so far…..

Step 15
Next add the particles image to the scene. Place it around the model. Set the particles image to normal at 25% opacity.

Step 16
Create a new layer on which we will paint some highlight on the model’s face. Take red color (#fc6703) and a soft round brush. Stroke the brush on areas around the face as indicated by selection in the screenshot. Then, set this layer to soft light:


Create another new layer to paint soft yellow on areas around the face as indicated by selection in the screenshot. Set this layer to soft light at 100% opacity. This will give more vivid highlight on the face. Finally, group all these layers in a folder. I named this folder highlight on face.


Step 17
Proceed to create light on the fingertip of the model. We will apply almost similar ways as we did in previous step when creating or adding color to the scene. Go to layer > new > group to create a folder for the light layers. I named this folder light. Open the folder and create a new layer within this folder. Take a very soft round brush set to about 40 pixels size. On this new layer, create soft yellow light on the fingertip by clicking the brush on it. Then, set this layer to overlay at 100% opacity. I named this layer yellow.
22 responses to “How to Create an Infernal Scene in Photoshop”
-

Interesting
-
Thanks a lot for the great tutorials you are providing..but as suggestion..why you are not doing the tutorial in videos on youtube channel…it would be really great and more helpful for trainer and trainee
Thanks agaim for the great effort -
amazing tutorial can u share again psd link not working for learning
-
good work!
-
I lik dis
-
I am too retarded to complete dis
-
Please re uploaded PSD file because when i click on download showing 404 not found error, this is best work for me i want check how did you do this
amazing outstanding fantastic best work master blaster -
Can you upload the files again
-
Elegant, modern, very different..
-
Beautiful, creative and acutely enjoy able!
-
Thank you for the tutorial.
Very good lesson but it lacks some details, it will be well to repeat the turoriel with more details -
Awesome.
Thank you for sharing -
how do u create the smoke
-
Where is the Raven image?
-
how do you create the smoke layer
-
simple usa un pincel de humo lo encuentras en la pagina de Devian art
-
-
Amaing work you did there, you are great. I will give it a try
-
really awesome ad heart touching tutorials,but where is the contact us? how to contact you?
-
Very nice tutorial..
-
good tut
-
Very good tutorial!!
-
mazen
Leave a Reply