

Create another new layer above the yellow layer within the folder. Create soft white light on this new layer. Use smaller brush than the one used in creating the yellow light.

Step 18
Duplicate the light folder several times as needed. We will use the duplicates to add light on the candles. Move the duplicates to every candle. This will give more light to them. To determine the brightness of the light on the candles, we can place two duplicates on them. Select all the duplicated folders and regroup them in one folder. I named this new folder light on the candles.


Step 19
Next, we will make darker mood for the overall scene and let the reddish tone be more vivid. To do this, we will just simply duplicate the gradient layer (step 12) two times and place the duplicates on the topmost position in the layer panel. Set the first duplicate to overlay blending at 100% opacity and the second duplicate to overlay blending at 25% opacity. Mask on certain parts to the duplicates. Select the two duplicates and group them in one folder. I named this folder gradient.

Step 20
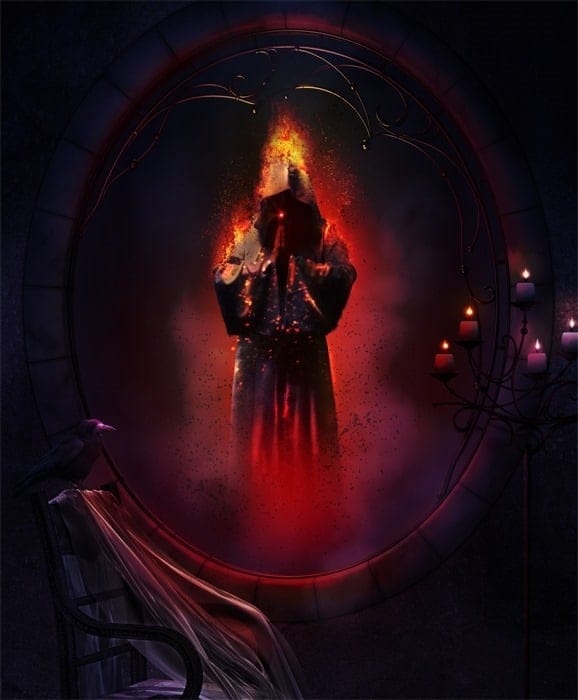
Now we will give color adjustment layer for the entire scene. Go to layer > new adjustment layers > photo filter. Set this layer to normal at 100% opacity. Make sure this layer is above all the other layers or folders in the layer panel. Here is the value and result of the image so far:


Then, duplicate the photo filter layer one time. Set the duplicate to color blending at 100%. Finally, group these photo filter layers in one folder. I named this folder photo filter. Give this folder a layer mask and mask on areas around the model and window to reveal the reddish tone on them.

Step 21
Go again to layer > new adjustment layers to give another color adjustment layer above all the other layers or folders. This time we will give channel mixer layer. Here is the value of the channel mixer and the result:


Finally, mask on areas around the model, lower part of window and light on the candles.

Step 22
From this step on, we will do some overall adjustment for the scene. Firstly, we will add highlight on the wall around the candles and lampposts. Create a new folder below the light folder previously made (step 17). I named this folder highlight on the wall and lamppost. Create a new layer within this folder. Take a very soft round brush and, on this new layer, paint soft yellow (#fecb04) on the wall around the candles. Set this layer to soft light at 100% opacity.
22 responses to “How to Create an Infernal Scene in Photoshop”
-

Interesting
-
Thanks a lot for the great tutorials you are providing..but as suggestion..why you are not doing the tutorial in videos on youtube channel…it would be really great and more helpful for trainer and trainee
Thanks agaim for the great effort -
amazing tutorial can u share again psd link not working for learning
-
good work!
-
I lik dis
-
I am too retarded to complete dis
-
Please re uploaded PSD file because when i click on download showing 404 not found error, this is best work for me i want check how did you do this
amazing outstanding fantastic best work master blaster -
Can you upload the files again
-
Elegant, modern, very different..
-
Beautiful, creative and acutely enjoy able!
-
Thank you for the tutorial.
Very good lesson but it lacks some details, it will be well to repeat the turoriel with more details -
Awesome.
Thank you for sharing -
how do u create the smoke
-
Where is the Raven image?
-
how do you create the smoke layer
-
simple usa un pincel de humo lo encuentras en la pagina de Devian art
-
-
Amaing work you did there, you are great. I will give it a try
-
really awesome ad heart touching tutorials,but where is the contact us? how to contact you?
-
Very nice tutorial..
-
good tut
-
Very good tutorial!!
-
mazen
Leave a Reply