
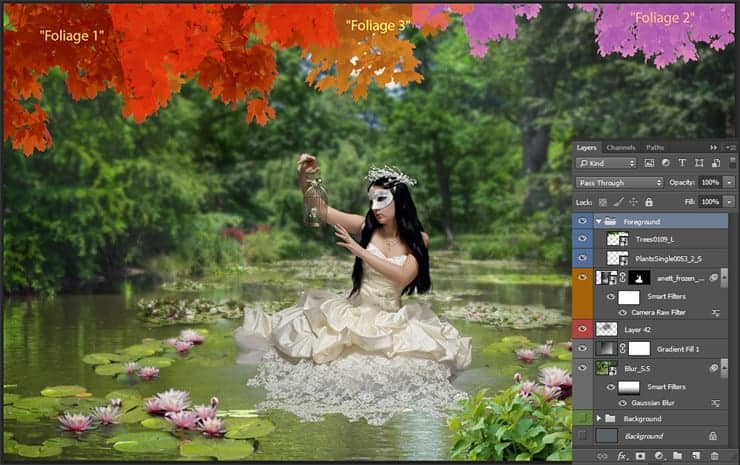
Step 18
Next, create a new group (“Create a new group” icon) inside this group and name it “Dragonfly”. Open image “Bugs PNG” (Cmd/Ctrl + O or File > Open). Repeat step what you did with water lilies (Step 12) and the position of dragonflies in the right places. Do not be afraid to experiment with their position or placement. You need Rotate, Scale, Flip each dragonflies (use Free Transform Tool (Cmd/Ctrl + T) or Edit > Free Transform/ Transform). The most important thing is not to exceed the size of dragonflies more than the size of the flower lily. And remember, the farther away dragonfly, so the size is getting smaller.
Step 19
The composition is completely ready and can add effects and work on realism. At first add effects to water lilies. Go to layer from Step 15 and create a new layer above it (use “Create a new layer” icon or Cmd/Ctrl + Shift + N) and set Blending Mode to “Color Dodge”. Take a Brush Tool (B), right-click to get the Context Brush Panel. Select the Soft Round brush preset, and set the brush Size to 100 – 200px, Opacity to 100%, Color: #cc6b7f and click on each flower to create a light effect. Reduce layer opacity to 49%, Fill to 43%.

Create one more layer (Mode: Normal, Fill/Opacity: 100%) and with color: #e5d8cd and brush Opacity: 50% create a dense glow over every flower. You just need to click on a flower to be applied once the brush. Create a new layer with Blending Mode “Screen”, Opacity: 79%, Fill: 63%. Change brush Opacity to 100% (color remains the same) and draw a dot glow a little higher each flower.

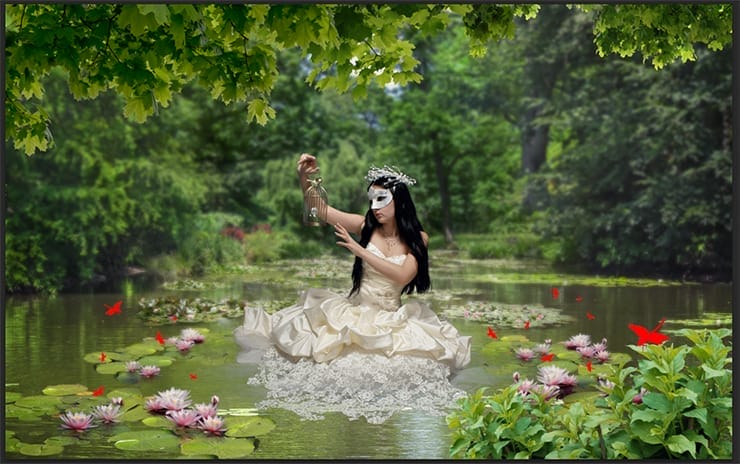
Step 20
Now the fun part. I wanted to make a small glowing speck (something like fireflies or magic). You need a brush of soft bokeh. Now we will create it. Go to Brush panel – F5. Set Size: 8px, Spacing: 150%. Go to Shape Dynamics and there set Size Jitter: 100%, Angle Jitter: 35%, Roundness Jitter: 45%. In the next tab, “Scattering” set Scatter: 1000%, Cont 1, and save your brush by clicking on the “Create new brush” icon (I use this brush several times in this artwork).
12 responses to “Create a Night Fairy Tale of a Mysterious Girl in Photoshop”
-

Great Tutorial Thank you!
-
Good photo editing skills.
-
Really nice best
-
Nice Tutorial (Y)
-
Great tutorial! I’ve done almost all manipulation tutorials online and this one is very nice. It used some different techniques I haven’t explored. On step 23, what color do we use on the dress? Mine just says “#”
-
same here. i just used black and i think it worked out nicely :)
-
-
nice working ,, thank you
-
Thanks a lot for uploading the tutorial. Nice work!
-
how much percent dodg and burn brother
-
on the model brother
-
-
how much percent dodge and burn sory my bad english
-
Hi, use about 10 – 25% for Dodge and Burn tools. If needed increase this value.
-
Leave a Reply