Learn how to this surreal photo manipulation of an Alice in Wonderland on amazing and surreal atmosphere with Photoshop. In this tutorial, you’ll learn how to create your amazing atmosphere and adventure tales with realistic shadows and lighting, then complete it with a bleak color tone effect. Throughout the tutorial, you’ll learn techniques that will help you create better matte paintings and photo manipulations. Read this tutorial and find out how easy it is!
What you’ll be creating
To create this image of Alice, we’ll start by creating the atmosphere and the main stage in the form of road maps. Next, we’ll add we begin to add items as teapots, cups of little cards and other. Finally, we’ll finish it up with image correction and adding effects. You’ll need any version of Photoshop, inspiration and good mood!

Tutorial Resources
- Clouds
- Playing cards
- flying cards
- Umbrellas and fans
- Model
- Cups and saucers
- saucers
- Clouds/Sunset
- Tea Kettle
Step 1
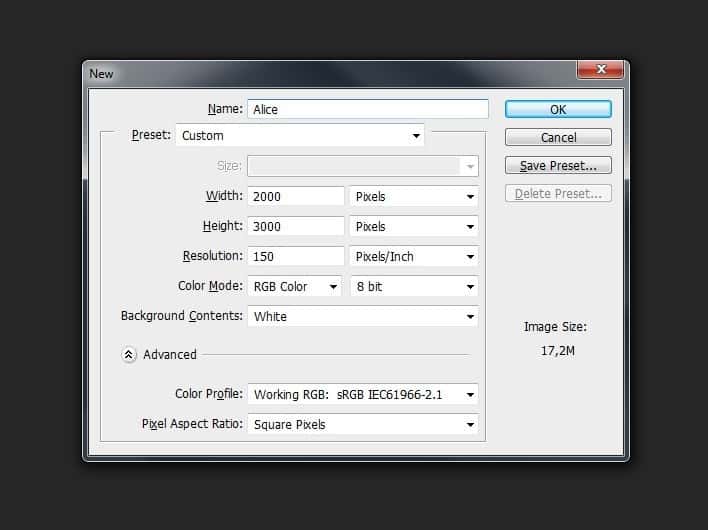
Start by creating! Create a new document. Go to File > New or the short key Ctrl+ N. A blank document with size of 2000 pixels wide and 3000 pixels high. I named the document “Alice”.
Step 2
Let’s start off adding the sky to our manipulation. Go to File > Place and select the image of the sky.

Step 3
After addition of the sky, then stretch, as shown in Figure. To transform the sky, press Ctrl+ T or go to Edit > Transform > Scale. Pull the black cubes in the corners formed frame.

Step 4
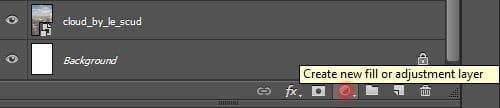
To the sky was brighter and stood out edges of the clouds, I added an adjustment layer to the sky. Go to Layer > New Adjustment Layer > Brightness / Contrast or button in the Layers palette and set the settings: Brightness 13, Contrast 13.


Step 5

Then add another layer > New Adjustment Layer > Photo Filter. These layers make a sunset sky.

Set the settings: Filter – Warming Filter (85), Density: 17.
Step 6
Then add another layer> New Adjustment Layer > Hue/ Saturation.
This layer will make the color more vivid sunset.


Set the settings: Saturation: +13, Lightness: +1 Now the sky is brighter with a strong color that gives unusual picture
At this stage, work with the background sky will be over.
Step 7
I did not like the sky of the source file, so I decided to replace it with a more beautiful and bright.
43 responses to “Create a Photo Manipulation of Alice in Wonderland”
-

Nice
-
I want to edit like Alice creat
-
lmao
-
hei i love your work its fantastic it gives me the oppotunity to learn Photoshop. any who based on your work how would you analyze the creation in terms of color harmony or its balance or the principle of art or its design
-
Great Tutorial thank you!
But some of the Pictures seem to be broken. :-/ -
Awesome! The best photoshop tut page of the world! Thanks
-
Thank you , i had a few problems here and there im still a noob i used my daughter for the model
-
I followed this tutorial and it turned out amazing! Thank you so much for this <3
-
Thanks , a great help
-
she and ‘very good and very clear explanations … congratulations
-
Great tutorial and fun image. Thank you.
-
thank you, it s fantastique.
-
How do you get the clouds above the cards please?
-
To make it you need add a Layer Mask ( Layer > Layer Mask > Reveal All or use button on Layer panel) to cards layer and use Brush tool (B) (I use soft round brush ) remove necessary pieces of cards in accordance with the relief of the clouds. That’s all.
-
-
Thank you for the great tutorial! It has been very helpful to see a few techniques in action.
-
Absolutely beautiful works.. This is what called “Creativity”.
-
D:
-
awesome tutorial! THANKS!!! I learned so much.
-
Thanks very much!! I love this ;)
-
Otzien harasho! Dobraya rabota! spasiba
-
Nice tutorial!
-
Very nice tutorial
-
butiful
-
no comment
-
Very easy to follow-thank you!
-
Thank you very much! I am very pleased!
I tried to make a simple tutorial. So that everyone could repeat it and understand a little bit with the possibilities of Photoshop.
-
-
This is beautiful it that you made by photo shop, i want to learn though you sir i request you please would you teach me like profession.
-
thanks for the tip really need it ^_^
-
Thank you very much! I am very pleased to hear that!
The work was great, but I hope useful.Soon in this site will still be my tutorial. Invite view them :)
Thanks for the great review!
-
-
I finished this project 2 Days ago! I have to say this has really helped me get back into photoshop, I haven’t used it in over 5-6 years so this taught me QUITE A BIT!
Heres my final result! It could use a few touchups but let me know what you think :) Thanks Again!
http://picload.org/image/lopgldi/alicefinal.jpg-
Oh! I am very glad that you came in handy and helped my lesson to refresh your knowledge and skills. It’s okay that you did this painting for 2 days. It’s so much that immediately and not make out :) I watched your work and I liked it! The only thing that can remove a little shadow on the model in the area of contact between the legs and maps. Make a little not brighter. In general, I liked it! Thank you very much for your beautiful work, patience and good comment. I am very pleased! Once again thank you very much!
-
-
NVM! i figured it out! I hadn’t downloaded the High-Rez version of the resources
-
I’m glad you’re paying attention to quality. Try in the future to download all the resources in good quality. Remember, in the transformation of Object in Photoshop, the picture may be of poor quality, if it is to stretch very much. Good luck in the works!
-
-
Hello! I just have a question :)
When I stretch the initial Sky/cloud resource it becomes extremely pixelated is this normal? Its really blocky so I’m not sure if im doing something wrong or not haha
Any advice would be great! Thanks :)-
Hi! It is normal to become pixel photo and loses its quality. You add the image as a smart object so the quality after transforming back. I hope you could do it! Good luck to you! Have questions, please write. I’m happy to answer them!
-
-
Impressive work
-
Thank you ever so much!
-
-
Wow.
This is the best photoshop tutorial-
Thank you very much! I am very pleased to hear that!
Thanks for the great review!
-
-
Thanks u so much :x
-
You’re very welcome! I hope this tutorial will be useful for you. Thanks for the comment!
-
-
You’re awesome, thank you
I share-
Thank you very much! I am very pleased to hear that! I hope that this lesson will be useful for you and will bring a lot of fun!
-
Leave a Reply