

Step 13
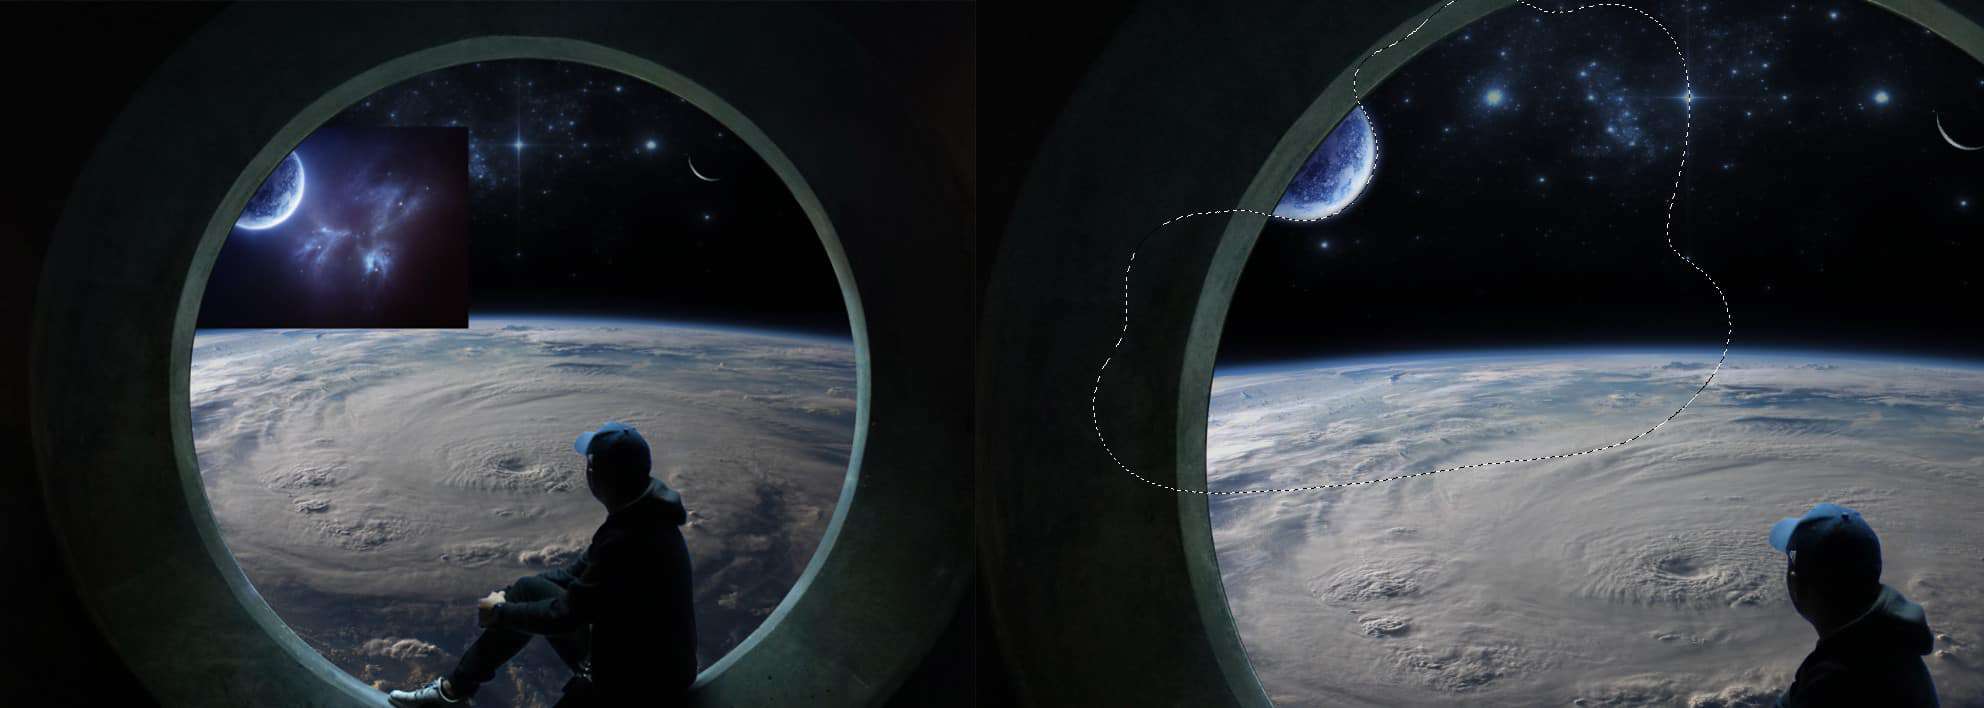
Now, create a layer mask to delete the background behind the moon. Again use Brush Tool (B) and Soft Round, size set as you want.Foreground Color to black and paint, Blend Mode change from Normal to Pin Light, this is what it should look like.
Step 14
Next, File > Open > pkg_cosmos2and select cosmos2_0005. Press Ctrl+A and simply copy (Ctrl / Cmd + C) and Paste (Ctrl / Cmd + V) it to our work canvas. Crete a layer mask and delete a part as in the picture below with Brush Tool (B) Soft Brush and foreground color black.
Step 15
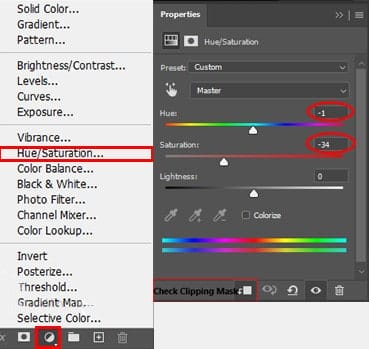
In the next step, we will add a little color to the moon to make it look more realistic. Go to Adjustment Layer icon and select “Hue/Saturation”
Step 16
Add Adjustment Layer “Curves”

It should look like this

Step 17
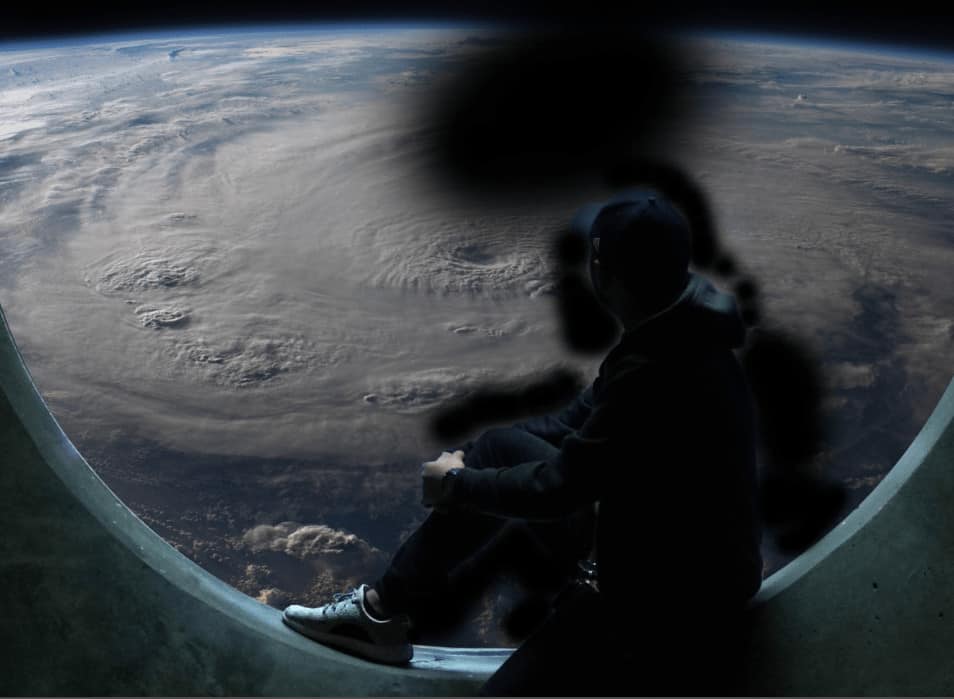
Now add a bit of shadow to the parts of the man that are too bright because it doesn’t look realistic, it doesn’t fit the background. Select a Man layer and create new layer, then we use a Brush Tool (B) select Soft Brush and you can choose any size. Then choose black color and paint, but try not to paint directly on the object but only to the edges quite a bit, as shown in the picture below. When you’re done, check the Clipping Mask icon.

Step 18
We have two more steps left for the end, we will add a new one Adjustment Layer “Levels”
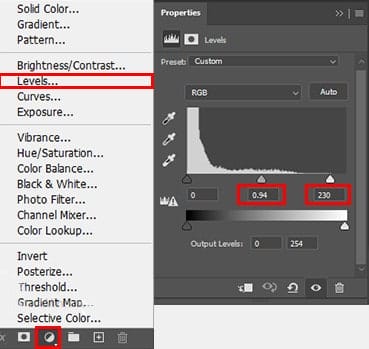
Step 19
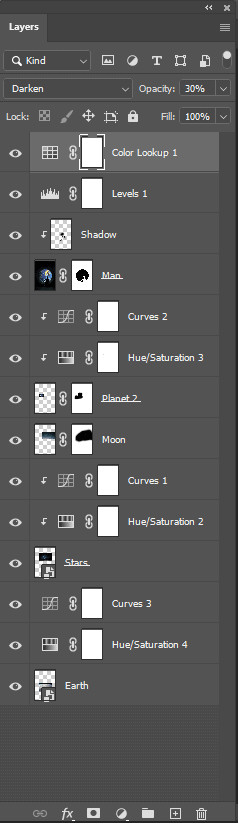
Next, add Adjustment Layer “Color Lookup” and select 3DLUT File to FuturisticBleak.3DL. Change Blend Mode to Darken with Opacit to 30%.
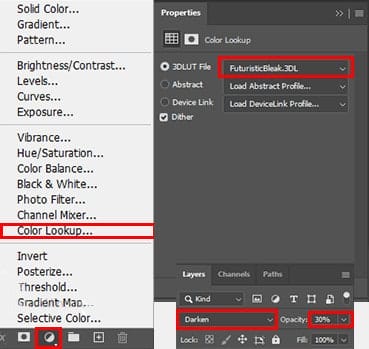
And finally, everything should look like this. First you insert the images, then we do the color correction with the Adjustment Layers.
Final Results

Download the PSD
32 responses to “Create a Photo Manipulation of a Fisherman in a Lake”
-

Awesome! Could you please share the links for the tutorials resources?
-
awesome
-
HI, I’m really struggling with getting the size and perspective of the water ripples right. How big did you make it before changing the perspective and how exactly did you change the perspective.
I’m using CS3
LP
-
For the transform tool, hold the Shift+Ctrl+Alt (Shift+Cmd+Option on Macs) and then drag the top-left corner towards the right. Then drag the top-middle downwards.
-
-
I did your tutorial in the past, here: http://annewipf.deviantart.com/art/Fisherman-479371714
But it seem we cannot see the tutorials published on photoshop-tutorials anymore. :(
I tried to contact photoshop-tutorial, but it doesn’t work. :(
Could you tell me if there is something to pay now, or what we can do? Thank you. -
Thank you for this, it has helped me understand the adjustment layers much better, which is what I was aiming for.
Appreciate the time & effort.
Scott
-
Fantastic and inspiring. Thanks for sharing.
-
Здравствуйте. Вижу что урок хороший и по возможности всегда стараюсь ваши уроки выполнять, только у мне трудности с луной. Перехожу по ссылке а страница отсутствует. Можно ли это исправить? Спасибо за интересный урок.
-
Very nice. I love this design. :)
-
Very nice.
-
can someone put this tutorial video link or video
by the way thx -
I like the idea of this tutorial, it’s very creative and the result looks great.
-
Broder lo que haces es super.! mil de felicidades
-
Wow, these are really creative! They remind me of those Chip Fosse drawings from Overhauling’. Great work!
-
I did it: http://annewipf.deviantart.com/art/Fisherman-479371714 Thank you! :D
-
Found this guide to be missing loads of steps, such as better explaining how to make the light glow.
in CC many of your layer blending modes don’t work the way you talk in this guide.And the way to blend in the waves just isn’t described and probably out of date for CC again.
-
Step 10: “create a new layer below the BG folder”.
must be “above”. please, change it)-
Thanks a lot A, yeah it should be ‘above’ thanks for the correction, it would be a big help….
-
Thanks! The tutorial has been updated :)
-
-
Awesome tutorial!
-
I’m having a really hard time getting my radial blur so dark and smooth. I’ve played with the controls to no avail. Any suggestions would be appreciated. Thanks for the great tutorial!
-
good creation ah..
-
good
-
thanks for the tutorial. i made it
check my pic
http://baskar03.deviantart.com/art/Lake-457659781 -
Lovely tutorial, thank you. I’m looking forward to your next one : let it be soon !
-
no one cares bud
-
-
Hello.Thank you for the great tutorial.
But would you give me some more helps about making that wave in water ( page2 )? I have this problem the boat disappears behind the wave. Thanks-
make sure that the fisherman folder is above the water ripple (wave) layer….
-
-
Wow ! its really outstanding tutorial ….
thanks for the easy step to make manipulation ……
-
Thank you for this great tutorial that I had a lot of fun to make!
http://cartes-mireilled.eklablog.com/montage-peche-nocturne-sur-un-lac-avec-photoshop-a108058836 -
really it is awesome
perfect thanks!
-
thanks for easy step by step tutor
Leave a Reply