

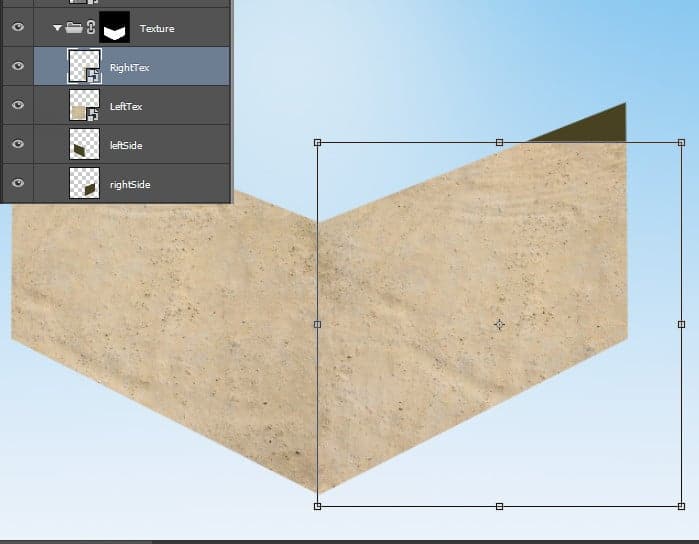
Step 7
Duplicate the texture layer (Ctrl + J) and move it to the right side.
Step 8
Open the file “Sand Texture2” and copy/paste into our scene. Desaturate the layer (Image > Adjustments > Desaturate) and convert the layer into a smart object and position it as shown below. Change the blending mode to Soft Light. This will give our ground texture a bit more variation.

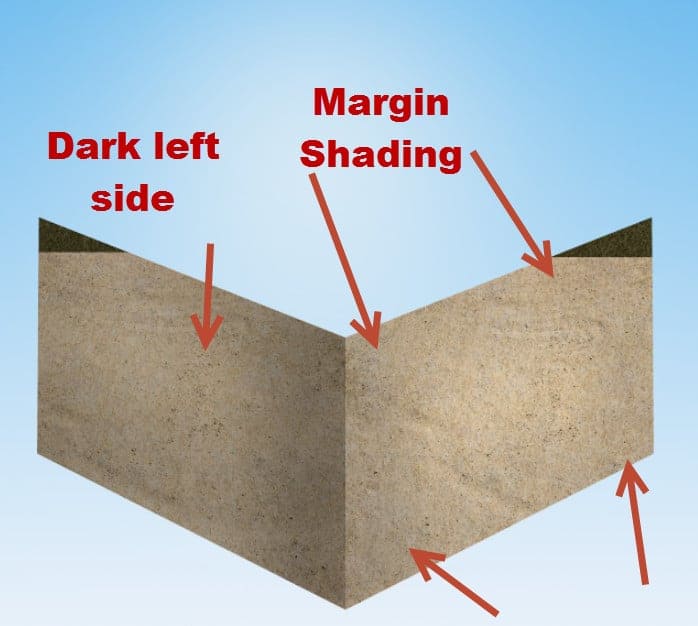
Step 9
Create a new layer and choose the standard round soft brush. Lower the opacity to 10% and paint with black on the margins of the ground. Create another layer and paste some more shadow on the left side of the ground.
Step 10
Create a Hue/Saturation Adjustment Layer (you can find all the adjustment layers in Layer > New Adjustment Layer > …..) with the settings shown below and place it inside the “Texture” group.

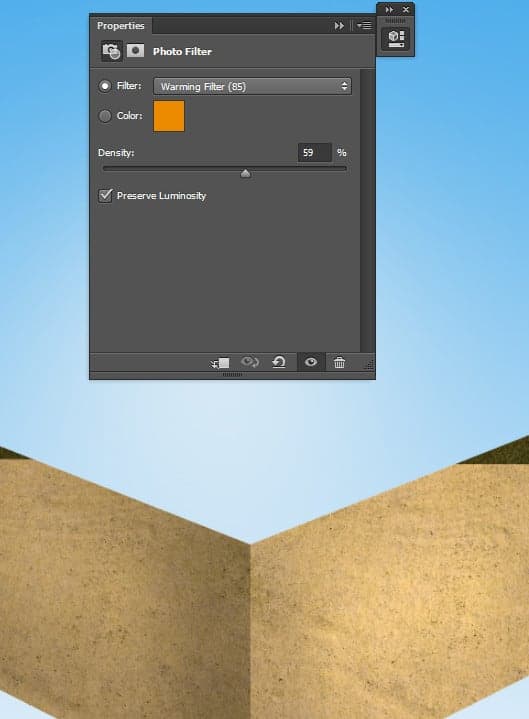
Step 11
Create a Photo Filter Adjustment layer and use a Warming Filter preset to warm up the ground and place it inside the “Texture” group.
Step 12
Create a new layer and select the standard chalk brush. Lower the size to 2px and the opacity to 50%. Paint some straight white lines on the corners as shown below. In order to paint straight lines click where you want the line to begin and then Shift-click where you want the line to end.

Step 13
Create a new layer and choose the standard chalk brush. Lower the opacity to 50% and the size to 10px and with a dark muddy brown (#73634e) paint some dirt on the corner indicated below.

Step 14
Create a new layer and change the blending mode to Overlay. Lower the opacity to 56%. Choose the standard round soft brush and lower the opacity of the brush to 10%. Paint with white over the corner to give it a bit more volume.

Step 15
Create a Curves Adjustment layer and use the settings shown below to increase the contrast. Place the curves layer in the “Texture” group.

Step 16
The intensity of the ground is a bit too much so let’s tone it down. Create a Hue/Saturation Adjustment Layer and lower the saturation to -19.

Step 17
Open the file “Cracks”. Select the black cracks ( Select > Color Range and click anywhere on the white area. Press Ok to exit the color range window and press Ctrl + Shift + I to invert the selection) and copy/paste them into our scene. Place the cracks layer on the right side of the ground. Duplicate the cracks layer (Ctrl + J) and move it to cover the left side too.
15 responses to “How to Create a Realistic Water Cube in Photoshop”
-

thanks
-
wow
-
hi
-
Well – a floating island… -.-
-
so fantastic (Y)
-
cool with good aesthetic.
-
Amazing tutorial!
-
Hi
-
-
Sorry correct link is here: https://www.photoshoptutorials.ws/photoshop-tutorials/photo-manipulation/create-realistic-water-cube-photoshop/
-
thank you…works perfect now :)
-
-
Do have video?
-
hi dear
-
-
I have the same problem
-
I got the same error…
-
i can’t open up this tut…says it has to many redirects or there is a problem with the server…any other people having the same issue?
Leave a Reply