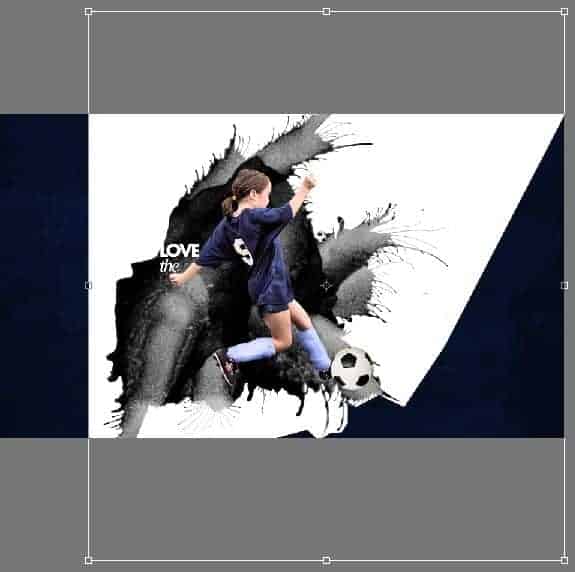
Step 49
Invert the layer then convert into Smart Object.
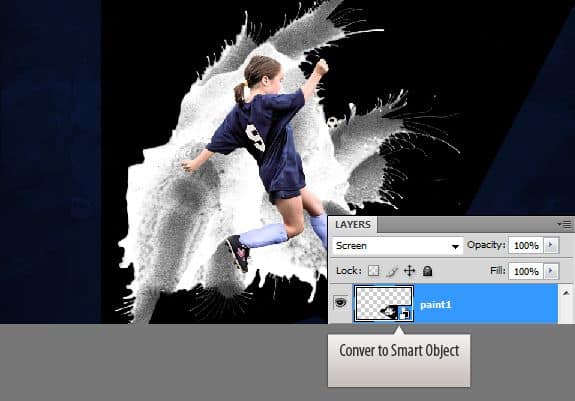
Step 50
Rotate the texture place it below the girl’s foot.

Step 51
Change the blend mode to Screen. That eliminates the blacks

Step 52
Make a copy of the paint layer and place behind the girl. You need to rotate it.

Step 53
Make a few more copies of the same layer and arrange them intuitively.


Step 54
Copy the other portion of the texture.

Step 55
Paste the copied portion in the main file. Invert it. Make it a Smart Object.

Step 56
Resize and change the blend mode to “Screen”.

Step 57
Open up the fire stock image. Select and copy some of the flames.

Step 58
Switch back to the main file. Paste the flames.
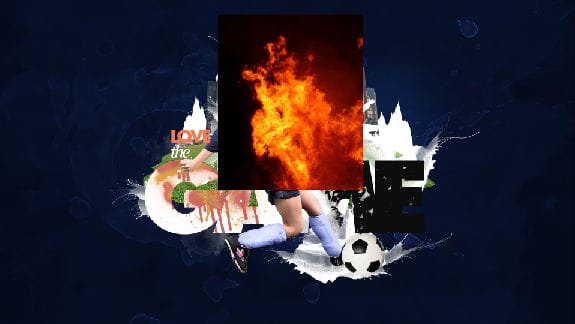
Step 59
Slightly increase the black levels using the Levels Adjustment layer.
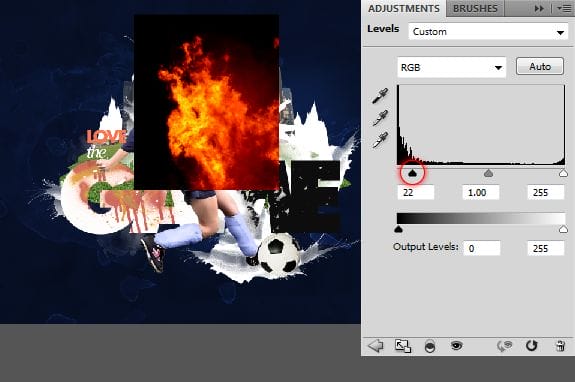
Step 60
Hide the edges with Layer Mask. Use a round soft brush to paint out the edges.

Step 61
Send the fire layer back to the girl layer.

Step 62
Change the blend mode to “Screen”. Reduce the opacity if you feel required.

Step 63
Open paint splatter image. Copy a piece from it.

Step 64
Paste and invert the layer.

You may need to rotate it slightly. Set the blend mode to “Screen”.
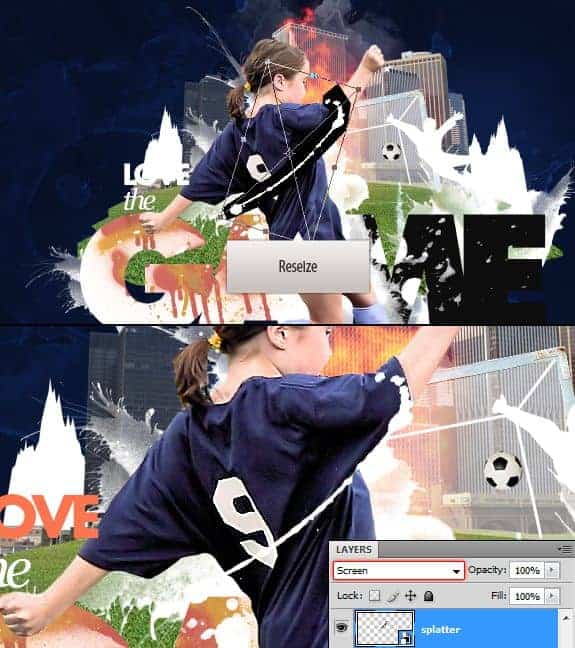
Step 65
Copy another chunk from the same image.

Step 66
Invert and set the blend mode to “Screen”.

Step 67
Open up the plant image. Select the leaf using the Pen Tool.

Step 68
Copy and paste it into the main file. Convert it into Smart Object.

Final Results

Tutorial by Niranth M
8 responses to “Create a Sports Wallpaper with Splatter Effects”
-
Great, thanks for all the helpful info!
-
DONT KNOE HOW 2 USE IT
-
Way too hard for me :(.. But nice tutorial anyway
-
Thank you so much for your simple and clear tutorial. As a newbie to PS, I didn’t know that the blend to screen feature can be so useful! Thank you!!! ;-)
-
also goalkeeper silhouette is missed. and Steps mess. Step 31 goes after Step 20. Author should be more careful.
-
Thank you for the comment – I really appreciate you pointing out the errors! I’ve fixed the steps but there were some stock images link that I couldn’t find the links to. It appears that the author does not have links to some of the resources and recommends that you find your own.
-
-
Few stock images are missed. I think you should include every stock image that you used in Resources section.
No brown mountain, no flame, no ball… -
good


 I am a Graphic / Web Designer and a wannabe VFX artist. Hope you learned something and had fun reading this tutorial. Thank you for following this tutorial. – niranth
Leave a Reply